

Make a Pi-Day Jump Rope with Printable Pi-Day Lesson


We originally did this project as a PI Day activity. But you can do this activity anytime of the year and with multiple ages of children.
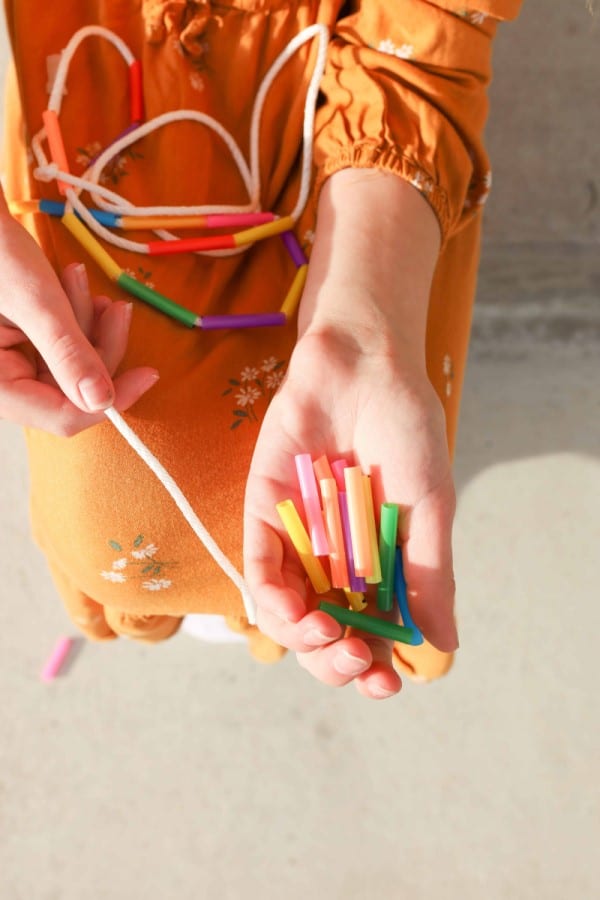
What makes this a Pi Day jump rope? Each number from zero to nine are assigned a straw color. Then, 1.5″ straw pieces are threaded onto a rope in order of Pi out 52 digits. (If you do this project, you might go out somewhere around 52 digits, depending on the length of the rope used.)

It would make a fun day-camp project (with some modifications to make the handles of the jump rope easier to do in a big group), a rainy-day project, a what-can-we-do-with-all-of-these-straws project or do like we did—use this as A Pi Day jump rope.
We have put this together in a printed lesson plan you can download below which includes worksheets on Pi and making our Pi bracelet, as shown here in this Pi Day activity. Enjoy Thehomeschoolscientist.com Pi Day Jump Rope Activity©!
Make a Pi Day Jump Rope
Equipment
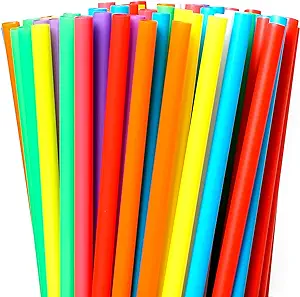
- Neon straws We used neon and primary colored straws, purchased from Amazon. See below for the exact products. We had to use a light orange and a neon orange; a light pink and a neon pink, etc.
- 1 Package of 3/8" cord If you use anything wider, it will not fit through the straws.
- 2- 3/8" washers If you just wrap duct tape around each end to make handles, you do not need these.
- 1 Dollar store jump rope We used it for the handles. The one we used is linked here.
- Duct tape is optional if you aren't using the dollar store jump rope handles
- 1 Permanent marker
- 1 ruler
- Some cellophane tape The type used to wrap presents 🙂
- Printable sheet linked below.
- Little tubs, a paper plate, or something else to hold the pieces of straw you will cut.
Instructions
- Cut a 7' 6" piece of rope. It will fray on each end.

- Cut a small piece of tape to wrap tightly to each frayed end.

- Wrap the tape tightly BELOW the frayed end. Do this to both ends.

- Trim off the frayed end. Do this to both ends of the rope.

- Next, let's prep the dollar store jump rope handles. Remove the jump rope from the packaging and cut the handles off, leaving about 6 inches of rope on each handle.
- We cut the handles off of the jump rope, leaving about 6" of rope hanging out of the handle. You’ll notice the rope is secured with a little white piece of plastic inside that has the rope wedged in it. It takes some strength to push that little piece out. An adult should do this part.We were able to pull on one handle and the 6”-piece of rope we had left hanging out of the handle and pop out the white insert. On the other handle we had to put a ballpoint pen in the smaller opening and push the piece through the handle until it dropped out of the wider opening. Once you remove the white insert, these handles work well. Alternately, you can wrap duct tape around each end of the rope to make handles.

- This is what that little piece looks like when it's removed from the handle. You can toss it out.
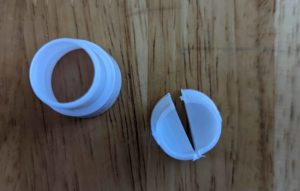
- Put the bigger white insert back into the handle.

- Do this step for ONE end of the rope. We'll finish the other handle after we are done stringing the straw pieces. Feed one end of the cord up through the handle.

- String one washer onto this end of the cord.

- Tie several knots around the washer. We ended up doing 3.

- Pull the washer down into the handle.

- Now it's time to prep the straws! Assign a number to each color. Use the printable linked below. Write the color next to the numbers. We had to use the neon orange and light orange. So, you may have different hues of the same color that you have to use.
- Place several straws together and put beside the ruler. Using the marker, mark off 1 1/2" pieces.

- Separate the colors. You might want to put them on paper plates or in little tubs for faster stringing and to keep them from rolling off the work surface. (We learned that the hard way!)

- Starting with 3.14, start stringing the straws onto the rope. (You could use a clear straw or a bead to represent the decimal point.

- Optional: At first, we had trouble getting the end of the rope to go through the straw pieces, so we used a skewer to help it through. However, soon the tape was flattened enough from use that we didn't need the skewer.

- Continue stringing through the straws, referring to the worksheets to put the numbers in order. We left 8 inches un-threaded on the opened end and then put on the second handle, using the same steps outlined above.

- If using duct tape for the handles, you'll want to wrap it neatly around multiple times until it forms a thick handle that is easy for your child to grip. We found using the dollar store handles made for a sturdier jump rope. While it did require extra time and *skill* to get it apart, it worked really well!
- Have fun and try the heart-related activities below.
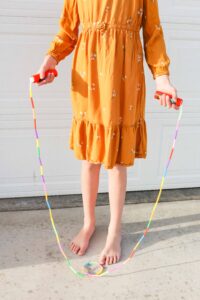


A Science Idea for You Pi Jump Rope
Use the jump rope to measure heart rates. Take a resting heart rate, write it down. Then, jump rope for 10 seconds, write down your heart rate. Next, jump rope for 20 seconds and record your heart rate. Repeat for 30 seconds.
When was your heart rate the highest?
What is the difference between your resting heart rate and your heart rate after each interval of jumping rope?
Next, measure the time it takes for your heart rate to return to your recorded resting heart rate. How long did it take for your heart rate to return to your recorded resting heart rate?
Take it further by running around outside for 10 seconds, 20 seconds, 30 seconds. Record your heart rate after each run.
Again, measure how long it takes to return to your resting heart rate.
Which form of exercise raised your heart rate the most?
You might want to try bike riding, roller skating, or doing another form of exercise and compare heart rates for each of the different forms of exercise.
Request the Pi Day Jump Rope Lesson & Printables. When you subscribe to our enewsletter, you’ll receive more free resources. We do share other science, math, and homeschooling resources. We promise not to spam you.


I hold a master’s degree in child development and early education and am working on a post-baccalaureate in biology. I spent 15 years working for a biotechnology company developing IT systems in DNA testing laboratories across the US. I taught K4 in a private school, homeschooled my children, and have taught on the mission field in southern Asia. For 4 years, I served on our state’s FIRST Lego League tournament Board and served as the Judging Director. I own thehomeschoolscientist and also write a regular science column for Homeschooling Today Magazine. You’ll also find my writings on the CTCMath blog. Through this site, I have authored over 50 math and science resources.