Build a Circuit Lesson
Create a light up greeting card while teaching kids about simple, parallel, and series circuits.
Yield: 12 cards
Cost: $15
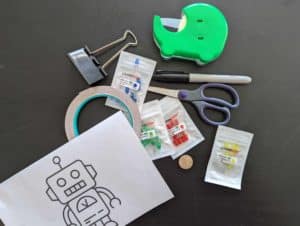
Equipment
- 1 roll of copper foil tape One roll is enough for 4 students doing 1 project. I don't recommend skimping on the tape, as this is an engaging activity and one your kids will want to experiment with.
- 2-3 packages of LEDs Purchase multiple colors...it makes it so fun!
- Scissors
- 2-4 CR2032 Batteries Available on Amazon or at CVS, Walmart, etc.
- Cardstock or white paper We used white paper, and it worked fine. But cardstock makes a nicer presentation when giving as a gift.
- Crayons or colored pencils
- Tape Optional
- Permanent marker Optional for marking the cathode side of the LED.
- Binder clip
Instructions
- Print the card template according to the directions in the file. Print on cardstock or plain paper.
- Fold the card along the dotted line and color the design on the front of the card.
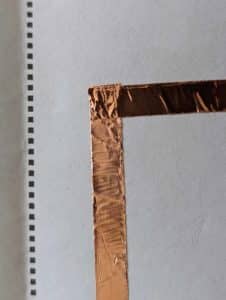
- Follow the wide lines on the circuit "template" and cut copper tape to cover the gray lines. Or you can roll the tape as you move around the card. See the next step to review how to handle corners.
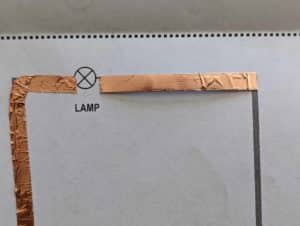
- Start with the battery area and place the tape. When you get to a corner, you can either make a neat fold and use one contiguous piece.
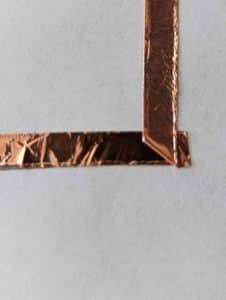
- Or you can cut strips to fit each line and make sure the pieces over lap on the corners. Either method works.
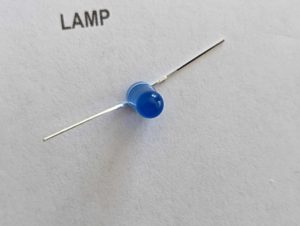
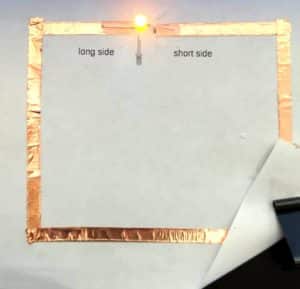
- Once tape is applied, flatten the wires on the LED out to each side. Mark the short side (the cathode or negative side) with permanent marker.
- Tape each wire of the LED down to the copper tape. We used another piece of copper tape to adhere the wire. You can also use clear tape.
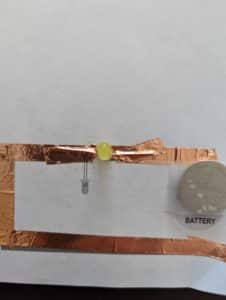
- When the LED is in place, tape your battery on top of the copper tape with the negative side down touching the copper tape. This will connect the negative side of the battery to the negative side of the LED.
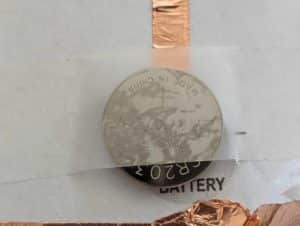
- Fold the corner tab with the copper tape up to touch the positive side of the battery. You will need to adjust the fold to get the circuit to complete. Once you make the connection, use the binder clip to hold the connection securely.
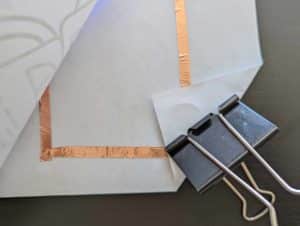
- If the lights don't work, check to make sure the negative (short side of the LED is connected to the battery side of the circuit. Also check for any gaps in the copper tape. (The photo here is from the house project.)