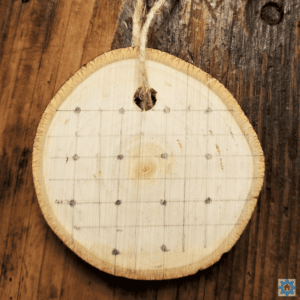
Draw a horizontal line on the face of the tree cookie.
Starting at the left end, dot the line every 1/2 inch.
At the first dot, draw a line perpendicular to the first line, all the way down the ornament.
Draw another horizontal line 1/2 inch below the previous line, making sure it is parallel to the line above it.
Draw a dot where the perpendicular and second horizontal line intersect, and every half inch down the horizontal line from there.
Continue to draw and dot lines 1/2 inch apart, all the way down the ornament.
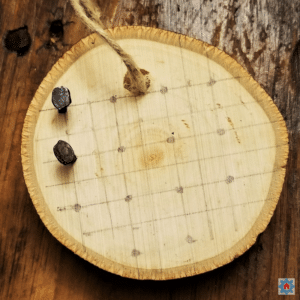
Add nails. Hammer a nail into the tree cookie at each dot from STEP 1. I would start the nail for my son, then my children would finish hammering it into the wood, leaving about 1/4 inch of the nail sticking out of the wood.
With all the nails in, our natural wood geoboard ornament was complete!
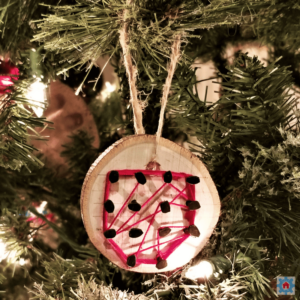
Add a design to the geoboard ornament. I pulled the yarn, and asked my son to cut it. I tied a knot to one of the nails, then asked my son to create a design around the nails. When my son was done with his design, I tied the yarn to one of the nails, then trimmed and tucked the yarn into the design.