

Making Butter in a Jar Science Experiment with Worksheets


This making butter in a jar experiment is an excellent chemistry activity that is super-easy and one all ages will enjoy. We have set up our butter experiment with an interesting dependent and independent variable.
Before you start making butter in a jar, download our free Making Butter worksheets. This printable pack has something for a wide range of grade levels. If you have a preschooler or kindergartener, there is an easy “My Observation” sheet they can color, along with coloring and puzzle pages. Older students will enjoy other pages we have included. There are concepts for older elementary and middle school students. The sign-up box is below.
Table of Contents
Many of the foods we eat are created by using principles of chemistry. Butter is one of them. Butter is created from cream. Cream is basically milk with a high fat content. When cream is agitated with a churn, or shaken in a jar, the fat starts to glob together and separate from the liquid. This glob of fat is butter, and the liquid is called buttermilk .Let’s learn how to make butter and then we’ll take a closer look at the science behind it.
We are going to turn this into an experiment by setting up an independent and dependent variable. We will make two small batches of butter. We’ll use heavy cream straight from the refrigerator.
One jar will have marbles placed in it and the other will not. Our hypothesis is that marbles placed in the jar with the cream will provide extra agitation and speed up the time it takes for the butter to form and the buttermilk to separate from the glob of butter.

One jar will have marbles placed in it and the other will not. Our hypothesis is that marbles placed in the jar with the cream will provide extra agitation and speed up the time it takes for the butter to form and the buttermilk to separate from the glob of butter.
Our dependent variable is the time it takes to start to see separation. We will stop at 6 minutes, 8 minutes, 10 minutes, 12 minutes, and 14 minutes to compare the contents of the two jars.
Making Butter in a Jar – Worksheet and Printables
Use our free printable set of worksheets for this activity! We have created this pack to use with multiple ages. Request the resource below, and join our enewsletter community. You’ll be the first to know about new resources and fun giveaways!
Once you have read through this post, check out our other free science printables here. Plus, we have a library of free math printables for K-6 here.
A Few Notes Before Starting the Making Butter in a Jar Experiment
Here are a few things to do before your children start making butter in a jar and experimenting with different variables (such as temperature of the cream.)
- Discuss the control variables: What do you need to keep the same? The size of the jars? The temperature of the cream? How each jar is shaken? (Each person shakes their own jars, one in each hand.).
- As your child is shaking the jars, ask them: Do you hear any changes in the jar with the marbles? (The noise of the marbles will start to dwindle as the cream thickens. Then, once the butter “globs” together, the marbles will hit the sides of the jar more freely. So, they will hear the marbles again.
- Also ask your child, “What other changes do you hear?” They won’t hear the sloshing of the cream as time passes.
- You may want to write their responses for them on the lab sheet, so they can continue to shake the jars without much interruption. Or, if your children are working in pairs, one person can write while the other shakes.
Procedure for Making Butter in a Jar
Materials Needed
- A container of heavy whipping cream (high-fat content) straight from the refrigerator
- Measuring cup
- 2 Mason jars with lids
- Marbles that have been cleaned in hot water and dried on a paper towel. We used marbles found in the home decor section of the dollar store. ONLY use 3.
- Salt (optional)
- Butter knife
- Bread or crackers for taste-testing
- Paper towels or napkins
- Timer on a cell phone clock
- Begin by discussing the concept of emulsion and how it relates to making butter. Emphasize that cream is a type of emulsion.
- Fill each jar with 3/4 cup of heavy whipping cream. You can use 1/2 cup if you have multiple children and want to do several jars.
- Put 3 marbles in one jar. The other jar will not have marbles.
- Tightly seal the jars with its lid and begin shaking vigorously. Each person should do their own so that we keep the speed and “shaking style” consistent between the two jars. (Each person is going to shake their jar a little differently. Some people will shake more vigorously than others. So, we want to keep as many variables the same as possible.
- Stop occasionally and observe what is happening to the cream. At 5 minutes, stop and open both jars, what are the differences between the jars? Talk about what, if any, changes they see and feel as they shake. Record this on the lab sheet.
- Continue shaking and stopping about every 2 minutes. Again, talk about the changes. Are there any surprises? Is what you predicted would happen actually happening?
- After a few minutes, you students will notice the cream thickening and separating into solid butter and the liquid buttermilk. Carefully remove the lid and observe the separation. Discuss the science behind this process. See the explanation below.
- We noticed that the jar without the marble definitely reached the separation stage sooner than the jar with marbles. It took an additional 4 minutes for the marble jar to catch up to the other jar.
- Remove some of the butter from the jar and give it a taste!
- For an optional step, sprinkle a pinch of salt onto the butter and incorporate it. Discuss how this enhances the flavor and helps preserve the butter. (Next time you’re at the grocery store, point out the salted and unsalted butter. ) Enjoy your butter!
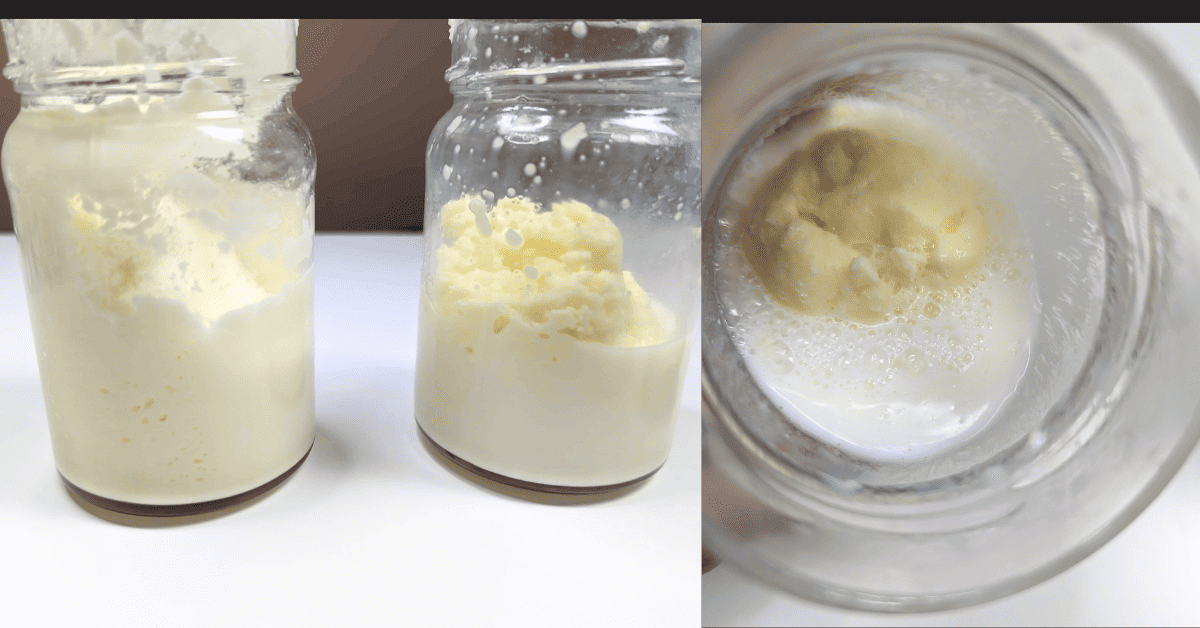
Photos From Our Butter Experiment
We observed that the marbles did NOT speed up the separation process, but in fact, it took longer for the heavy cream with the marbles in the jar to separate. Plus, the final texture was smoother. The butter without the marble seemed to have a “grainier” look to it. Both butters tasted the same and felt the same.
The butter separated after 12 minutes in the jar without marbles. It took 15 minutes for the butter in the jar to get almost the same amount of liquid.
So, we believe the marbles interefere with the coalescing of the fat droplets in the heavy cream. We thought they would help increase the agitation of the molecules and speed up the separation.
You can see some of the differences along the way in our photos below.

Above are both jars of heavy cream at the very start of the experiment. To the right is after 6 minutes of shaking. Both jars looked like this. The texture was smooth and had the look of yogurt.


After 9 minutes the jar without the marbles (on the right) was starting to “glob”, while the cream with the marbles was still smooth, but getting thicker.

At 13 minutes the cream without the marbles had separated a lot. The jar with the marbles was starting to separate. After another 2 minutes or so, the jar with the marbles was separated. The look of the butter was definitely smoother than the butter that had been shaken without the marbles.

Draining the buttermilk. (You could make buttermilk bread or buttermilk pancakes!)

The final result. The butter shaken without marbles is on the right.

The chemistry behind making butter in a jar using heavy cream
The short, concise explanation
The shaking of the cream in the jar causes the milk fats to coalesce, forming butter while the liquid portion is the buttermilk. Coalesce means the process of small fat droplets coming together and merging to form larger masses. When you shake the cream vigorously, the mechanical agitation causes the fat droplets to collide and stick to each other. These collisions result in the coalescence of the fat droplets, leading to the formation of larger clumps or masses of fat.
A more detailed explanation of what happens when making butter in a jar fom cream
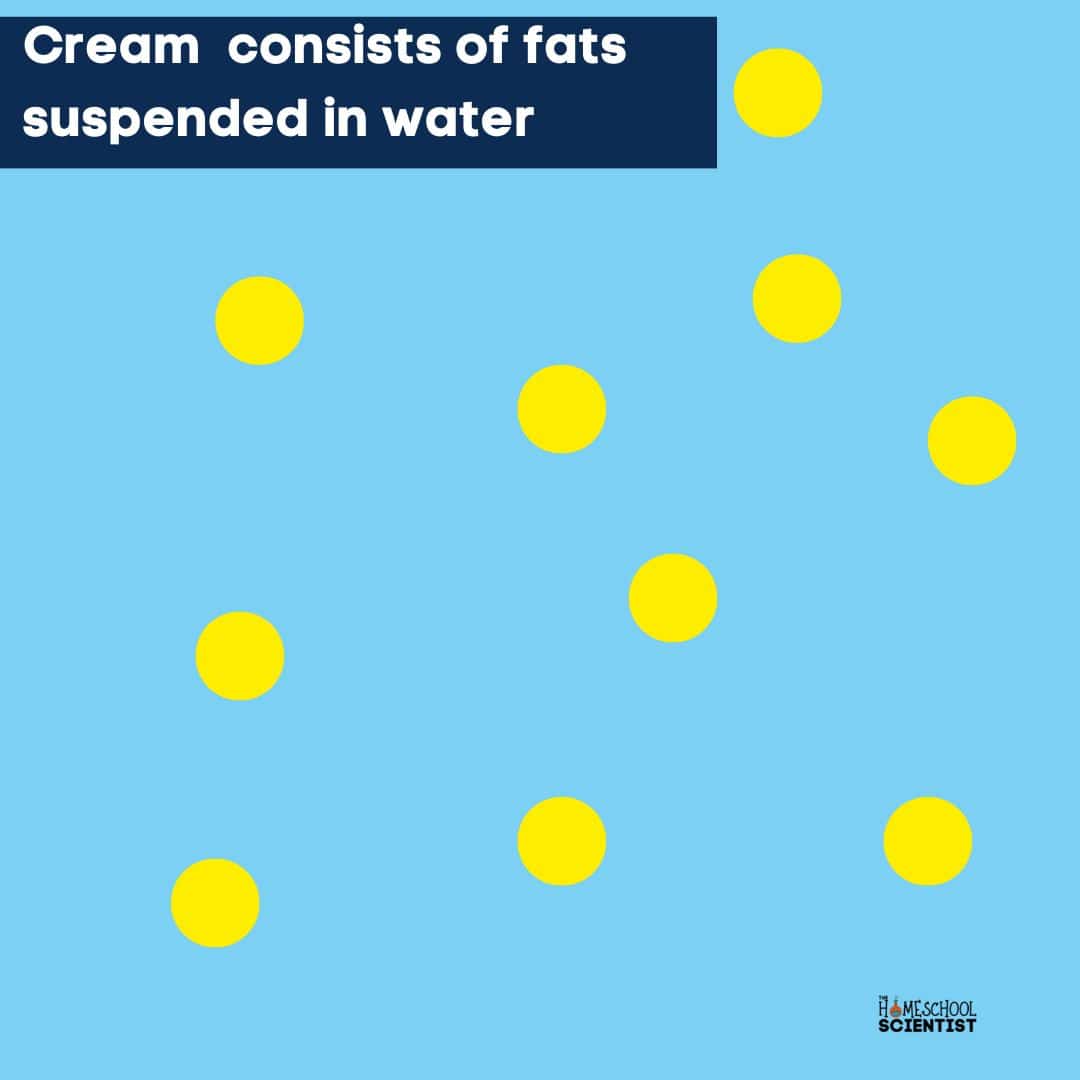
Let’s talk first about the heavy cream and its composition. The cream is an emulsion. An emulsion is a mixture of two immiscible liquids—fat and water. Immiscible means they do not mix. Have you ever poured cooking oil into a measuring cup or bowl and then added water?

The fat in the heavy cream is in the form of tiny droplets suspended in the water.
The fats in the cream are primarily triglycerides. Triglycerides are molecules consisting of three fatty acid chains attached to a glycerol backbone.
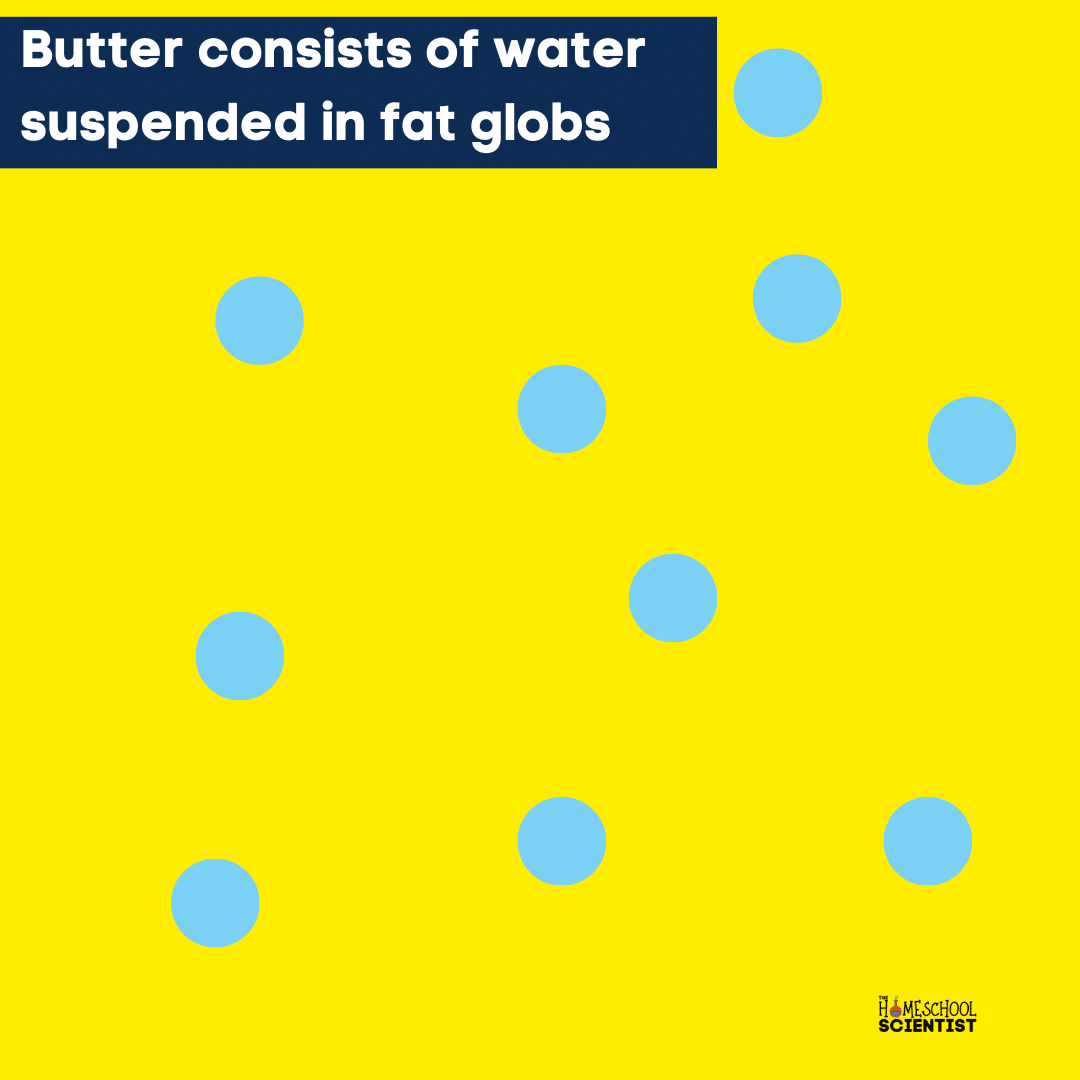
So, as the churning continues, the fat droplets coalesce or stick together. This process is known as agglomeration. Over time, these agglomerated fat droplets join to form larger masses or globs. The continual shaking encourages the separation of the fat from the water content in the cream.
This separation of the fat from the liquid part of the cream is what creates the butter and buttermilk.
Buttermilk is the liquid remaining after the fat globules have coalesced into butter. It contains water, proteins, and some fat globules that haven’t yet coalesced.
Remember, when we first started with cream, there were fat molecules suspended in water. After the churning, we have water molecules suspended in fat. This change is called phase inversion. This is a physical change, not a chemical change. We did not create a new substance. Instead the fat molecules that were suspended in water clumped together to form the glob of butter!
Helpful Links
- Use this activity as part of a farm or dairy study. The National Dairy Board has LOTS of resources!
I hold a master’s degree in child development and early education and am working on a post-baccalaureate in biology. I spent 15 years working for a biotechnology company developing IT systems in DNA testing laboratories across the US. I taught K4 in a private school, homeschooled my children, and have taught on the mission field in southern Asia. For 4 years, I served on our state’s FIRST Lego League tournament Board and served as the Judging Director. I own thehomeschoolscientist and also write a regular science column for Homeschooling Today Magazine. You’ll also find my writings on the CTCMath blog. Through this site, I have authored over 50 math and science resources.