

How to Make a Geoboard


Learning how to make a geoboard is a great way for our children to sharpen geometry and life skills. Engineering involves designing and building a prototype, so working with the materials and tools while learning how to make a geoboard is the perfect way to understand the engineering design process!
Since one of my children has a dyscalculia, getting a concrete visual of math concepts is extremely important for recall. Manipulatives like geoboards, pattern blocks, and counting cubes can be very helpful for students who have difficulty storing and recovering abstract math concepts.
We have always had a geoboard, but I thought it would be fun to practice some life skills by learning how to make a geoboard. Plus, kids love to build things with real tools!
Below are the instructions with photos, along with a 40+ page geoboard patterns printable. So, don’t forget to request your copy. (This is for K-2nd/3rd – depending on your child’s math level.)
What You Need to Make a Geoboard
- 1 tree cookie
- 1 pencil
- 1 ruler
- 1 packet of upholstery tacks
- hammer
Instructions for Making a Geoboard
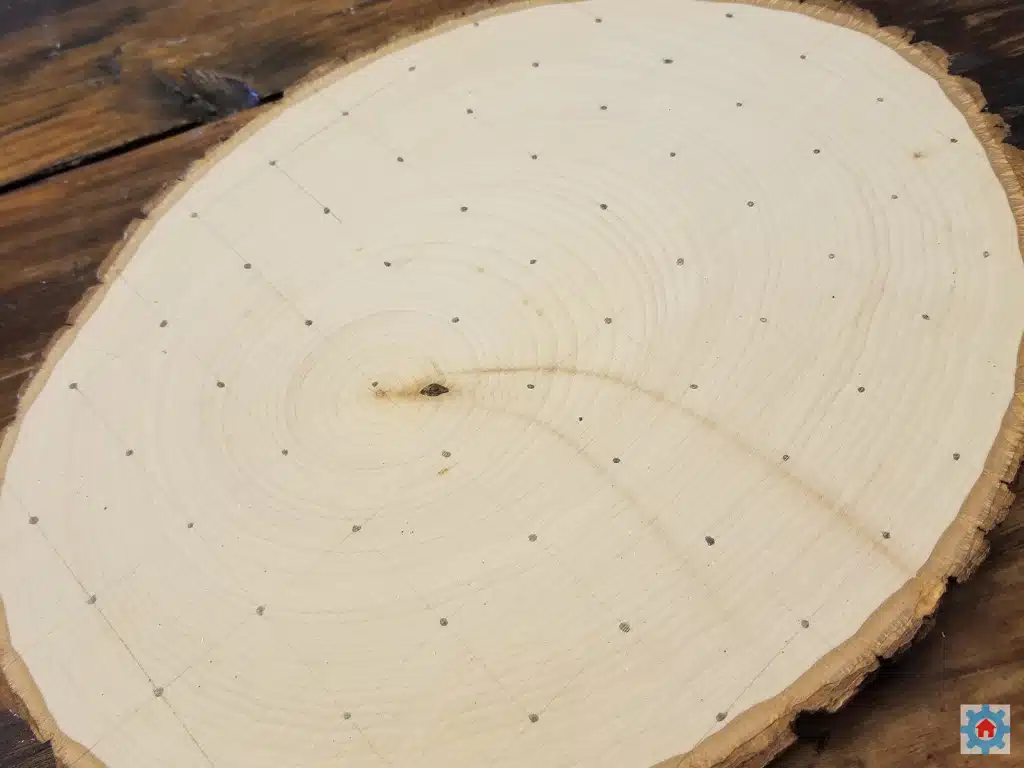
STEP 1: Make a 1 inch grid on the face of the tree cookie.
- Draw a horizontal line on the face of the tree cookie.
- Starting at the left end, dot the line every 1 inch.
- At the first dot, draw a line perpendicular to the first line, all the way down the tree cookie.
- Draw another horizontal line 1 inch below the previous line, making sure it is parallel to the line above it.
- Draw a dot where the perpendicular and second horizontal line intersect, and every inch down the horizontal line from there.
- Continue to draw and dot lines 1 inch apart, all the way down the tree cookie.
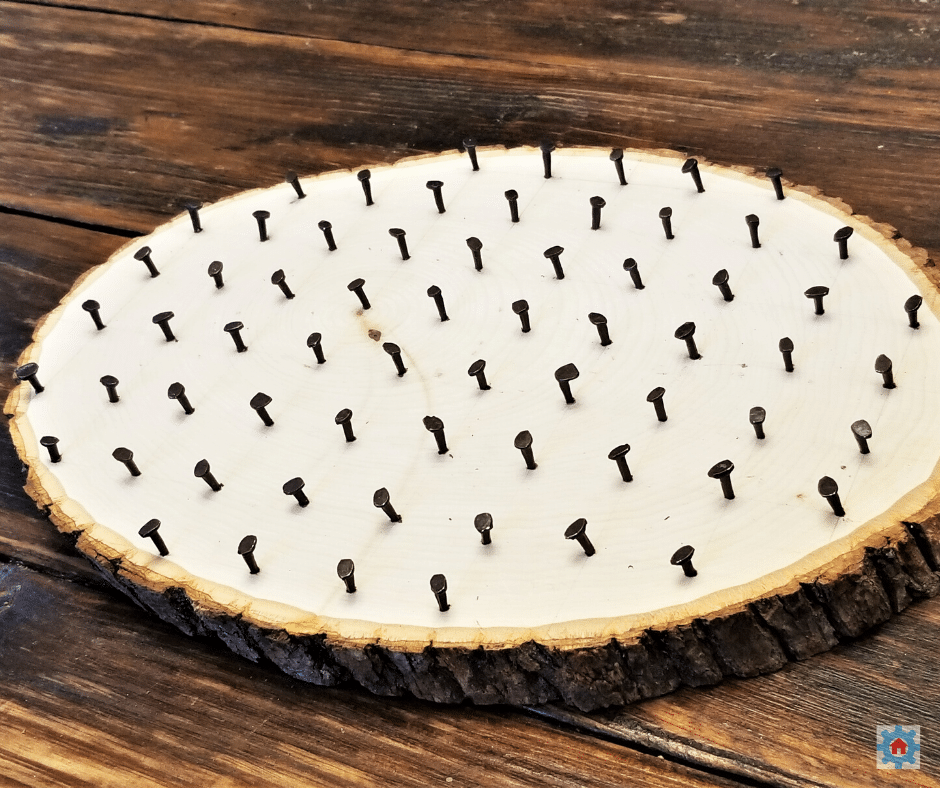
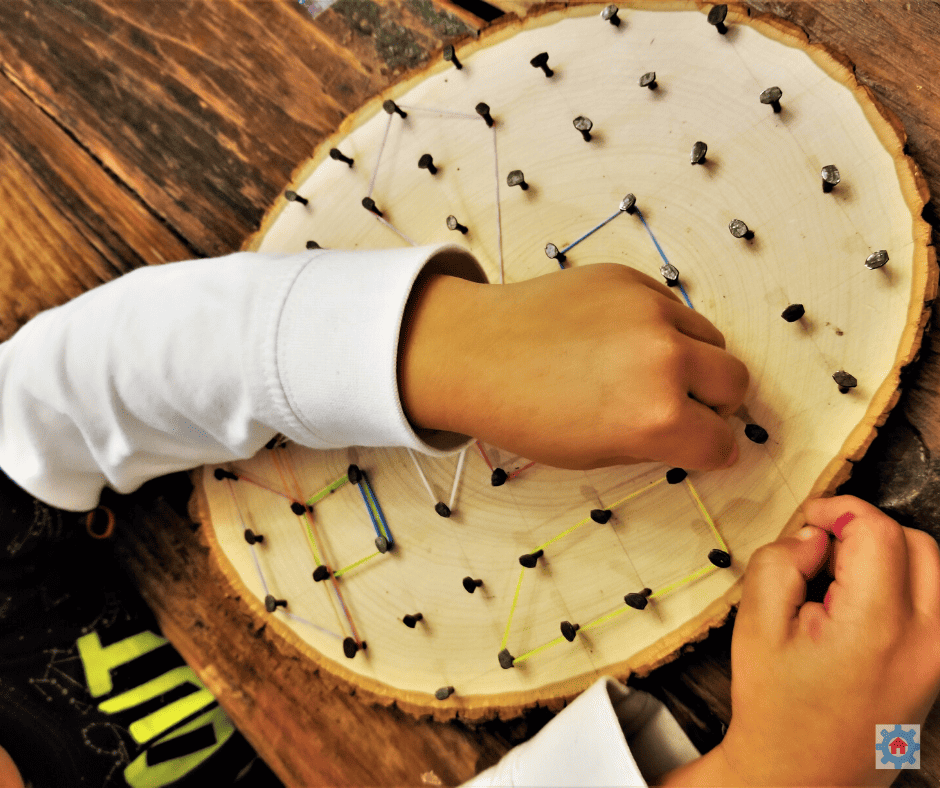
STEP 2: Add nails. Hammer a nail into the tree cookie at each dot from STEP 1. All my sons joined in hammering the nails in. They used their pincer grasp to hold onto the tiny nails, then carefully hammered each nail into the wood.

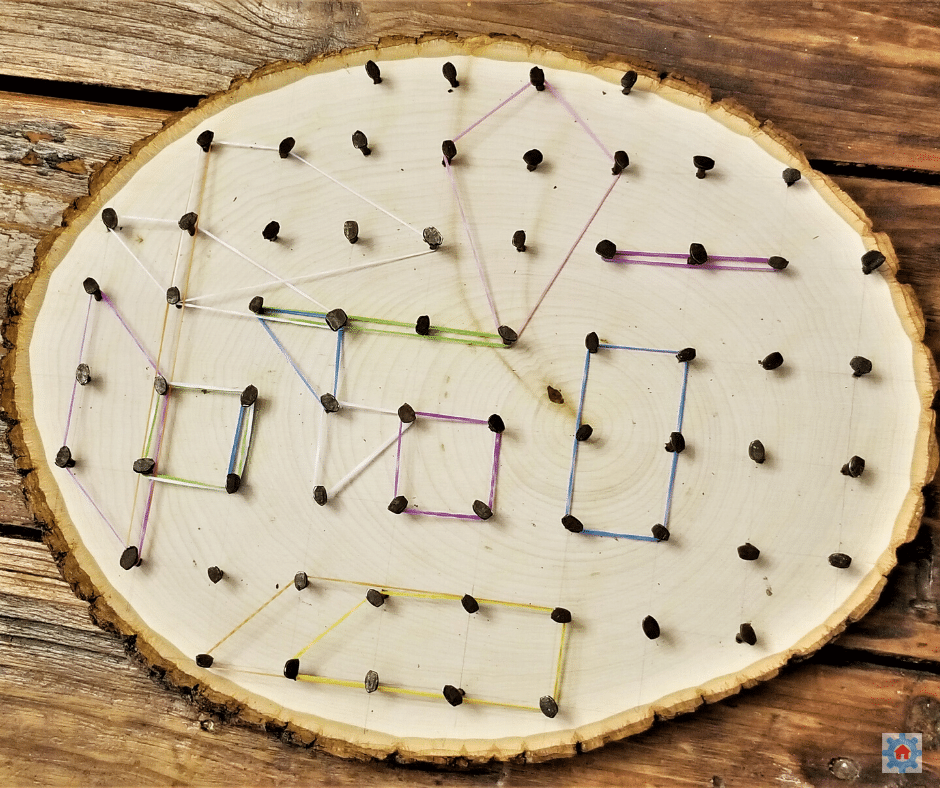
STEP 3: With all the nails in, our natural wood geoboard was complete!
To get started using the geoboard, let children free build and make different shapes. Our children enjoyed making up games using the geoboard.
Older students can make more intricate designs and then calculate perimeter and area!
I have created a series of geoboard printables for younger children. Request your free copy below!

Learn More About Geoboards
- Read about the inventor of geoboards
- Use a double-sided geoboard
I hold a master’s degree in child development and early education and am working on a post-baccalaureate in biology. I spent 15 years working for a biotechnology company developing IT systems in DNA testing laboratories across the US. I taught K4 in a private school, homeschooled my children, and have taught on the mission field in southern Asia. For 4 years, I served on our state’s FIRST Lego League tournament Board and served as the Judging Director. I own thehomeschoolscientist and also write a regular science column for Homeschooling Today Magazine. You’ll also find my writings on the CTCMath blog. Through this site, I have authored over 50 math and science resources.