

Easy Science Experiments with Oranges


Doing science experiments with oranges at home or in the classroom can be easy-to-do, affordable, and fascinating! We’ve put together some science experiments with oranges that even children as young as preschool age will enjoy.
All “experiments” we tried were incredibly easy!
Table of Contents
Download the Free Printable Worksheets
6 Science Experiments with Oranges
Science Experiments with Oranges – #1 – Sink or Float
- Fill a container with water. The container should be big enough to fit the oranges.
- Place the unpeeled oranges in the water.
- Do they float?
- Next peel one of the oranges and put it back into the container with the unpeeled oranges. Does the peeled orange float or sink? When we did our activity, at first the peeled orange did not float. However, we didn’t peel all of the pith off after you remove the peel of the orange. The pith is the stringy substance between the fruit and the peel. Once we removed all the big patches of pith that were still on the fruit, our orange did sink. Air was trapped between the pith and the fruit, causing the orange to float. Once we removed the pith, the orange sank.
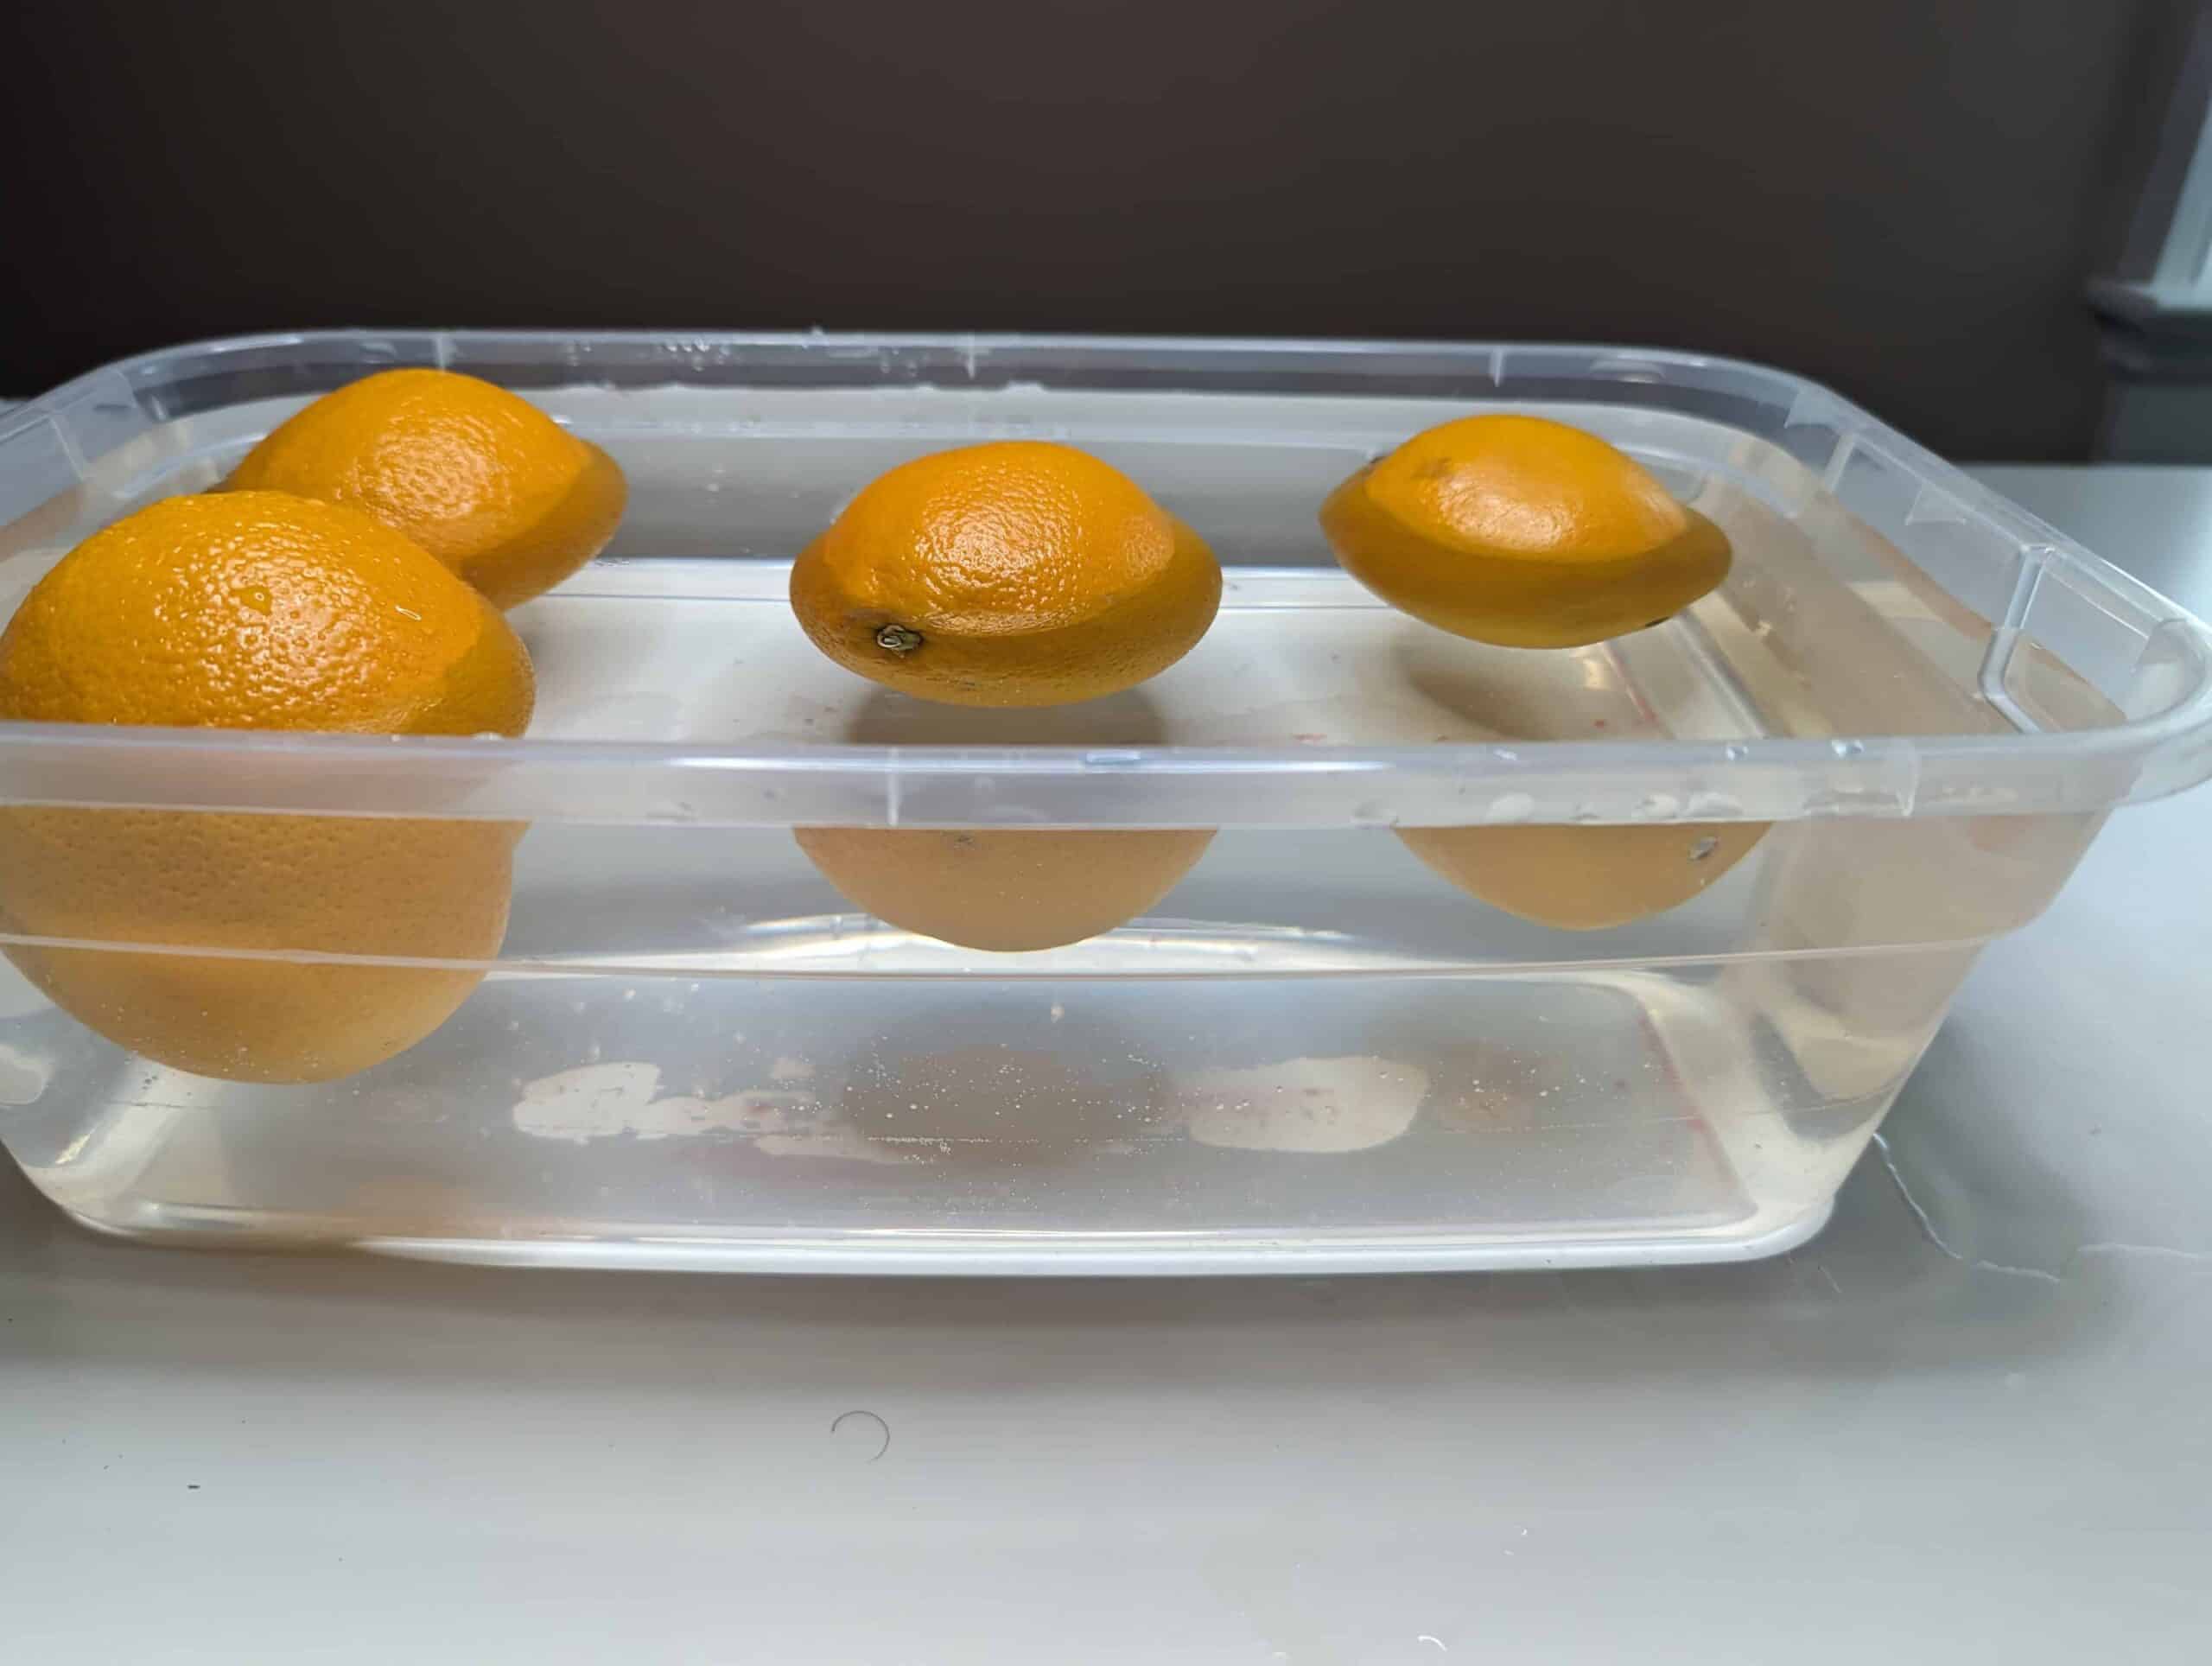
Place the unpeeled oranges in water.
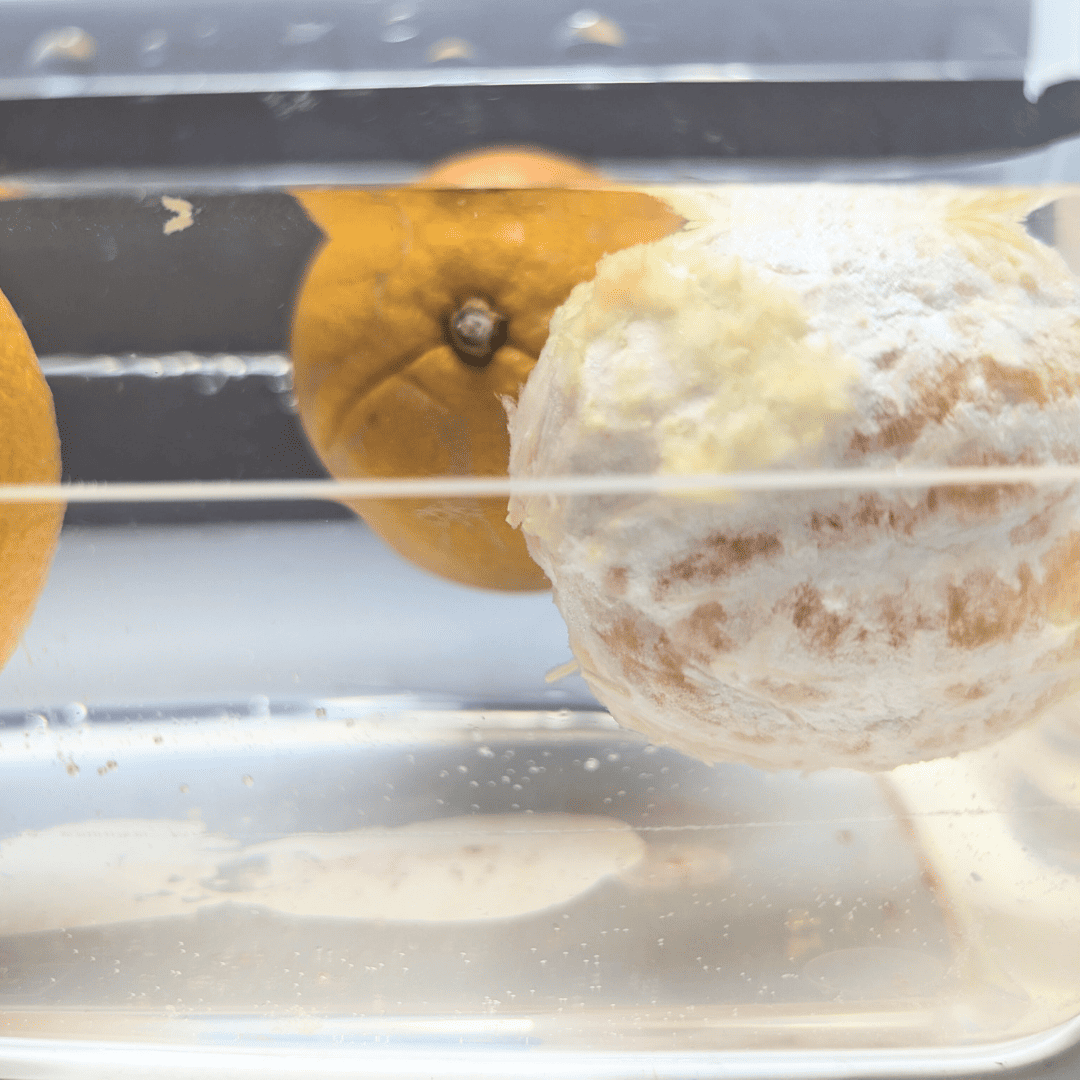
Peeled orange that still had pith attached where air could get in between the pith and fruit.
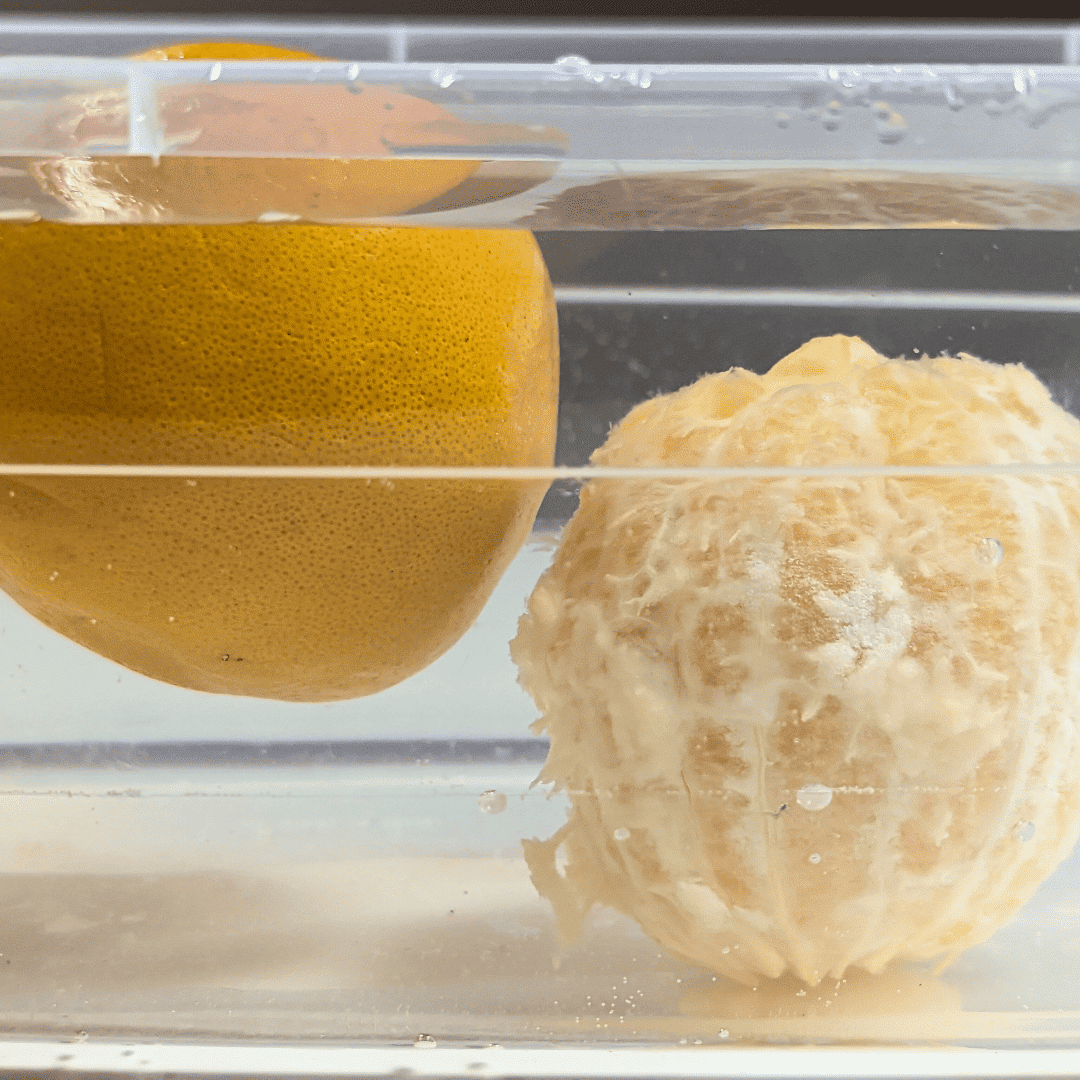
Peeled orange with pith removed.
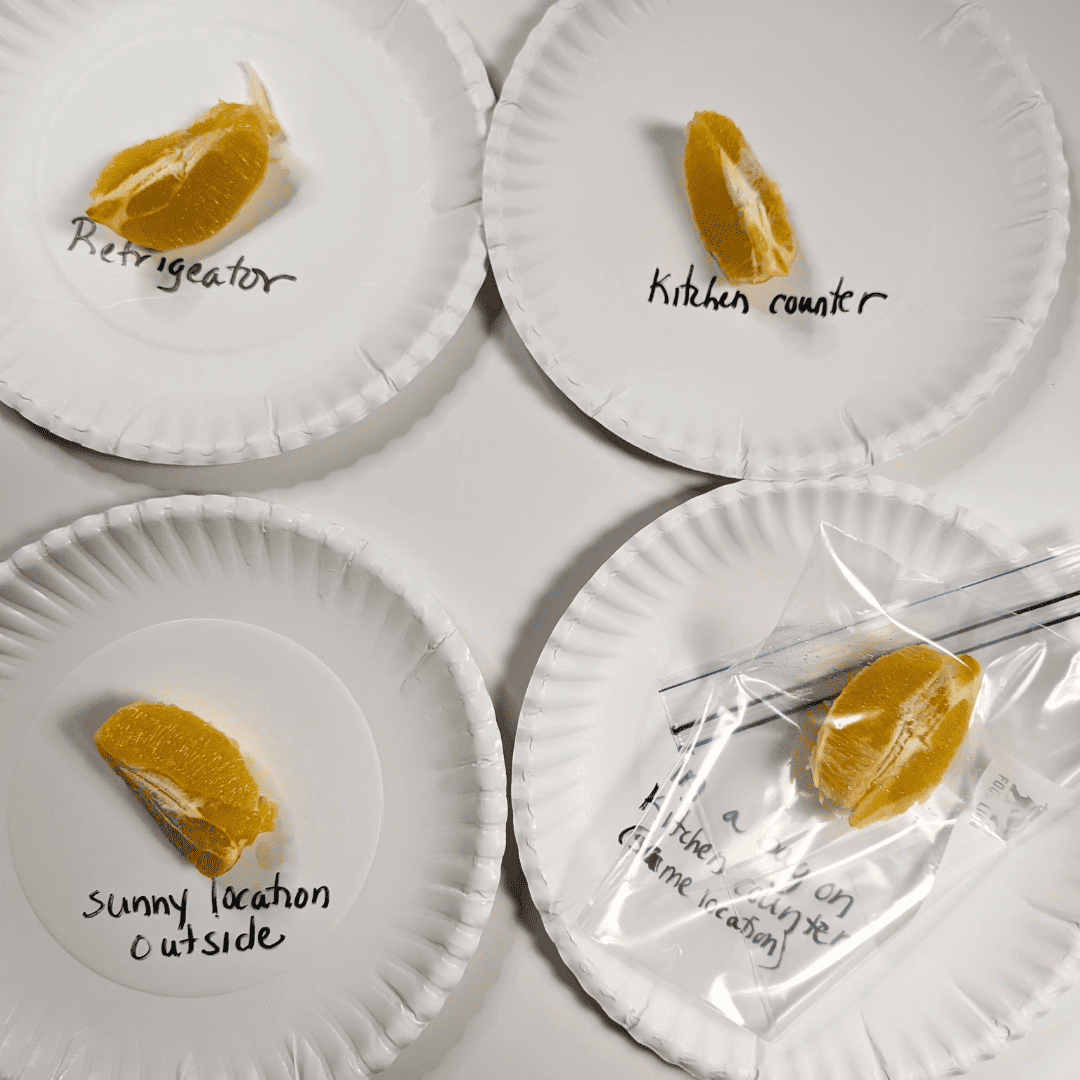
Science Experiment with Oranges – #2 – Which Rots First
Which rots first? You only need one orange for this experiment.
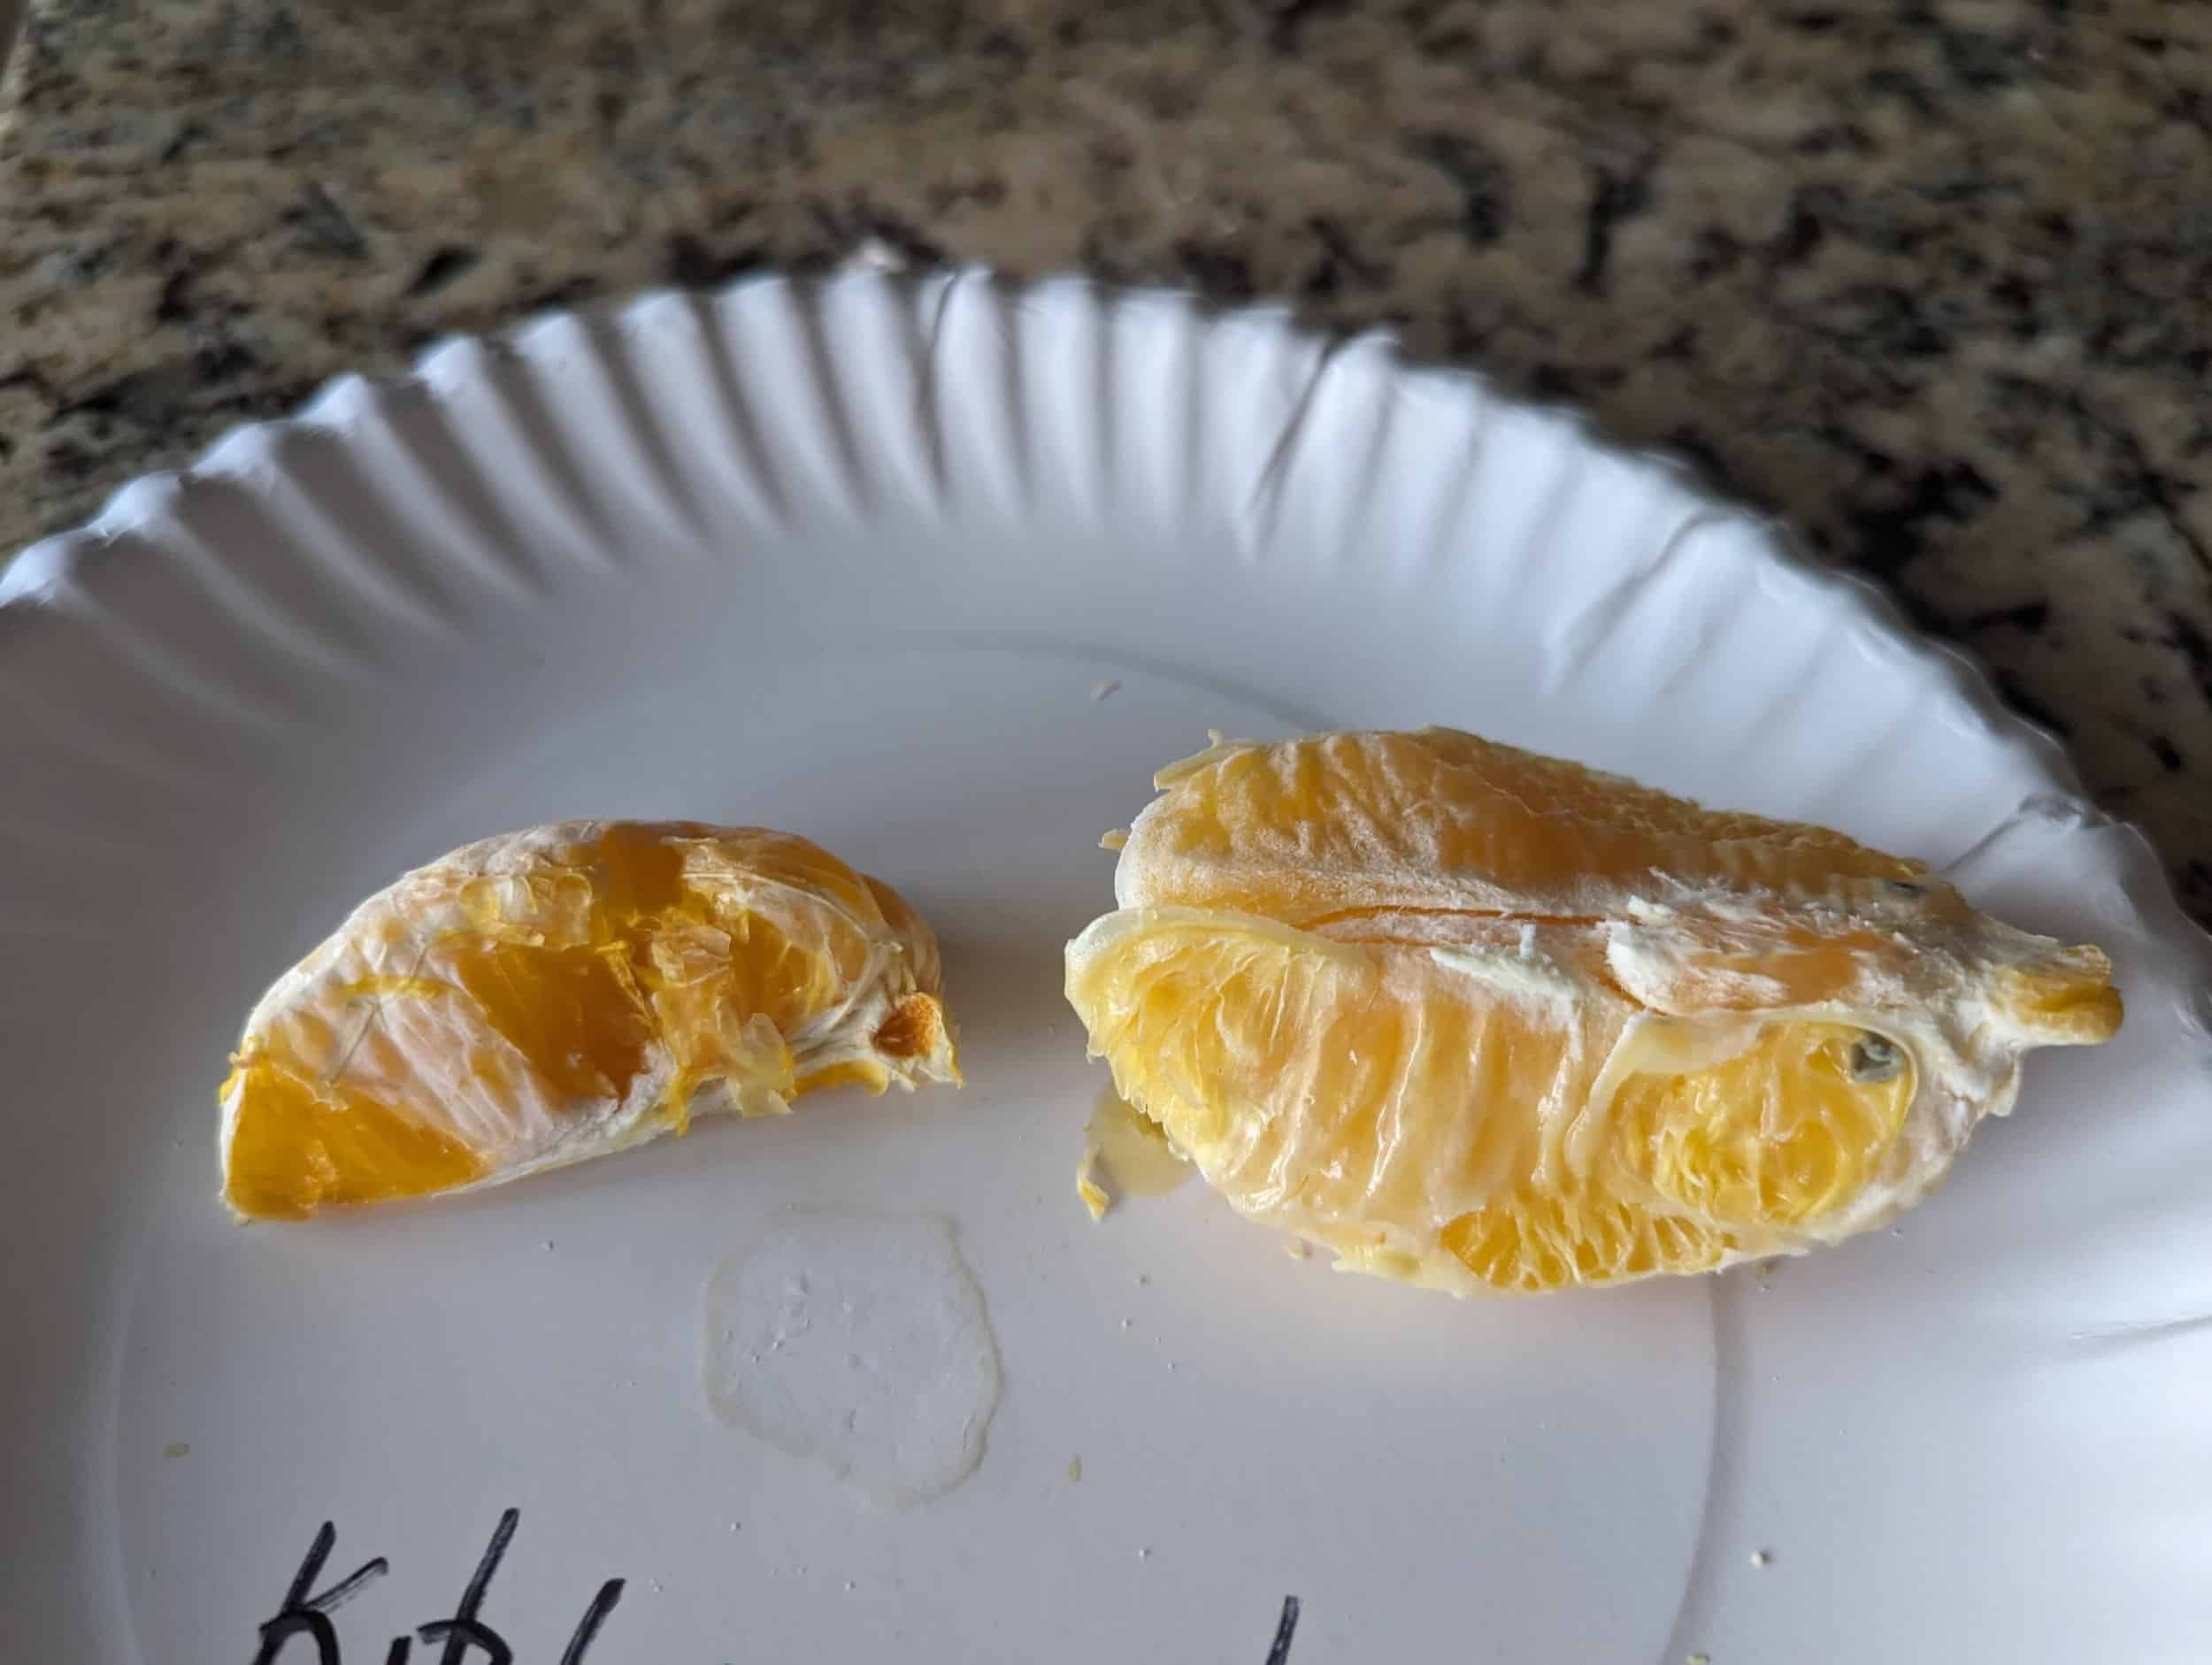
Step 1. Peel orange and separate into equal parts.
Step 2. Label paper plates where you will keep your oranges.
Step 3. Leave oranges alone for 3-4 days.
Step 4. Observe & discuss what you discover.
We watched our oranges for 9 days and didn’t have any visible mold! That was a big surprise to us. The outside temperatures varied from 28 to 63 degrees Fahrenheit.
After 5 days we noticed the three slices not in the bag had a hard, dry exterior. The orange slice in the bag had more moisture, and we were able to get more juice from it when probing it with a skewer.


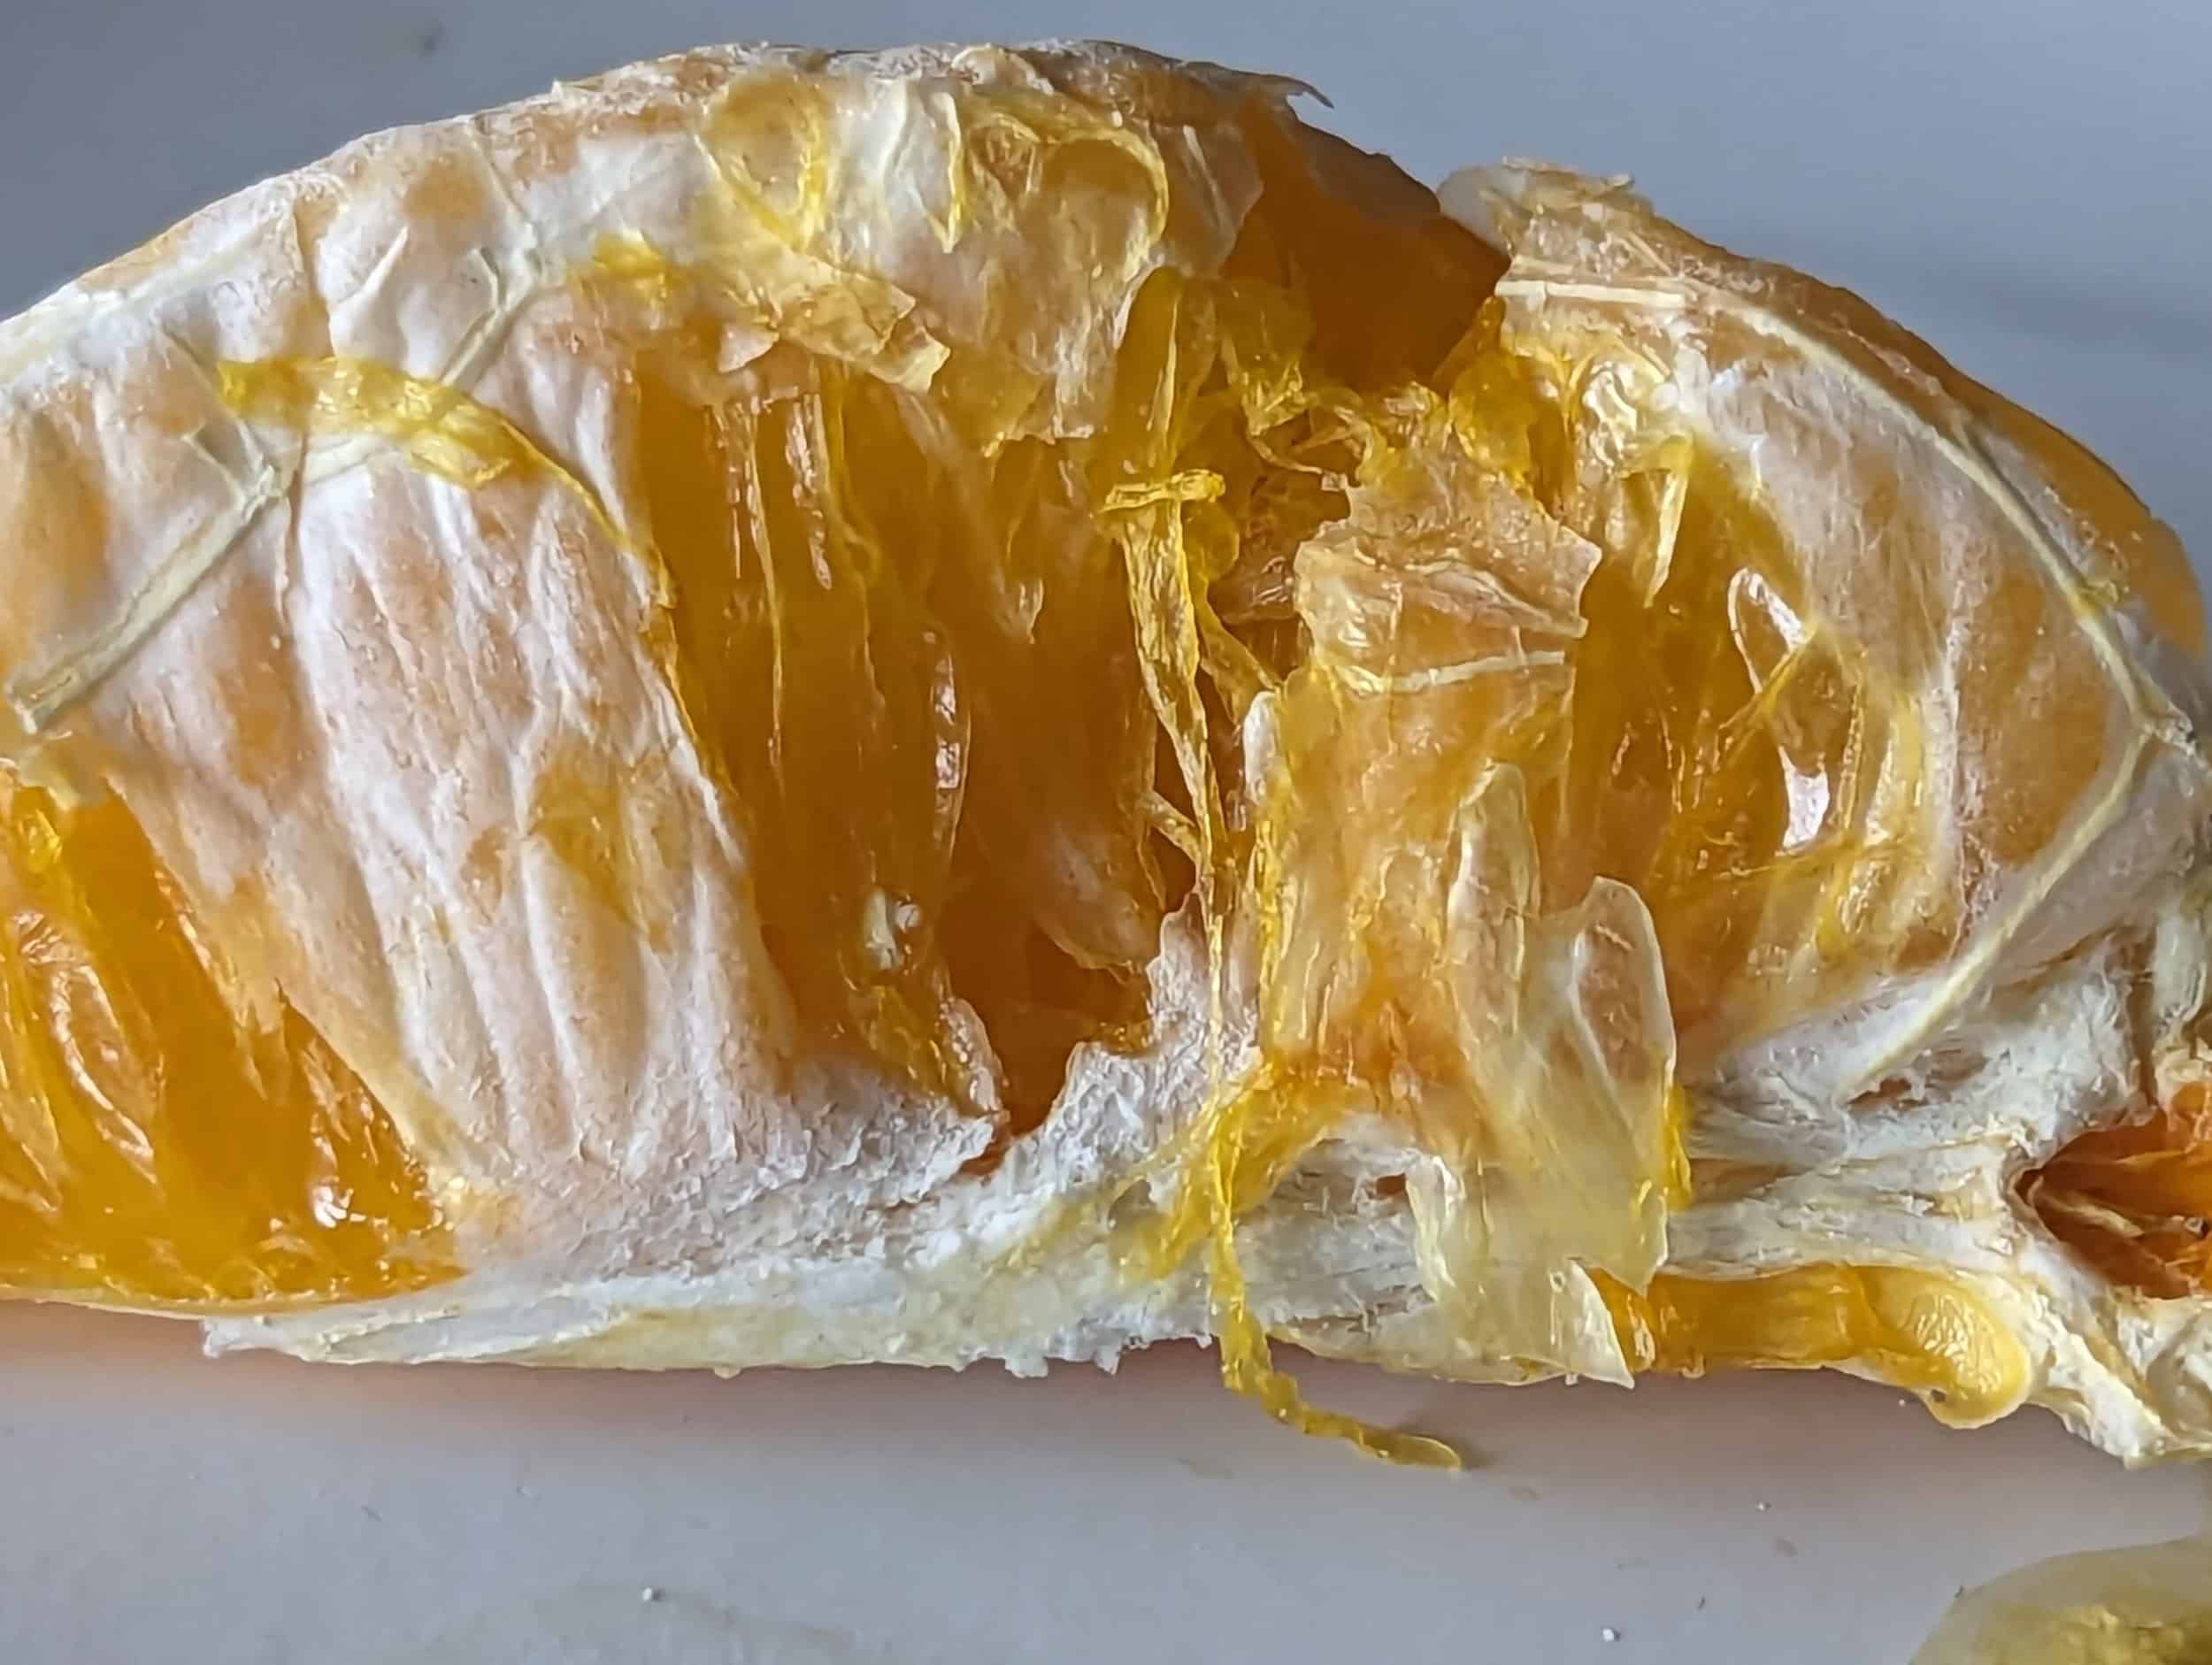
Slice sitting out on the counter uncovered after 7 days.

Orange slice stored in a plastic sandwich bag after 7 days.
Pictured here is the slice left out on the counter without any covering. The slice on the right is the slice placed in a zip-top plastic bag and placed on the counter.
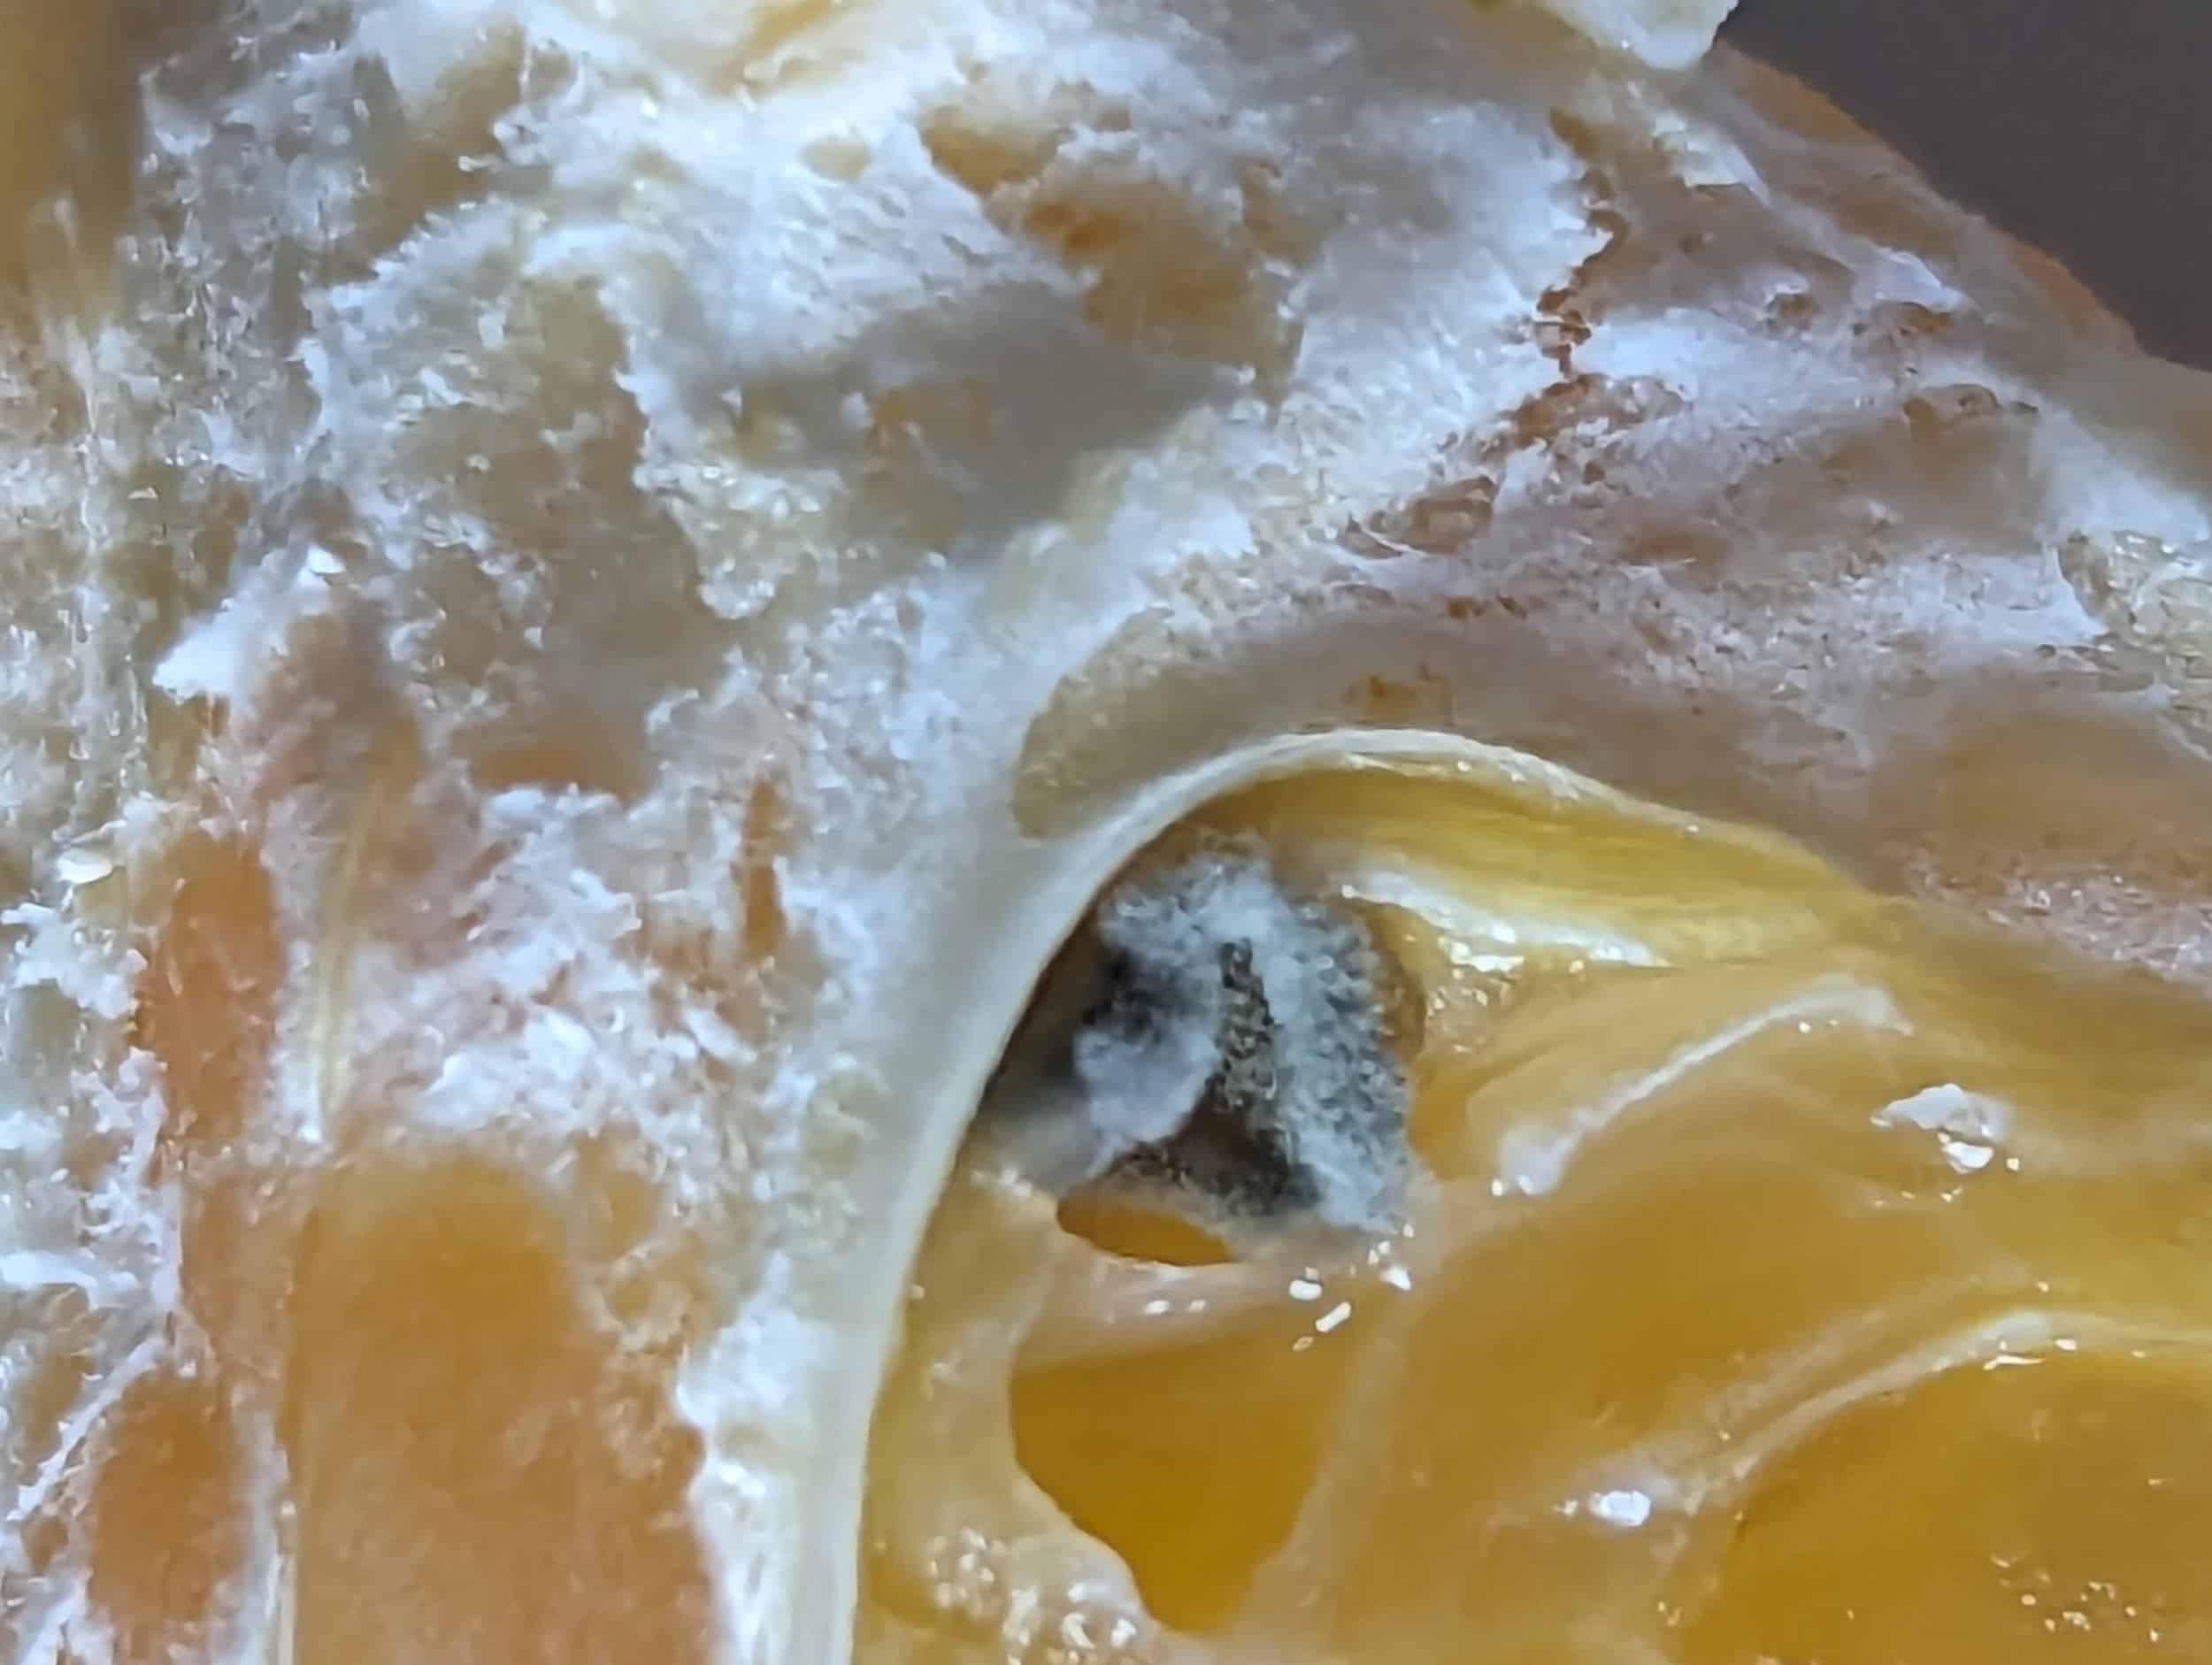
This is the orange slice placed in the zip-top bag on the counter. It started to grow mold after 9 days.
The orange slice left out on the counter was noticeably drier and smaller than the slice in the plastic bag.
The plastic bag protected the orange from being exposed to air and drying out. However, the moist environment the bag provided, supported the growth of mold more quickly than on the piece left in the open air. Check out our activity on growing mold by clicking here.
Science Experiments with Oranges – #3 Make an Orange Battery
This was by far our favorite orange activity! To easily complete this activity, we purchased a potato clock kit. This is the one we purchased.
This was by far our favorite orange activity! To easily complete this activity, we purchased a potato clock kit. This is the one we purchased.
It was well worth the $8.14! We have more activities coming out with this kit.

We started out testing 2 whole oranges, successfully got the clock running.
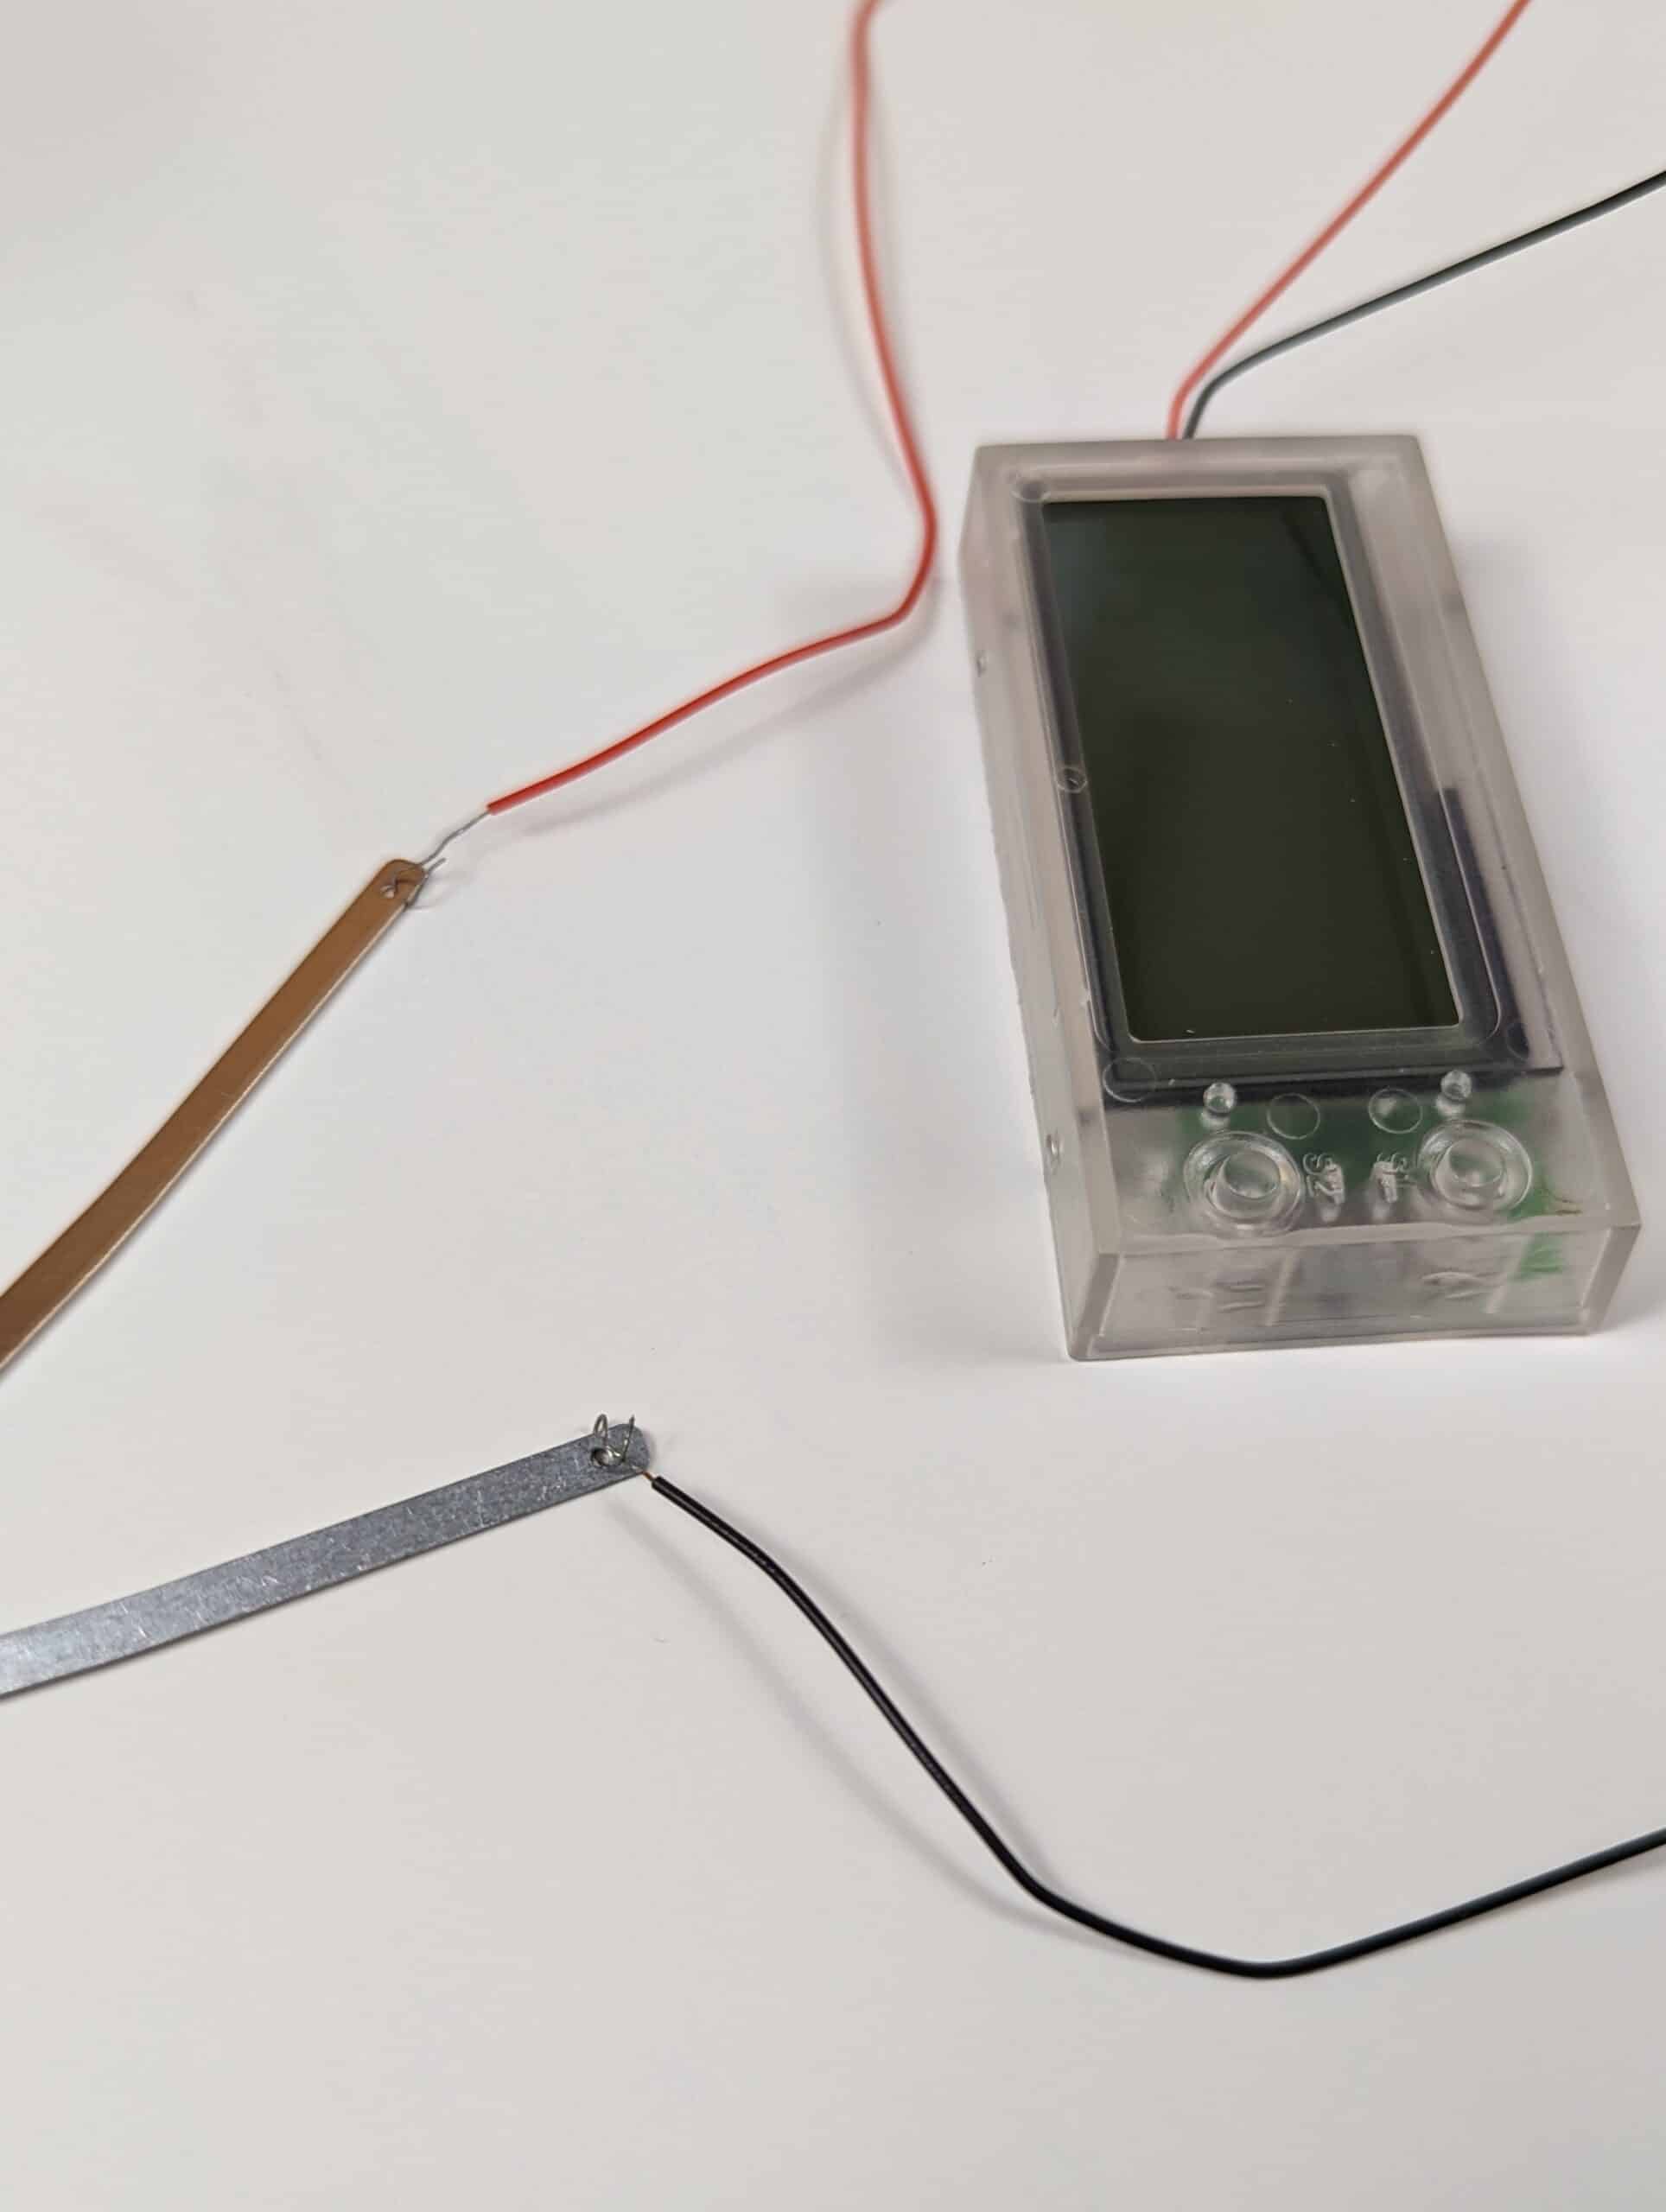

Then, Mr. Homeschool Scientist brought out the voltmeter he uses at work. (This one is a $700 voltmeter, but you can use something like this one from Amazon. lolol)
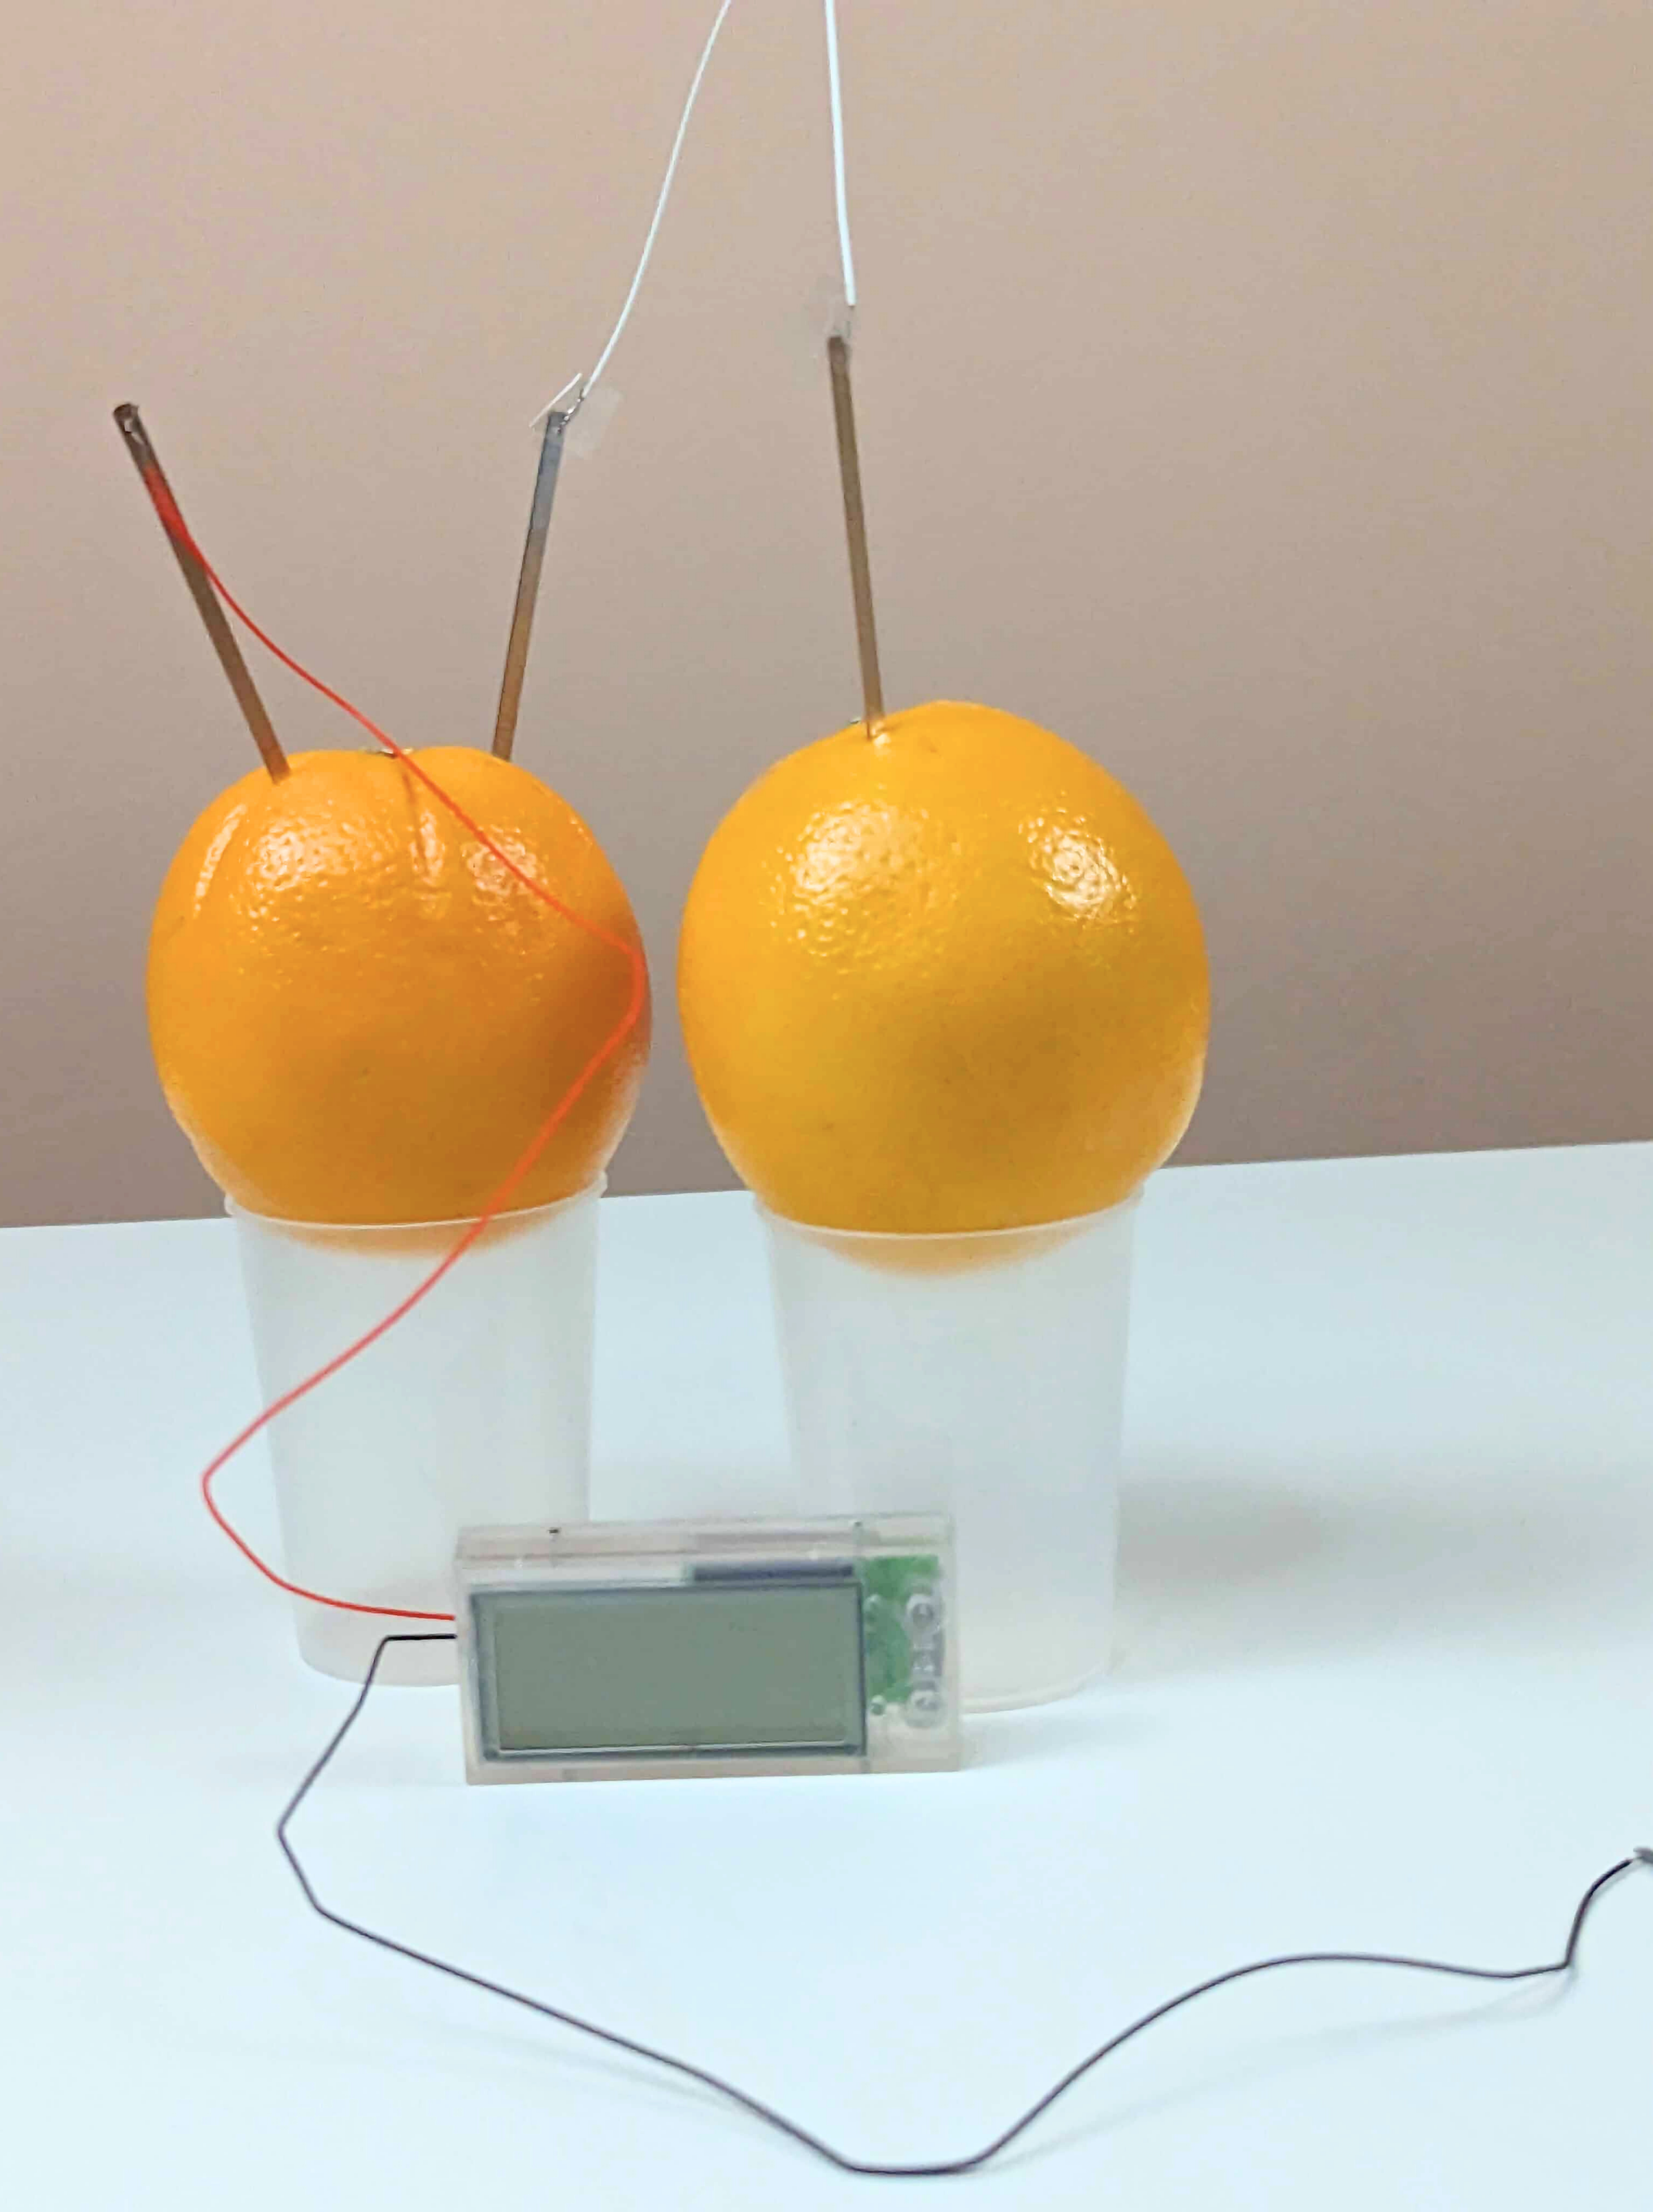

You can also gather your own materials for this project. You will need:
- 3 to 4 oranges (You will want more than 2 to test different ideas your children may brainstorm. 🙂 )
- A potato battery kit or the following
- Two different types of metal strips (such as copper and zinc)
- Some wire with alligator clips or copper wire
- A small LED bulb or a low-voltage device
- Voltmeter
Here is our set up, and you can see the clock did run! We tested the number of volts (Below you will find an explanation of volts.)

Then, we got the idea to use a third orange, cut it in half, and see if it would run the clock and what the volts would be. It was slightly smaller than the other two oranges.
You can see the set up and voltmeter reading.

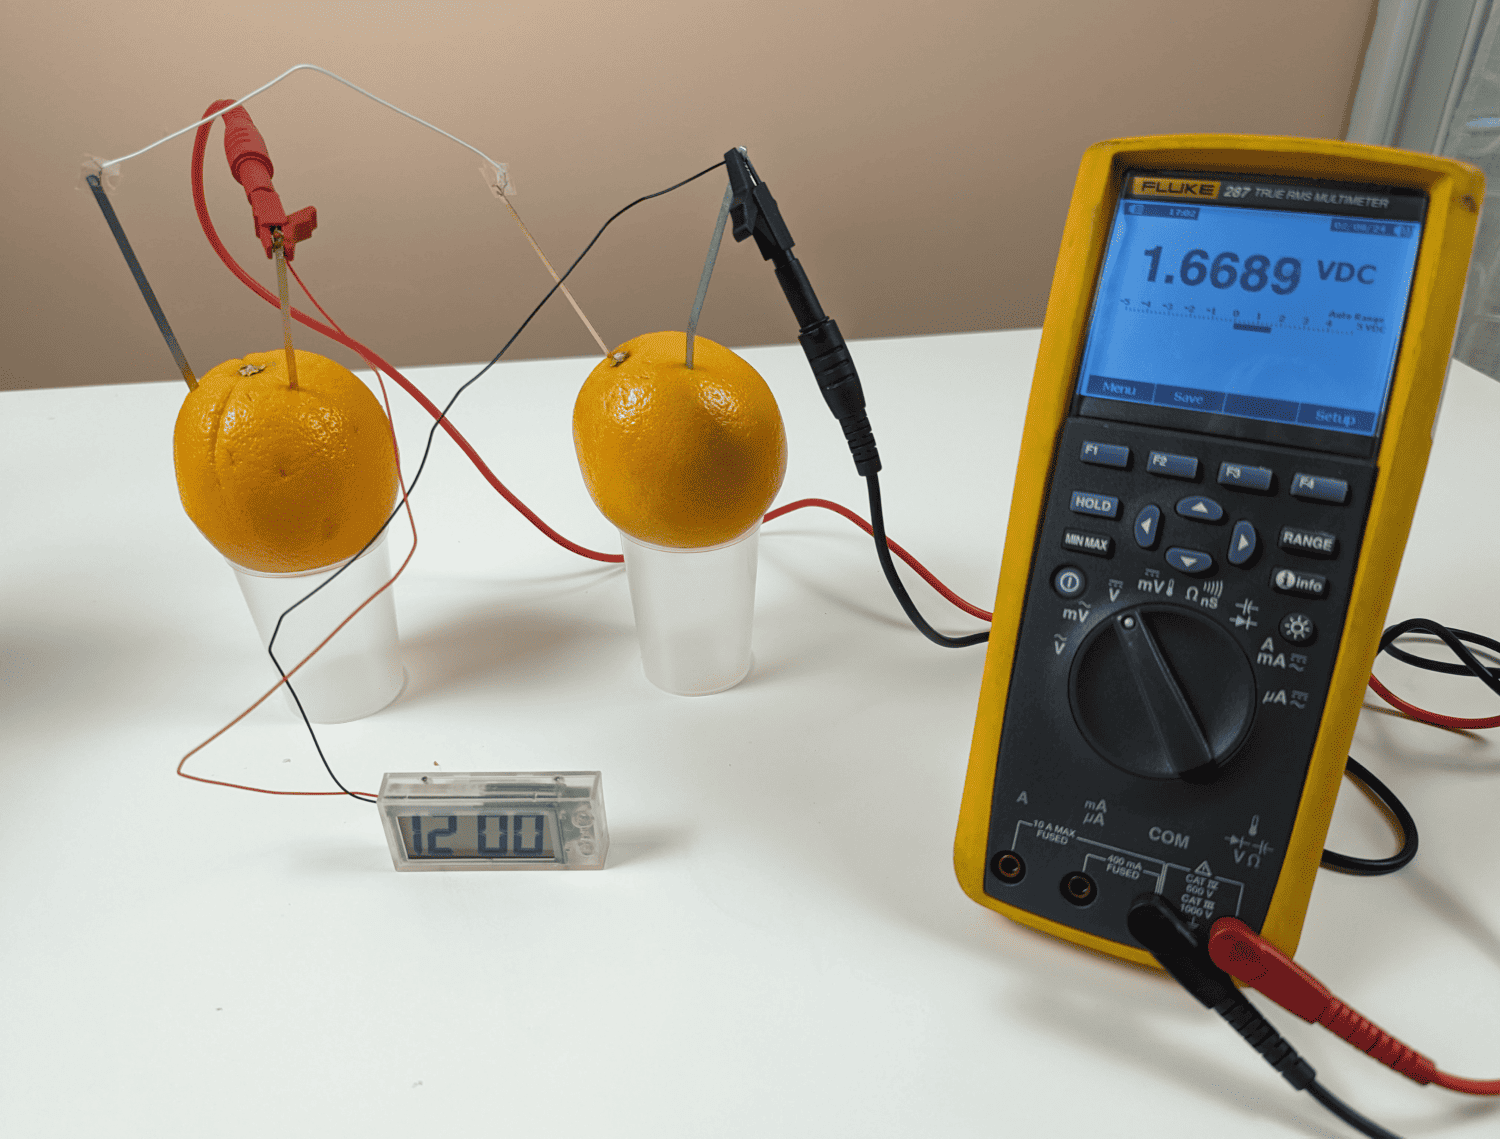
We first ran the set up with two full oranges. Then, cut an orange in half and measured the voltage. Check out the video below to see where the voltage started and how it slowly lowered. Notice how the voltage stayed pretty much the same when we switched from whole oranges to half oranges.
What is Voltage?
When you measure the voltage of a battery made using two oranges, you are essentially measuring the electrical potential difference between the two electrodes -the metal strips inserted into the oranges. Voltage, measured in volts (V), indicates the amount of electrical potential energy per unit charge available in the battery.
Voltage tells us how strongly the battery can push electrons through a circuit. The higher the voltage, the greater the potential energy available to move electrons from one point to another.
Voltage gives electricity the push it needs to travel through a wire and do cool stuff, like light up a bulb or power your phone.
So, the voltage measurement in our orange battery is measuring how much electrical push it has. This measurement helps us understand the battery’s ability to power devices or work in an electrical circuit
The device we are using to measure voltage is called a voltmeter, and it is specifically designed to measure electrical potential difference, or voltage, across various points in an electrical circuit. Voltmeters typically have probes or leads connected to the points between which you want to measure the voltage.
When a voltmeter displays a measurement of 1.6 volts, it means there is an electrical potential difference of 1.6 volts between the points where the voltmeter’s probes are connected. In other words, it indicates the amount of electrical energy available to move electric charges through a circuit.
So, when you use a voltmeter, it tells you how strong that push is. If it says “1 volt,” it means there’s a small push. But if it says “5 volts,” it’s like a much bigger push! The higher the number on the voltmeter, the stronger the push of electricity.
Science Experiment with Oranges – #4 – Does Fresh Orange Juice Cause Metal to Rust?
Will it rust? You need some type of metal. We used safety pins but you can use silver nails (which I couldn’t find)
Step 1. Drop 2 safety pins (or nails) into two different cups.
Step 2. Squeeze an orange into one cup covering the pin (nail).
Step 3. Pour water into the other cup covering the pin (nail).
Step 4. Leave alone for however many days you want. We did this on Friday and trashed it on Monday because the oj grew mold. Which would probably have been super fun to put under a microscope but I didn’t think about that until after I threw it out.
Step 5. See which pin (nail) rusted more.
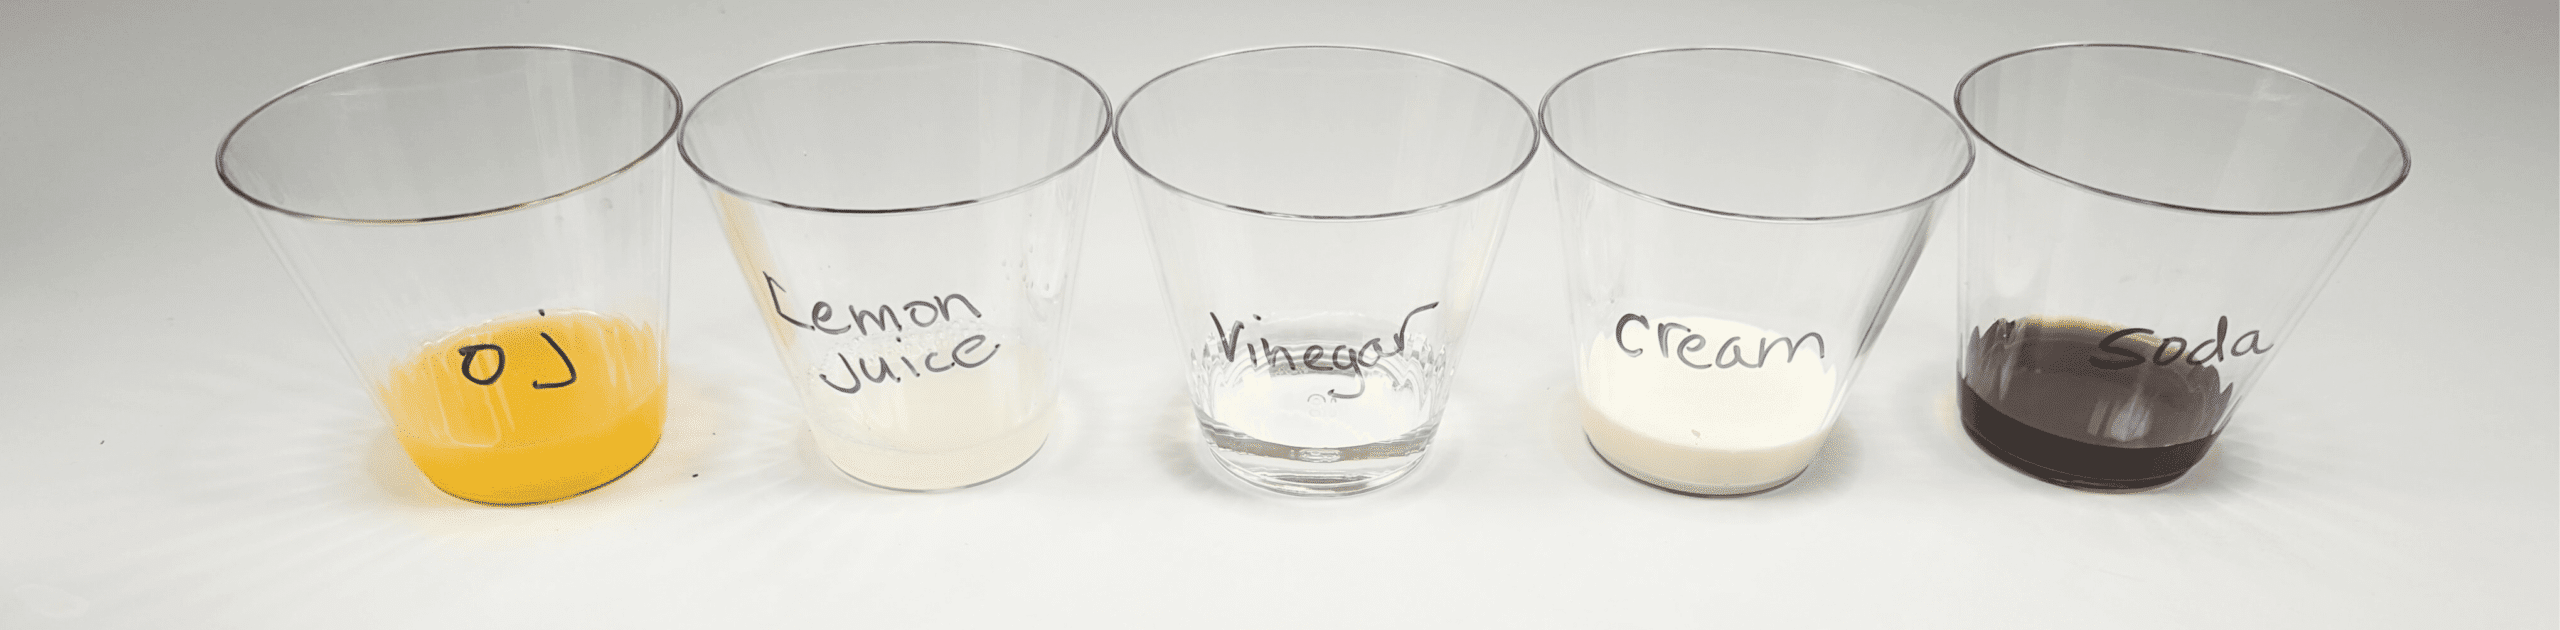
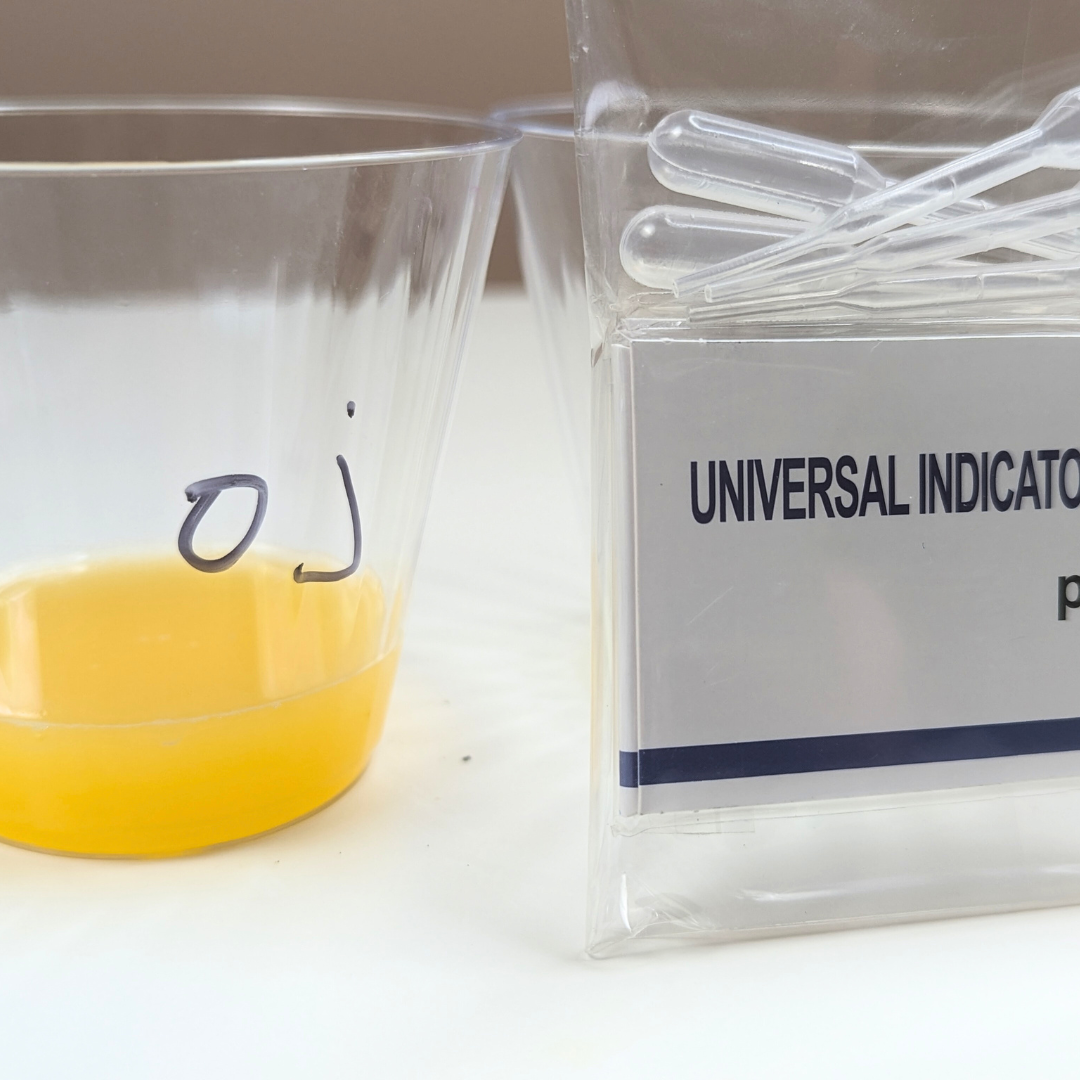
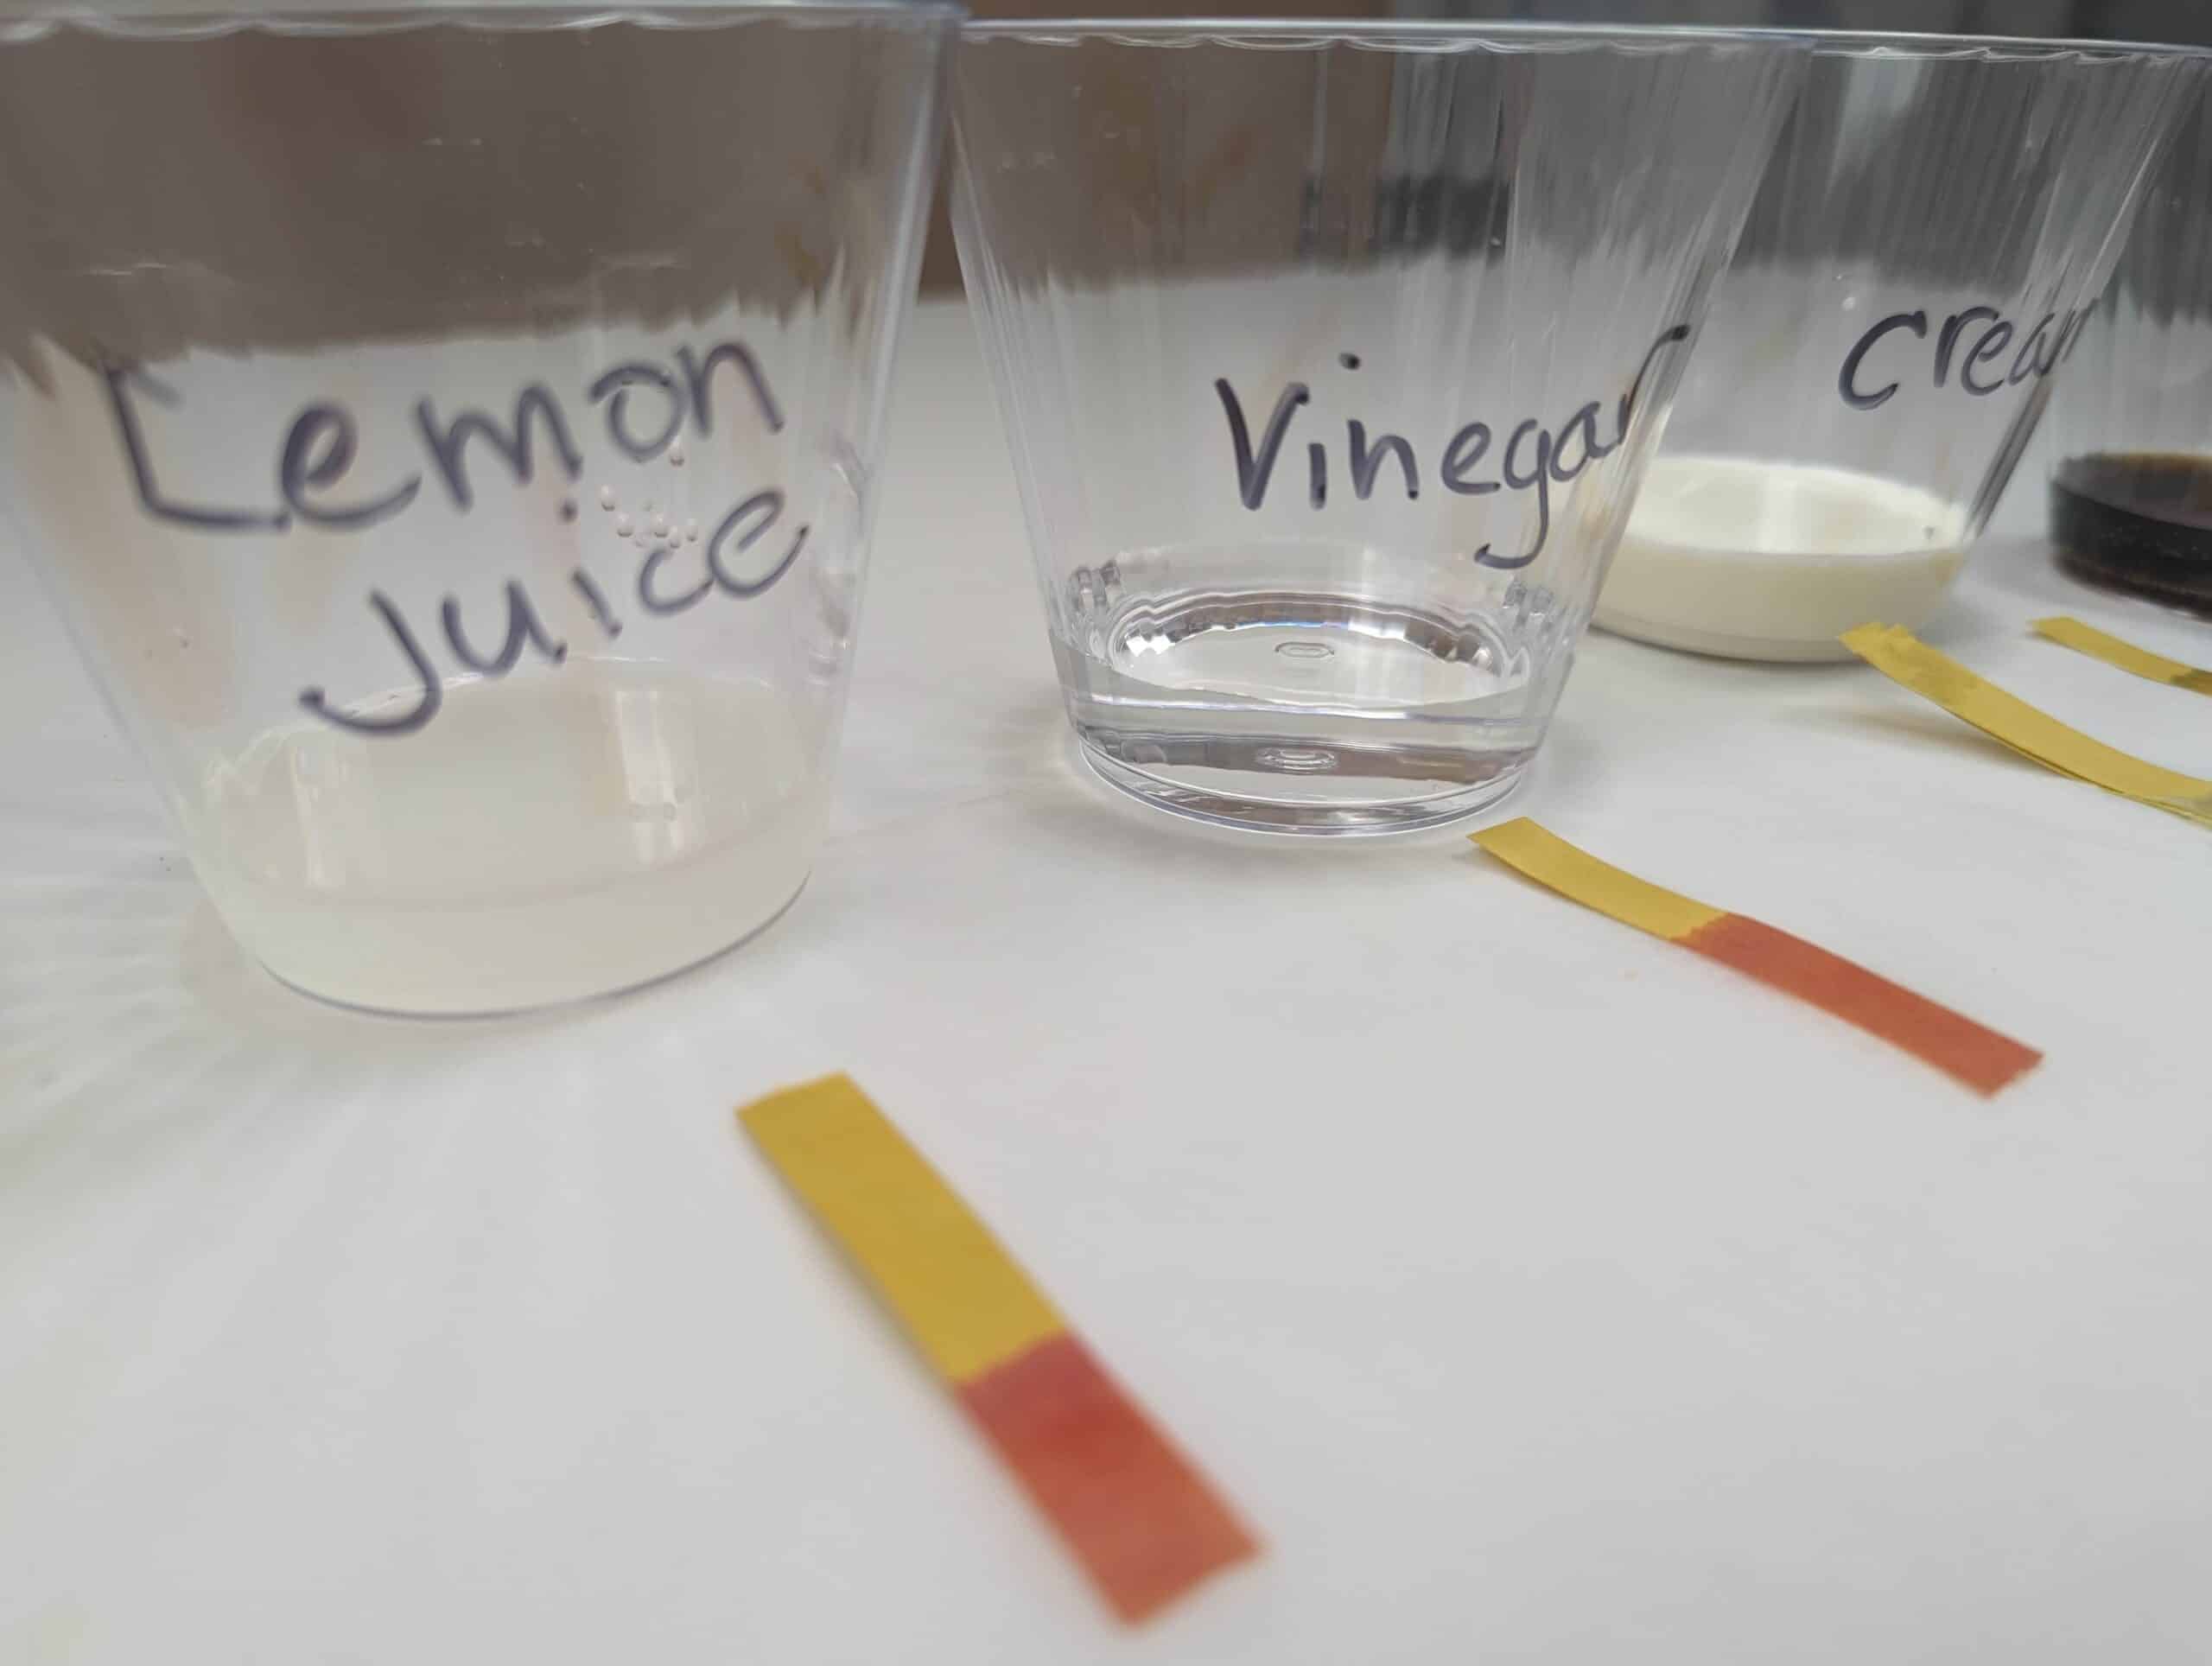
Science Experiments with Oranges – #5 -What is the pH of Oranges?
Is fresh orange juice acidic, neutral or base?
- Gather some orange juice, milk or creamer (We used creamer.), soda pop (If you have it.), vinegar, water, and lemon juice.
- our a little in each cup and label the cups.
- Gather pH strips like these.
- Dip one pH strip per cup and remove.
- Place the strip on the work surface in front of the corresponding cup.
- Use the pH chart to determine the pH level of each liquid.
Science Experiments with Oranges – #6- Does Orange Juice Freeze at a Faster or Slower Rate Than Water
Does orange juice freeze? If so, does it freeze at a slower, faster, or the same rate than water.
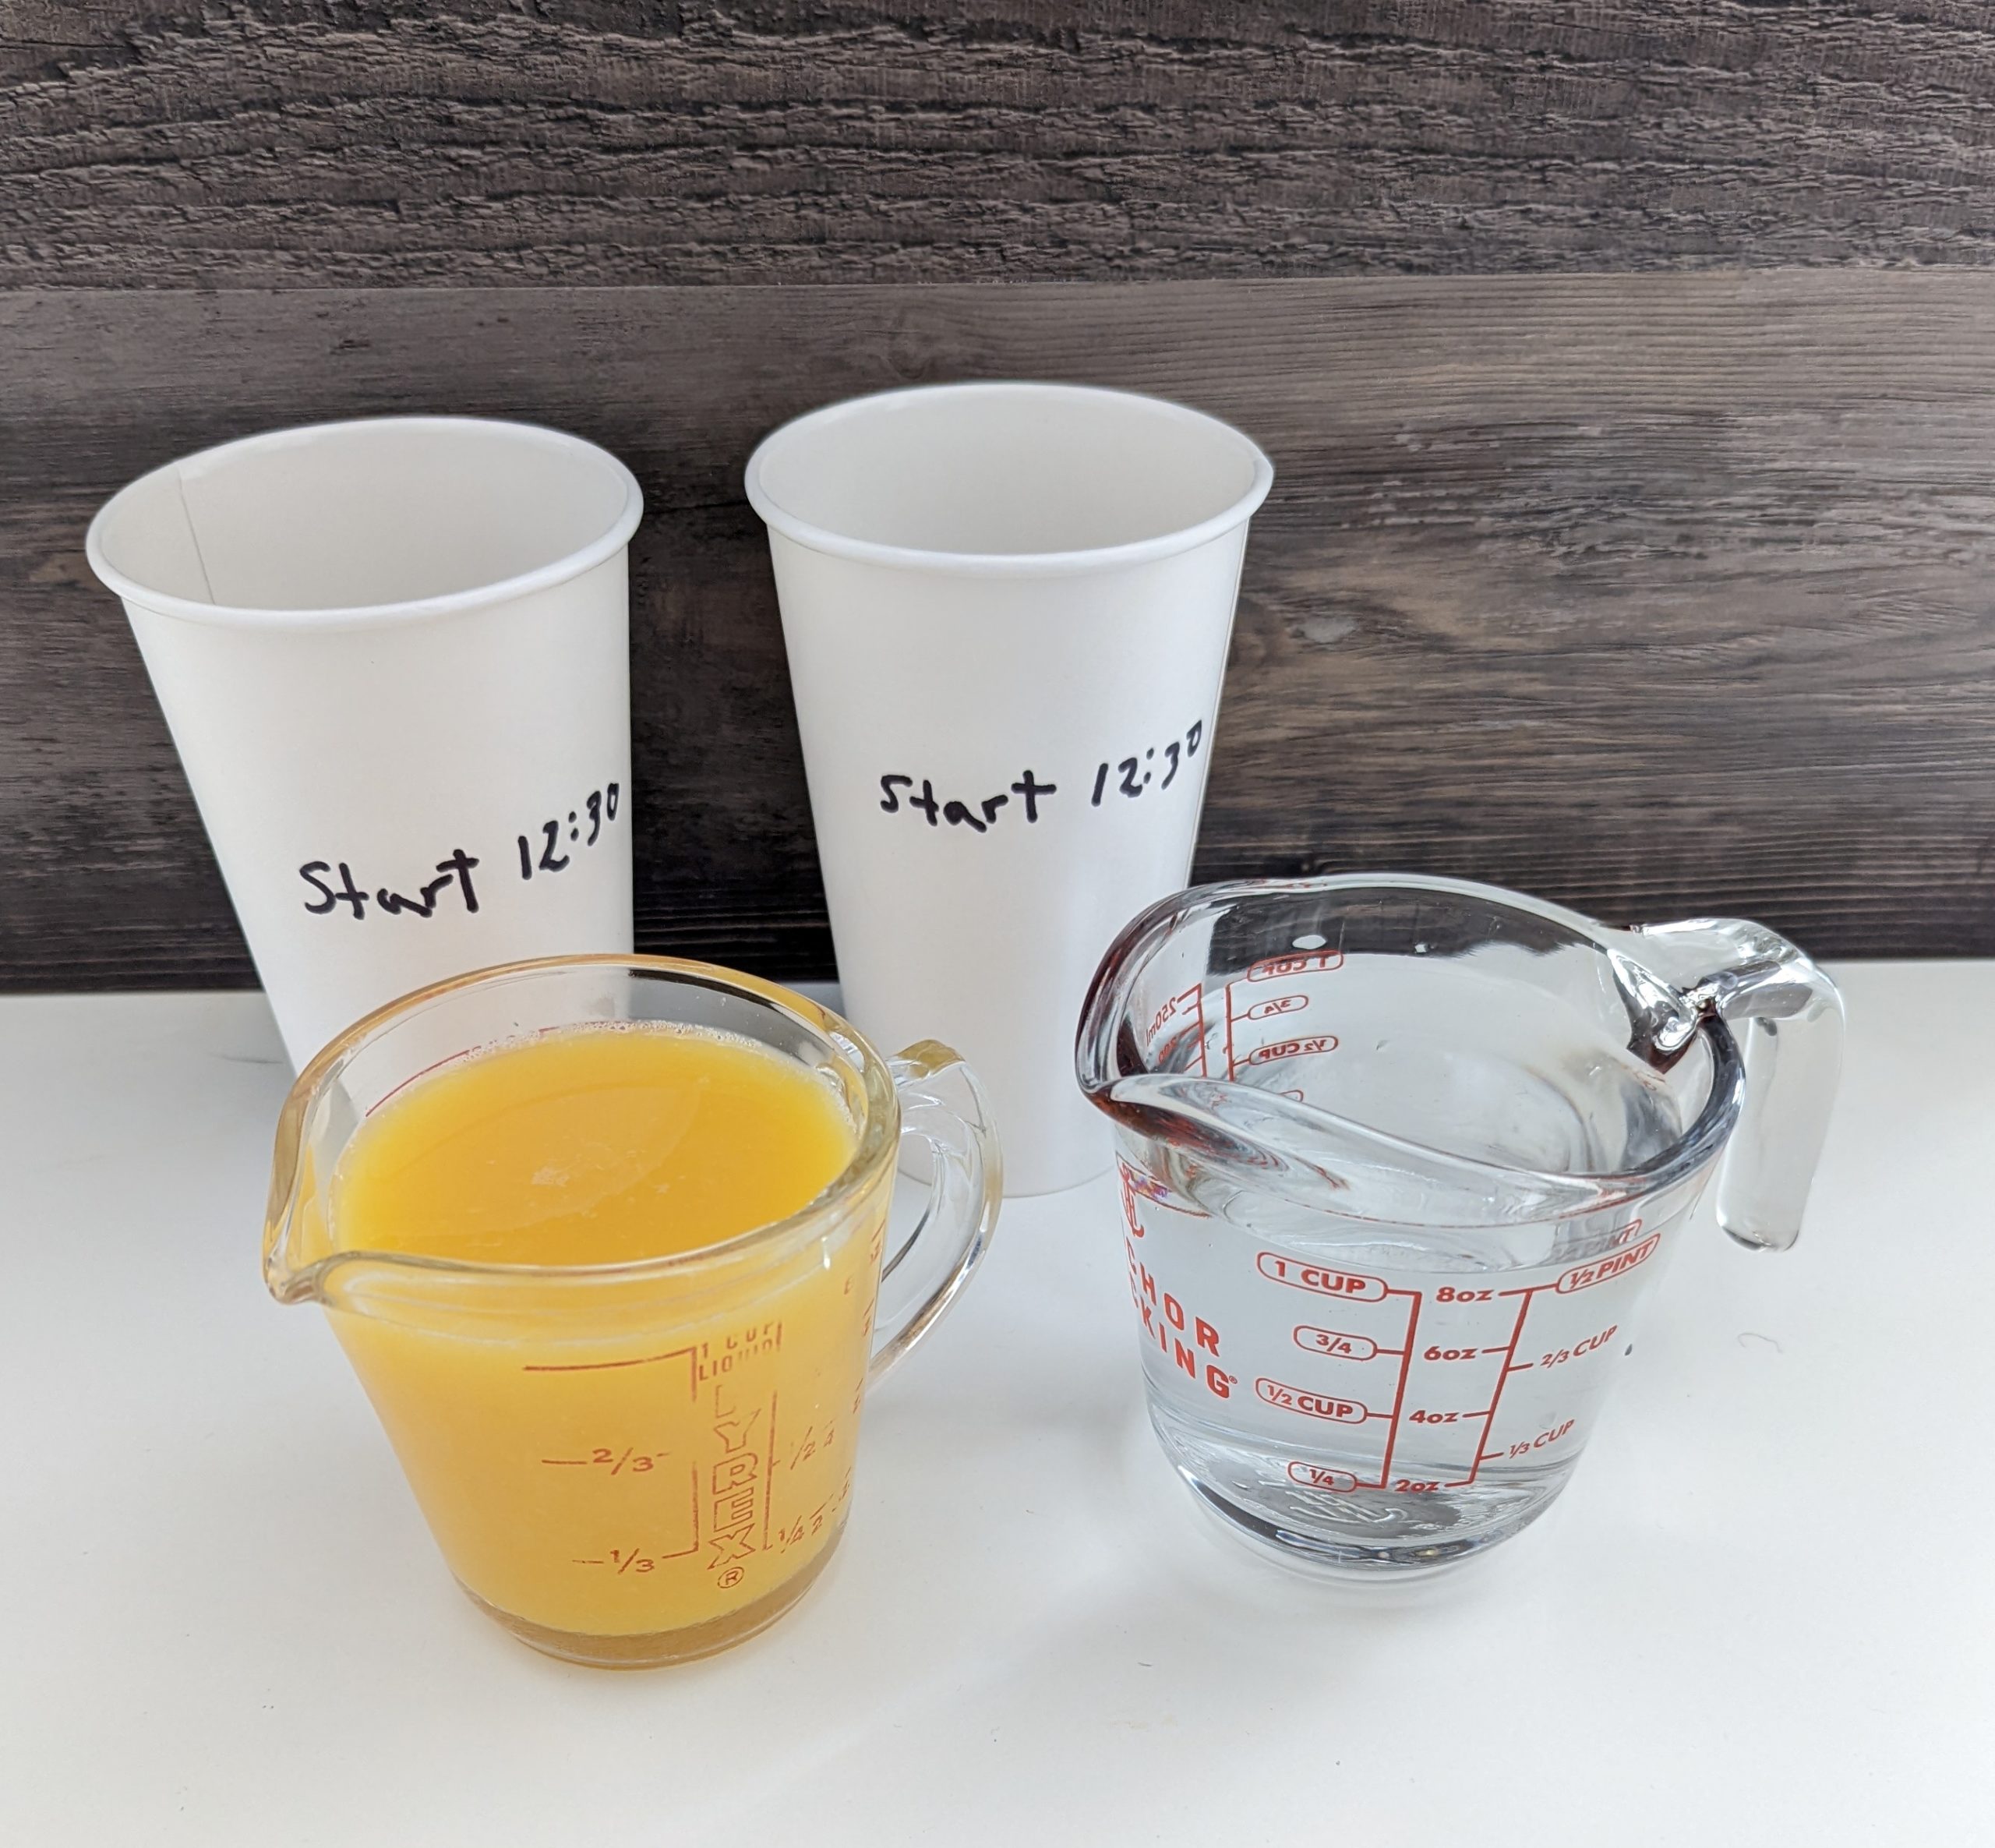
- Measure out 1 cup each or water and orange juice
- Mark the time on each of two paper cups.
- Pour the orange juice in one cup and the water in the other.
- Carefully place in the freezer.
- Check it after 2 hours, what do you notice? (The water was 2/3 ice, 1/3 water. The orange juice had frozen, but was slushy. When we squeezed the cup slightly, it loosened.)
- Put it back in the freezer and check in another 4 hours. What do you notice?
- Let it sit overnight in the freezer and check again.
Put it back in the freezer and check in another 4 hours. What do you notice?
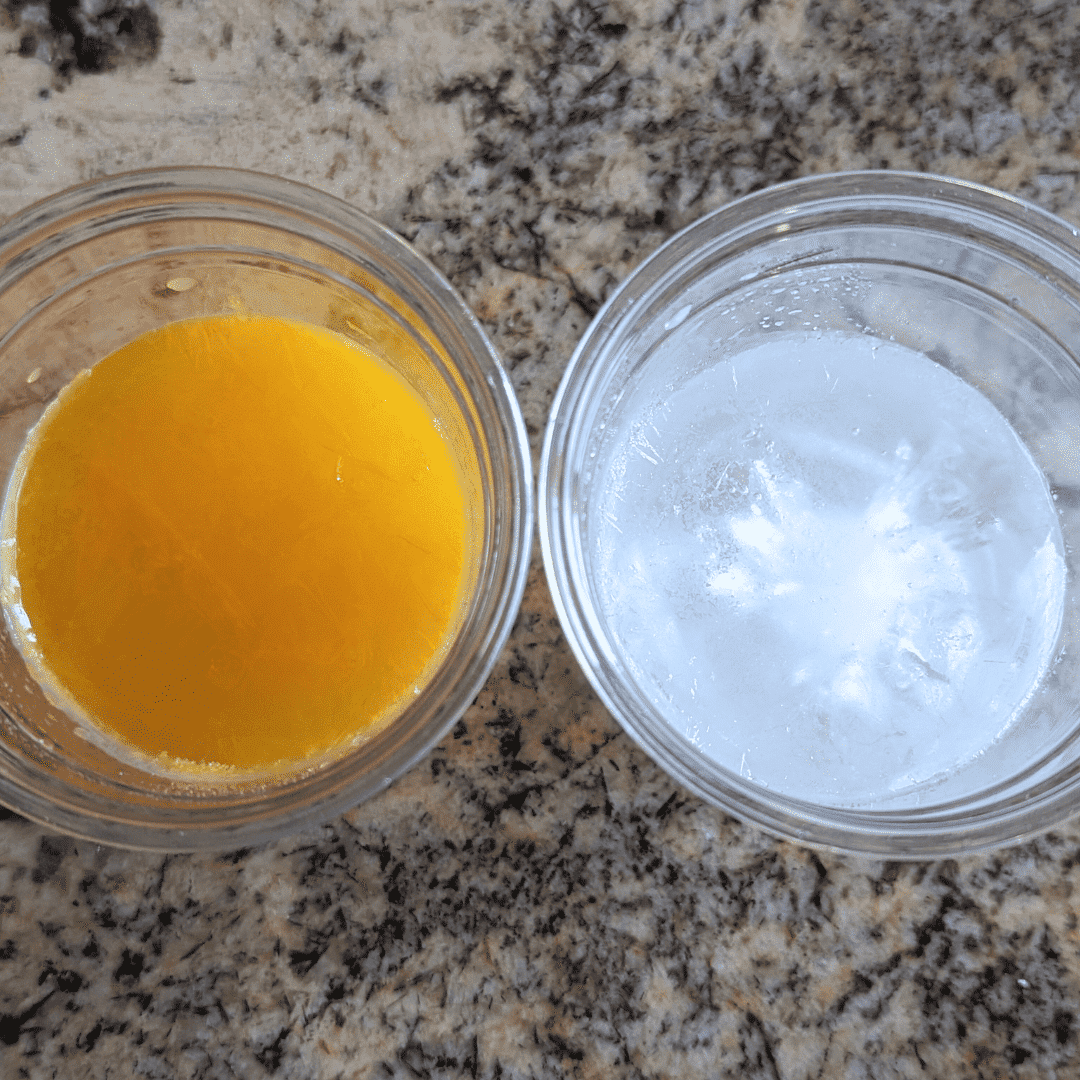
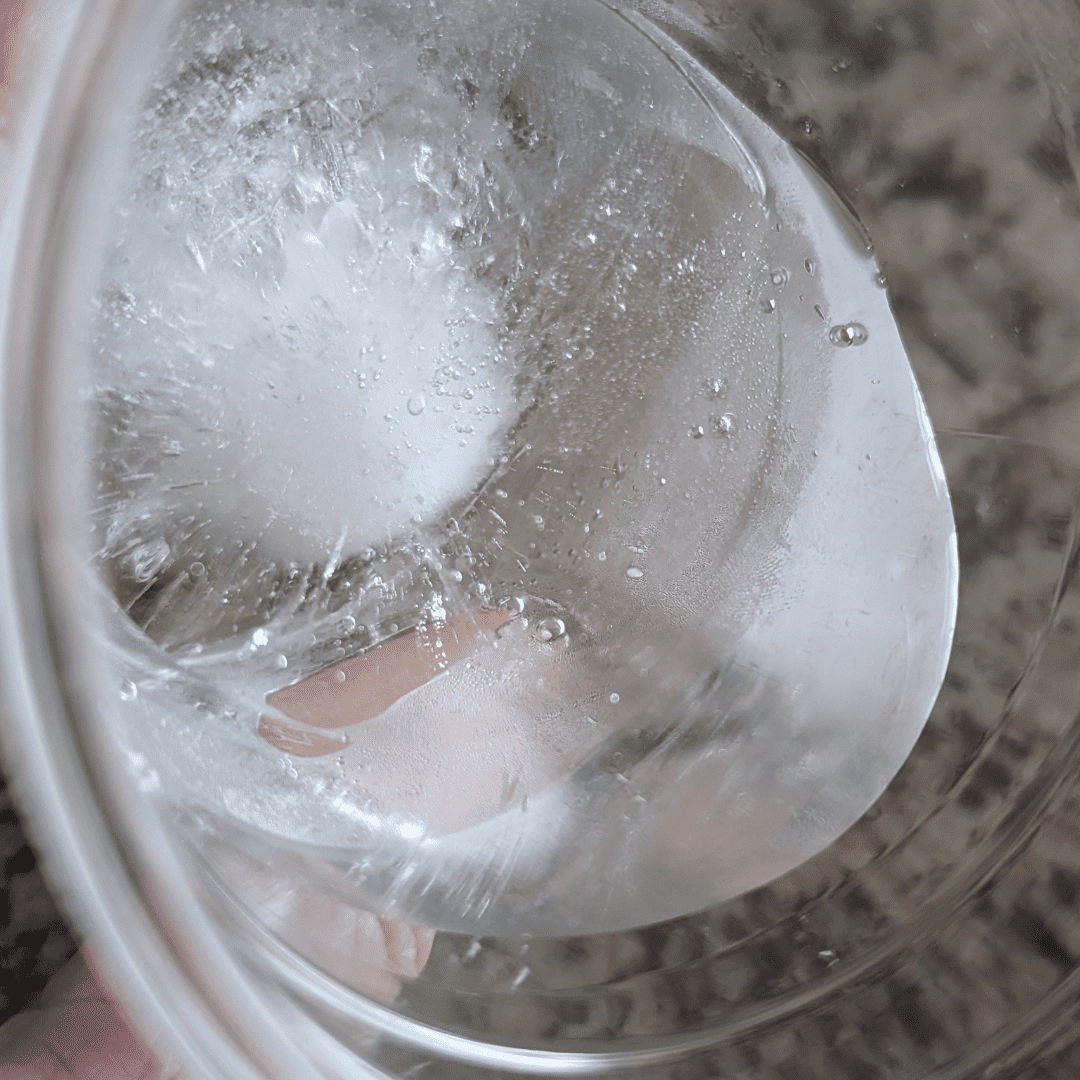
The far-left photo is our experiment after 24 hours in the freezer. Both were completely frozen. We then put them on the kitchen counter and decided to observe the melting process. After about 4 hours, both had started to melt, the water had more liquid than solid. So, the oj and water seemed to be melting at different rates.
The orange juice and water have different masses or densities. The rate at which a substance changes temperature is related to its mass. Since the water is less dense, so it will melt faster than the orange juice (which is denser than water.)
This is also why the water freezes faster than the orange juice. The water is less dense, so it changes temperature more quickly than the orange juice.
Bonus Orange Science Activity – Make an Orange Candle
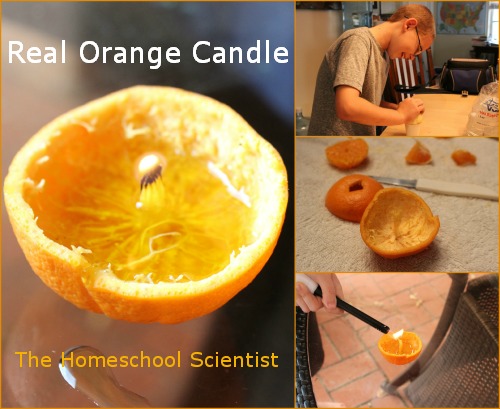
Bonus Activity
Real Orange Candle
I saw this neat little project online and tried to replicate it to see if it was real.
Step 1. Cut an orange in half.
Step 2. Carefully gut out the orange – do not rip the peel.
Step 3. Cut the center of one orange out for the “top” (make sure this is not the side with the long center – aka “wick”)
Step 4. Pour EVOO into the half of orange peel that has the “wick”.
Step 5. Light it.
Truth: It took about 2-5 minutes before it would actually light. We honestly thought we messed the whole thing up. But, finally, it did light and stayed lit for 6 minutes before we blew it out!
Science is all around us. You really do not need a fancy expensive kit. You just need some time and a little curiosity! What do you have around your house that you can use for an experiment?
Orange Resources Around the Web
Here are some resources that make a nice addition to an orange “study”:
This is a PDF from the Texas Cooperative Extension is about the safe handling of oranges.
Study other citrus fruit with this resource from Ag in the Classroom.
Heading to Florida? Tour an orange farm. See the listings on this site.