

Oxygen and Fire Experiment

Oxygen is a vital component of the air in our atmosphere. We need to breathe it in to survive, as do most other organisms. It is also necessary for combustion reactions, such as fire. In this oxygen and fire experiment, we will test the relationship between oxygen and fire.
Supplies
– large glass jar
– candle
– matches
– 2 cups of hydrogen peroxide
– a bottle (1 liter soda bottle or wine bottle will work)
– a balloon
– a teaspoon
Procedure
Put on your safety glasses.
Fill your bottle with approximately 2 cups of hydrogen peroxide. Then, add about 1 teaspoon of yeast to the peroxide. Quickly open the balloon over the opening of the bottle making sure no air can escape.
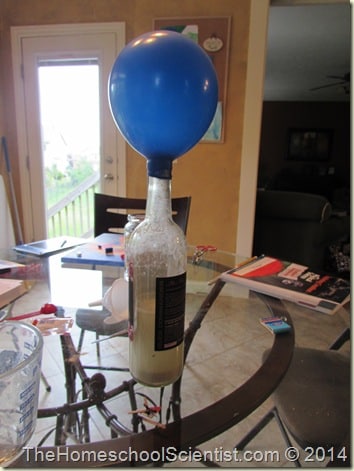
Gently, shake the bottle back and forth to mix the yeast and peroxide. You should now see bubbles beginning to form. These are oxygen bubbles created by the decomposition of the hydrogen peroxide. The yeast acts as a catalyst for this reaction.
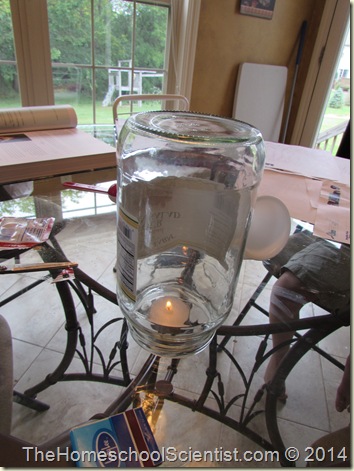
Meanwhile, light your candle and then cover it with the jar. Watch what happens to the flame. Don’t get too close to the jar. If it is weak, it could crack.
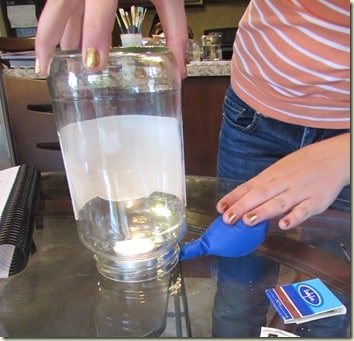
Look at your balloon. It should be partially inflated. Pinch the open end of the balloon and carefully take it off the bottle making sure no oxygen escapes. Keep the end pinched closed.
What Happened? Oxygen and Fire Experiment
Oxygen is necessary for fire. When the jar was placed over the candle the first time, the flame went out when all the oxygen was consumed.
We created oxygen when the yeast was mixed with the hydrogen peroxide. Hydrogen peroxide is not a stable compound. It is always decomposing into water and oxygen. It is kept in dark bottles to slow this reaction.
Yeast acts as a catalyst to speed up the decomposition of hydrogen peroxide. This is how we are able to collect a balloon full of oxygen.
When the oxygen from the balloon was placed into the jar with the lit candle, you should have seen the flame grow brighter. This was caused by the increased amount of oxygen in the jar. Fire actually burns faster (and appears brighter) when the oxygen concentration increases.
In this Steel Wool and 9 Volt Battery experiment, you can also see how the presence of heat and oxygen causes a combustion reaction and fire.

Physical Science Lesson
You can find this oxygen and fire experiment in Module 2 of Apologia’s Physical Science, 2nd Edition, curriculum. This module is all about air, its components, and their relationships to life on Earth.
Two years ago, she studied Human Anatomy with Apologia. You can see some of our experiments and projects in our Science Saturday series.
I hold a master’s degree in child development and early education and am working on a post-baccalaureate in biology. I spent 15 years working for a biotechnology company developing IT systems in DNA testing laboratories across the US. I taught K4 in a private school, homeschooled my children, and have taught on the mission field in southern Asia. For 4 years, I served on our state’s FIRST Lego League tournament Board and served as the Judging Director. I own thehomeschoolscientist and also write a regular science column for Homeschooling Today Magazine. You’ll also find my writings on the CTCMath blog. Through this site, I have authored over 50 math and science resources.