

Tsunami Lesson and Activity for Kids

What Is A Tsunami?
Tsunamis are large waves triggered by a shift in the ocean floor, usually caused by an earthquake. When the ocean floor shifts, water is displaced, and forces of gravity form the large tsunami waves. Tsunamis are also formed by disturbances from volcanic eruptions, underwater landslides, or a man-made explosion.
The word tsunami comes from the Japanese words “tsu” or “harbor” and “nami” or “wave.”
Tsunami waves are very long and can be very strong if formed by a violent earthquake. The waves move out in all directions from the source of the shifting Earth. The deeper the tsunami’s water forms, the stronger the waves, the longer they can travel and keep their strength. Tsunami waves moving into an area can last anywhere from 5 to 90 minutes.
The tsunami on December 26, 2004, in the Indian Ocean, was the deadliest on record. The earthquake that triggered the tsunami had a magnitude of 9.0 out of 10.0 on the Richter scale. It was a powerful earthquake in deep water; you can now understand why the December 2004, Indian Ocean tsunami was so devastating. Can you locate the plates in southeast Asia and India?
What is a Tsunami – Tsunami’s Through History
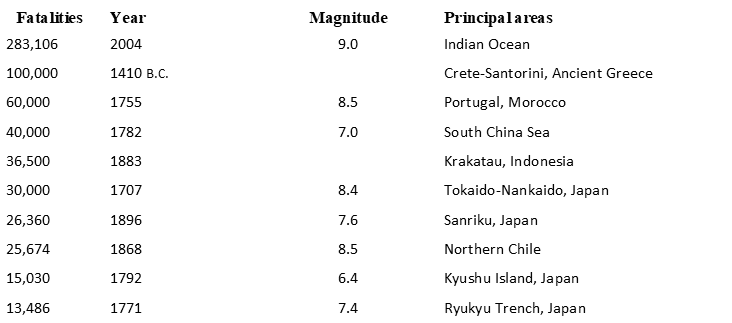
Source: National Geophysical Data Center, National Oceanic and Atmospheric Administration.
To further your understanding of shifting plates and the formation of tsunamis, follow the instructions below to make a simple model of a shifting tectonic plate.
We developed this activity after the 2004 tsunami to help students at in a homeschool co-op understand what they were seeing and hearing in the news. This activity and drawings are copyright of Thehomeschoolscientist.com.
Tsunami Activity for Kids – Demonstrate a Tsunami
Safety note: Adult supervision required when using any sharp object to make holes in the plastic lid.
Activity note: If you are able, set up a video camera on a tripod to film this activity. Then, you can play back
Materials:
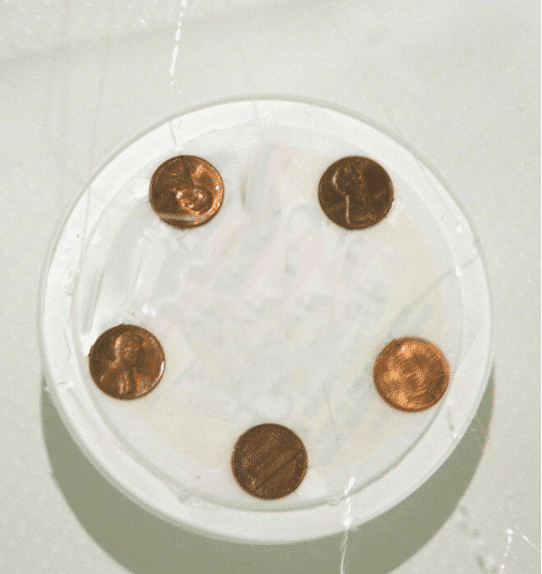
- 1 plastic lid from a 16 ounce yogurt container or similar container
- Fishing wire
- 5 pennies, tape, a small nail or ice pick (Something to make
- small holes in the lid.)
Directions:
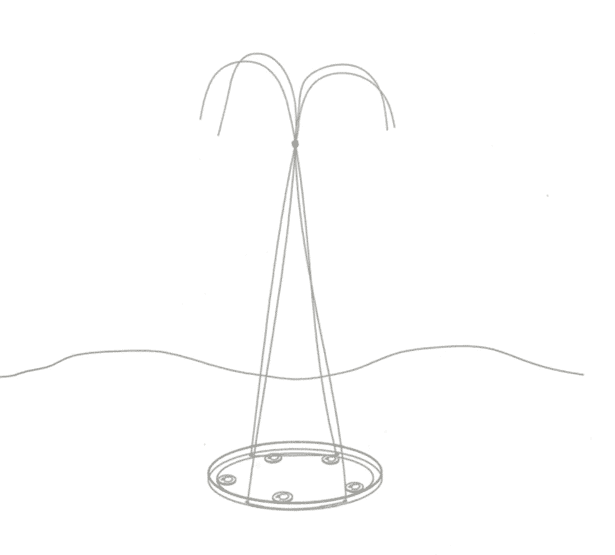
- Cut the fishing wire into two pieces, each about 32″ long. In the final model, you’ll have 4 pieces that are 16″ long.
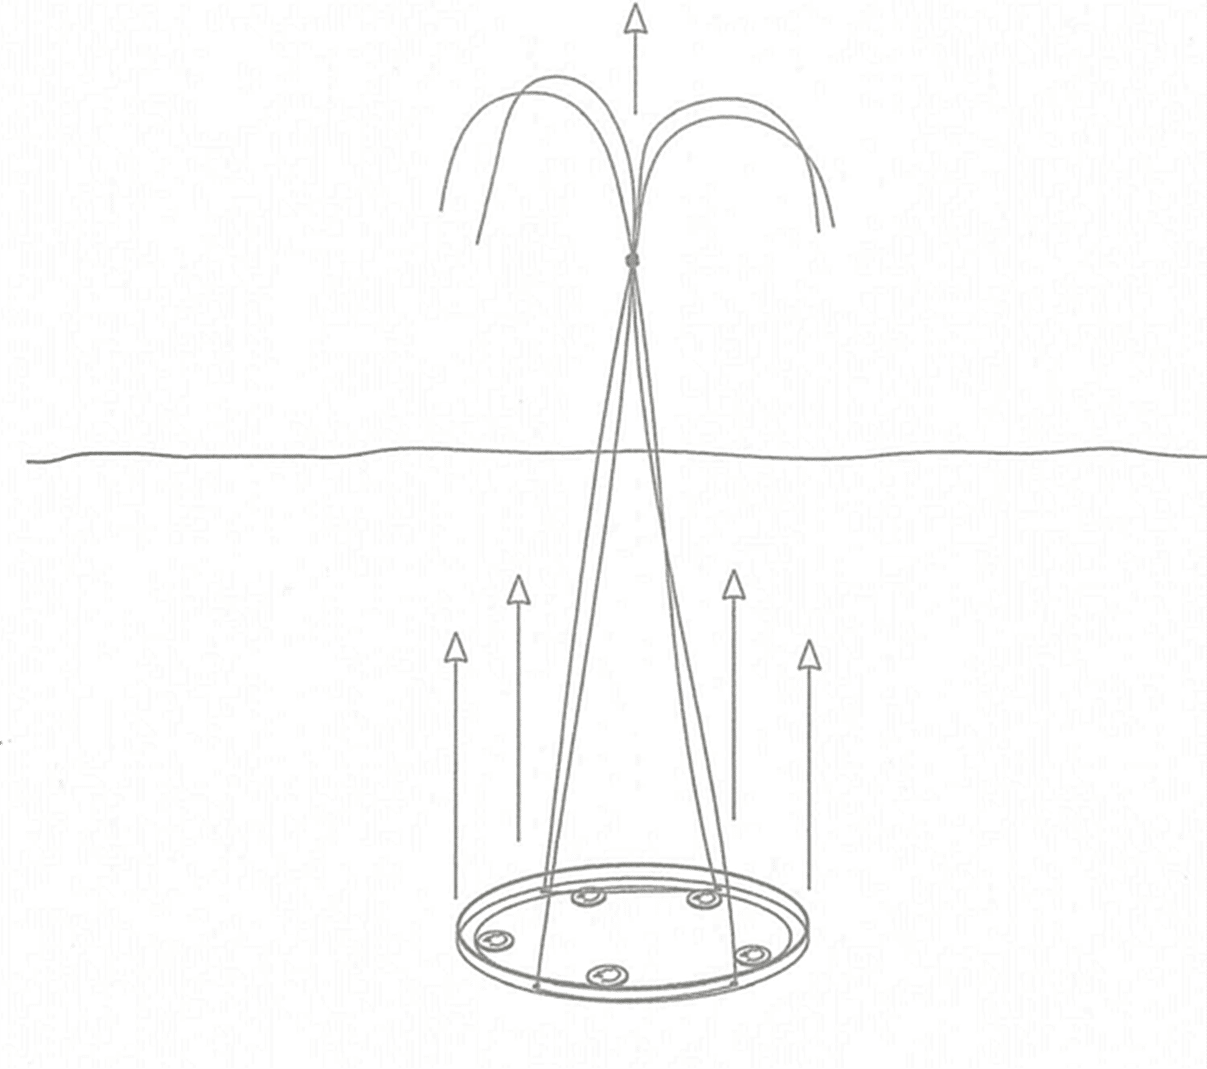
- Place the plastic lid on the table with the rim of the lid facing UP.
- Tape 5 pennies evenly space around the perimeter of the lid to
provide weight. (You can also hot glue the pennies to the top.) - Poke 4 holes in the lid with an ice pick, or small nail or awl. The
arrows in the photo above show the approximate location of the 2
pairs of holes.
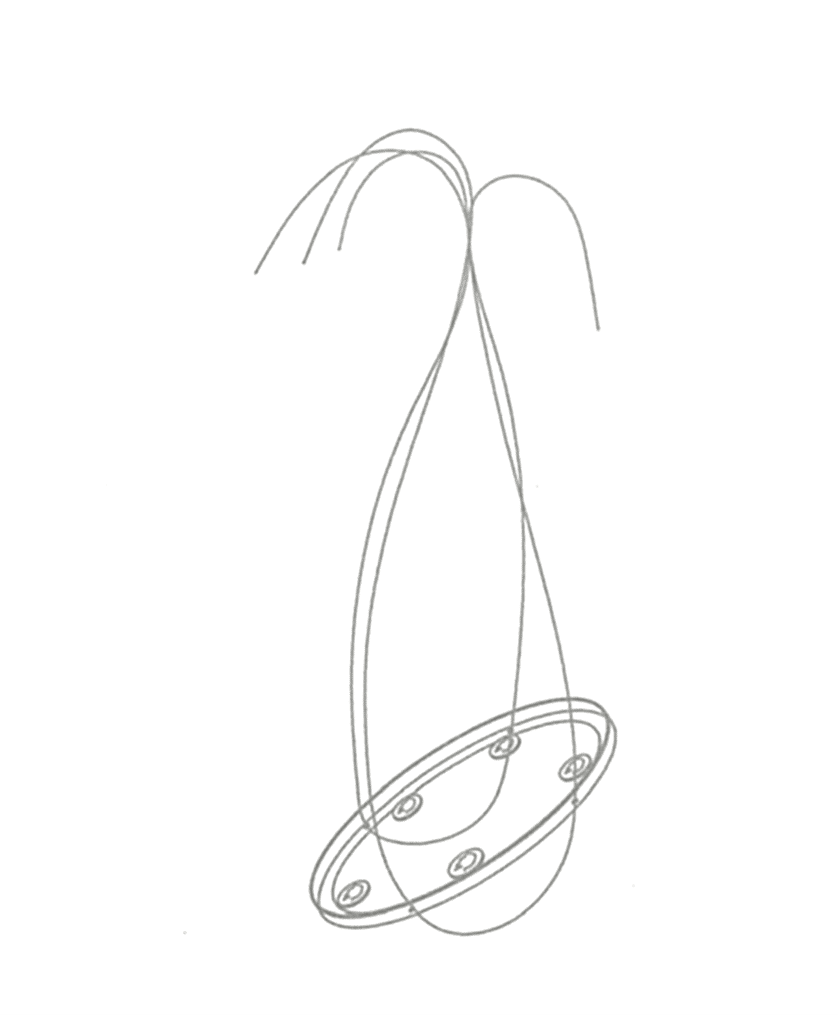
- Using each of the 2 pieces of fishing wire, thread 1 piece of fishing
wire through each pair of holes and hold all 4 ends of the fishing
line in one hand so the lid hangs down balanced and even. Each
of the 4 “sides” of string should be about 16” long. Tie off the tops
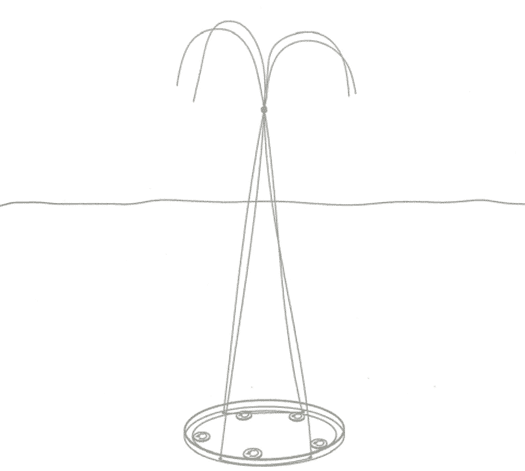
together in a knot. - Fill the tub with water to a depth of 10 inches.
- Push the lid down until it sits on the bottom
- Let the water get still.
- Hold the lid by the fishing wire and straighten out the
fishing wire by holding the line up and straight. Lift
the lid about 5 inches…not too fast, not too slow. See
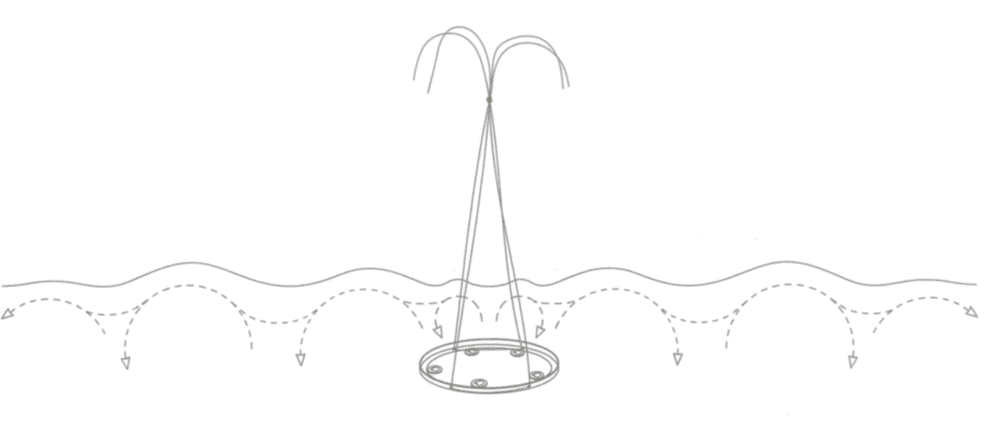
Drawing 4. - You’ll see the dome of water rise, the waves and then
turbulence under the water. See the final image.
What You are Observing in the “What Is A Tsunami” Demonstration
The lid is the tectonic plate. When you lift the plate, this simulates the movement of the plate during an earthquake. You can see the water displacement and gravity at work as the water moves up into a dome, then comes down gaining momentum. You can then see the waves moving out in all directions. By varying the speed and distance of the lift, you can see the variation in the strength of the waves.
Resources to Use with This Activity
- Many good resources from NOAA
- Comprehensive information on tsunamis from the National Oceanic and Atmospheric Administration
- Explanation of plate tectonics
- Map of the Earth’s tectonic plates
I hold a master’s degree in child development and early education and am working on a post-baccalaureate in biology. I spent 15 years working for a biotechnology company developing IT systems in DNA testing laboratories across the US. I taught K4 in a private school, homeschooled my children, and have taught on the mission field in southern Asia. For 4 years, I served on our state’s FIRST Lego League tournament Board and served as the Judging Director. I own thehomeschoolscientist and also write a regular science column for Homeschooling Today Magazine. You’ll also find my writings on the CTCMath blog. Through this site, I have authored over 50 math and science resources.