

Pumpkin Candy Experiment


Nothing says holiday spirit like a pumpkin candy experiment, right?
So, we were shopping for candy for our church’s trunk or treat. I always gravitate toward the chocolate because…it’s chocolate. Meanwhile, the kids migrated toward all things gummy, sour, and pure sugar.
We ended up with the pumpkin candies. I remember these mellow creme candies from my childhood. Of course, my kids grabbed them and just had to have them. I was about to say no, then I had an idea. “We’ll get them for science!”
Yes, we’ll dissolve those sugar b*ombs, so we grabbed a few other items at the store for this fun pumpkin candy experiment.
When we got the pumpkin candies home, I had my son read the ingredients.
Sugar, Corn Syrup, Confectioner’s Glaze, Salt, Gelatin, Dextrose, Honey, Artificial Flavor, Sesame Oil, Yellow 6, Red 3, Yellow 5, Blue 1
Table of Contents
{Learn how to read food labels.}
Basically, lots of sugar, a little oil, and some food dye coated in a confectioner’s glaze. We decided to see if all that sugar would dissolve in water and other liquids or if the confectioner’s glaze (a waxy resin) would protect it.
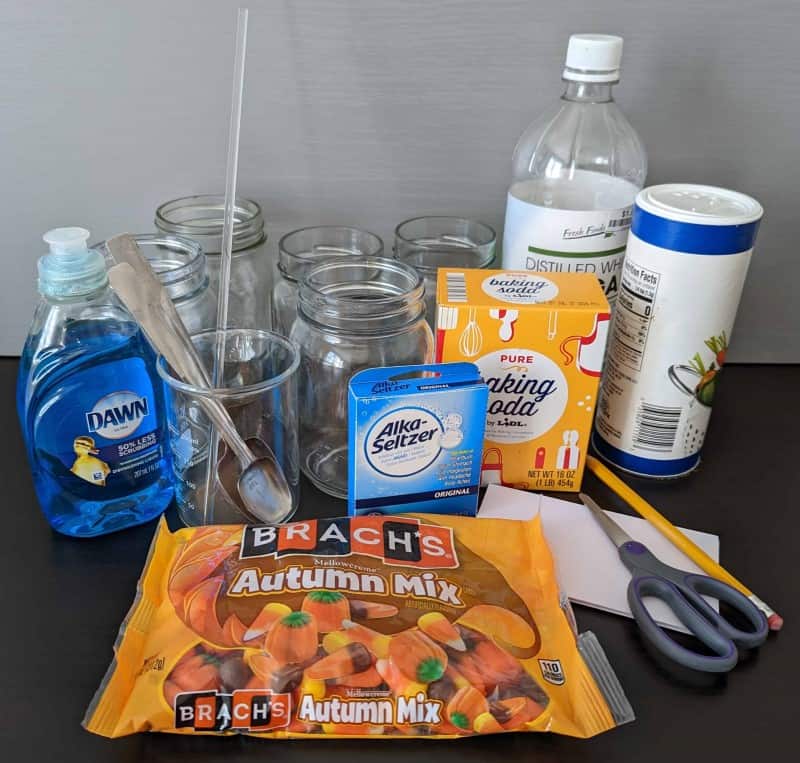
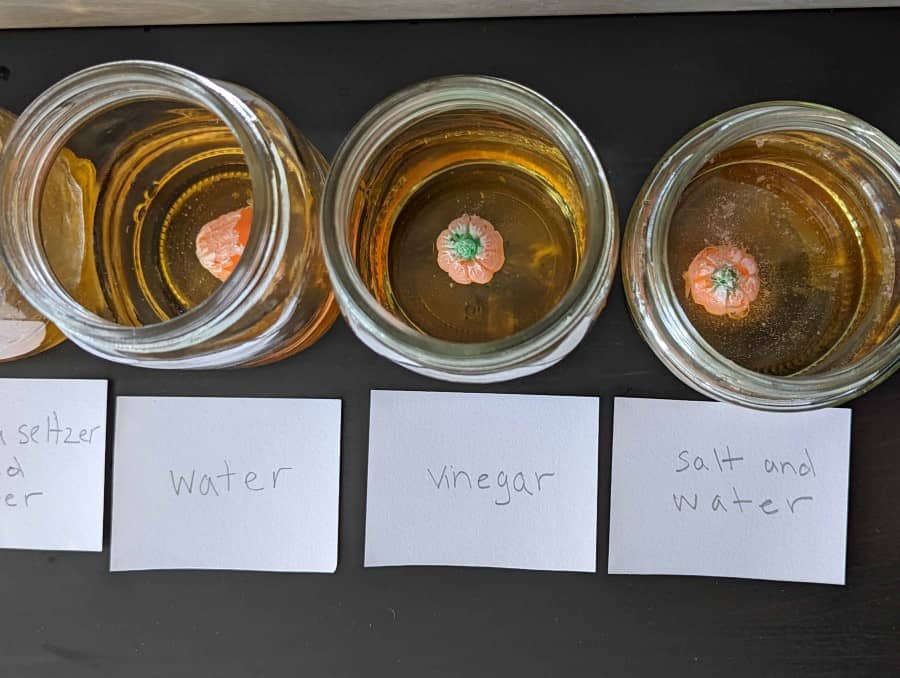
I let the kids choose what liquids to use in our candy pumpkin experiment. Based on some other dissolving experiments, we chose water, vinegar, soapy water (dish soap and water), Alka-Seltzer, baking soda and water, and salt water.
Download the Pumpkin Candy Experiment Worksheets
Please input your email below, and we’ll send you the printable pack that goes with the Candy Pumpkin Experiment.You will be added to our email list and will be the first to know when a new resource is available.
Also, keep reading below the sign up box for additional resources on our site.
Pumpkin Candy Experiment – Experiment Set-Up & Pre-Experiment Discussion
Since this pumpkin candy experiment is a chemistry activity, I made a list of chemistry vocabulary list, which included molecules, solvents, solutes, solution, ions.
We discussed how the liquids that we selected – water and vinegar were our solvents. The baking soda, salt, Alka-Seltzer, and soap are the solutes because they are dissolved. The mixtures are the result of mixing the solvent and solute (i.e. water and salt.)
Then, the pumpkins became a solute since they were dissolved in the mixtures.
We discussed what we hypothesized would happen:
- Which mixture would dissolve the pumpkin candy first.
- Which pumpkin candy would dissolve the slowest.
- Would the pumpkins dissolve completely?
This is what we mixed:
- 150 ml bottled water at room temperature (You may want to test hot water vs. ice water.)
- 1 teaspoon of salt mixed with 150 ml bottled water
- 2 Alka-Seltzer tables mixed with 150 ml bottled water
- 1 tablespoon of baking soda mixed with 150 ml bottled water
- 6 drops of Dawn dish washing liquid mixed with 150 ml bottled water
- 150 ml white vinegar
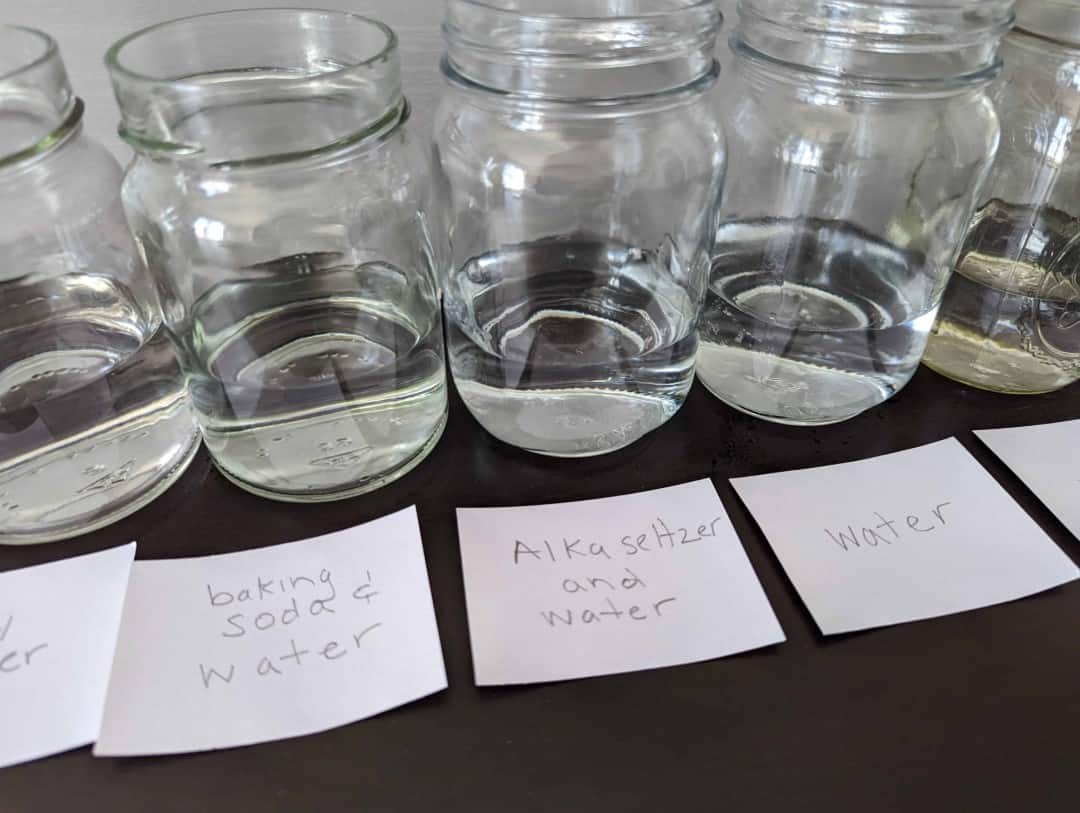
We stirred all mixtures well. Then dropped in the pumpkin candy.
We dropped the pumpkin candies into the liquids at the same time and started observing. After about 2 minutes, we started to see some changes.
Pumpkin Candy Experiment – Observations and Photos
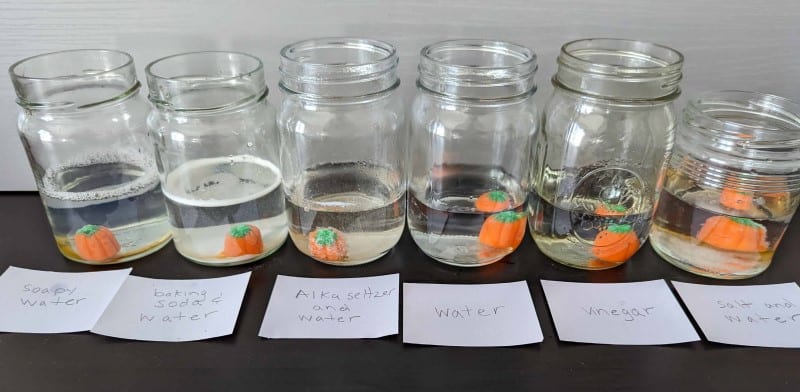
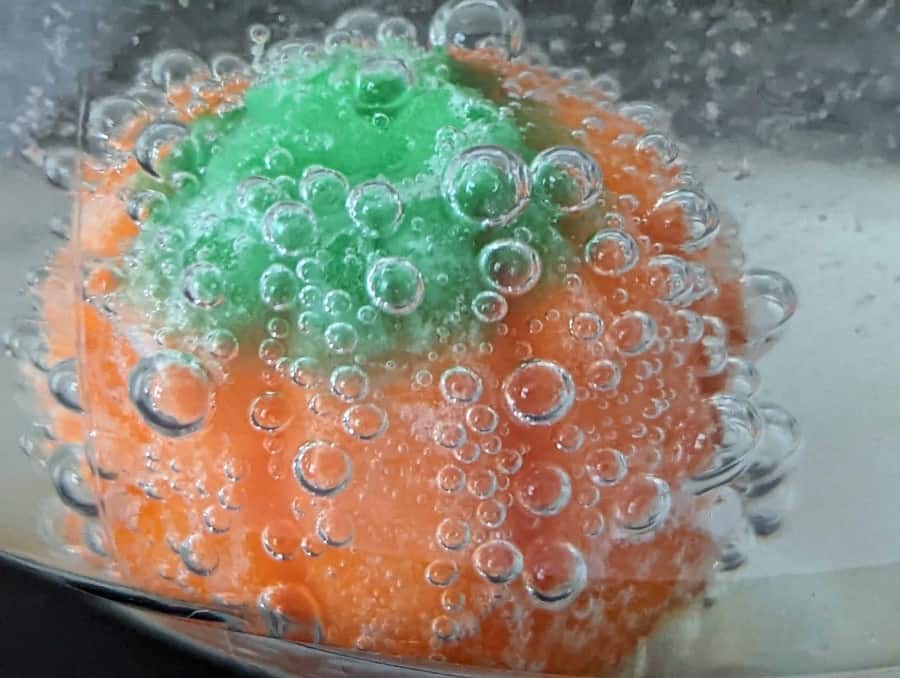
At 2 minutes, the pumpkin in the Alka-Seltzer and baking soda and water started to show signs of change first. The baking soda and water one leaked color first.
The pumpkin candy in the Alka-Seltzer was covered in bubbles!
At about 4 minutes the outside of all of the pumpkin candies were no longer bright orange. They were becoming covered in a cloudy glaze of white over its surface. The Alka-Seltzer, baking soda, and soapy water pumpkin candies were changing the most at 4 minutes. On the bottom of the glass, we could see some of the orange color of the pumpkin was starting to spread.

After 10 minutes, all most of the pumpkins were showing a white film over their surface and it was starting to separate from the pumpkin. We assumed this was the confectioner’s glaze that coated the candies. We picked some up with tongs and the sugar formed a string.

After 10 minutes, all of pumpkins were showing a white film over their surface and it was starting to separate from the pumpkin. We assumed this was the confectioner’s glaze that coated the candies.
We used small tongs to pick up the baking soda candy pumpkin and lift it out of the mixture. The coating was hanging off of the pumpkin as a sticky “string.”
At the 12-minute mark, the green stem on the Alka-Seltzer candy pumpkin was dissolving and getting misshapen.
After 15 minutes, it was easy to see how the mixtures were dissolving the sugar glaze on the candy pumpkins at different rates. The baking soda pumpkin candy left the most color on the bottom of the jar.
There were unexpected and interesting results, but we won’t list them all here so you and your children can enjoy the fun!
We took two out at a time and did a side-by-side comparison, talking about what was causing some of the results we were observing.

We had to leave the house for a couple hours and came home to this. The candies were completely dissolved and the waxy coating was floating on top of the water glass and the vinegar glass.
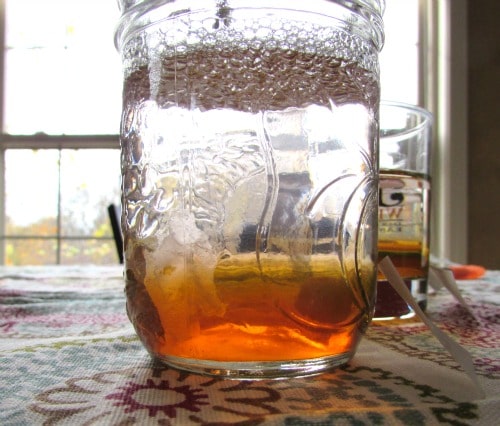
The coating did not float on top of the soapy water glass. It was immersed in the solution near the bottom of the jar.
Our conclusion was that the sugars that made up the bulk of the pumpkin candies were water-soluble and dissolved in the various water-based solutions, but the confectioner’s glaze that coated the candy was not and therefore, did not dissolve in water or vinegar.
The coating did not float in the soapy water glass. Could it be that the soap was starting to break down the confectioner’s glaze?
What Happened in the Pumpkin Candy Experiment
The candy pumpkins and all the mixtures are made of molecules.
The molecules in the candy and the molecules in the mixtures need to be attracted to each other for the candy to dissolve. As discussed in this post, water molecules have strong magnetic properties. These strong magnetic properties help break apart the bonds in sugar.
Alka-Seltzer is sodium bicarbonate (baking soda) and citric acid. When the sodium bicarbonate and citric acid dissolve in the water, their molecules collide and the chemical reaction produces carbon dioxide gas. These are the bubbles.
Taking the Pumpkin Candy Experiment Further
There are many ways to add or change up this experiment:
- Compare hot water to cold mixtures
- Try liquids like oil, soda, coffee, tea
- Using the same solvents in the same amounts, compare what happens when the candy mixtures is stirred vs. not stirred.
I hold a master’s degree in child development and early education and am working on a post-baccalaureate in biology. I spent 15 years working for a biotechnology company developing IT systems in DNA testing laboratories across the US. I taught K4 in a private school, homeschooled my children, and have taught on the mission field in southern Asia. For 4 years, I served on our state’s FIRST Lego League tournament Board and served as the Judging Director. I own thehomeschoolscientist and also write a regular science column for Homeschooling Today Magazine. You’ll also find my writings on the CTCMath blog. Through this site, I have authored over 50 math and science resources.