

Puking Pumpkin Experiment

Not all messy and “Cool!” science starts and ends with baking soda and vinegar. Our puking pumpkin experiment takes things up a notch with a foamy and dramatic reaction powered by hydrogen peroxide and yeast.
I first saw this activity years ago on Halloween at a neighbor’s house. They loved doing fun things as the kids came around trick-or-treating, and this was one of the effects they would do periodically as kids came through their candy “station”. Of course, after seeing the puking pumpkin, the kids wanted to try it too.
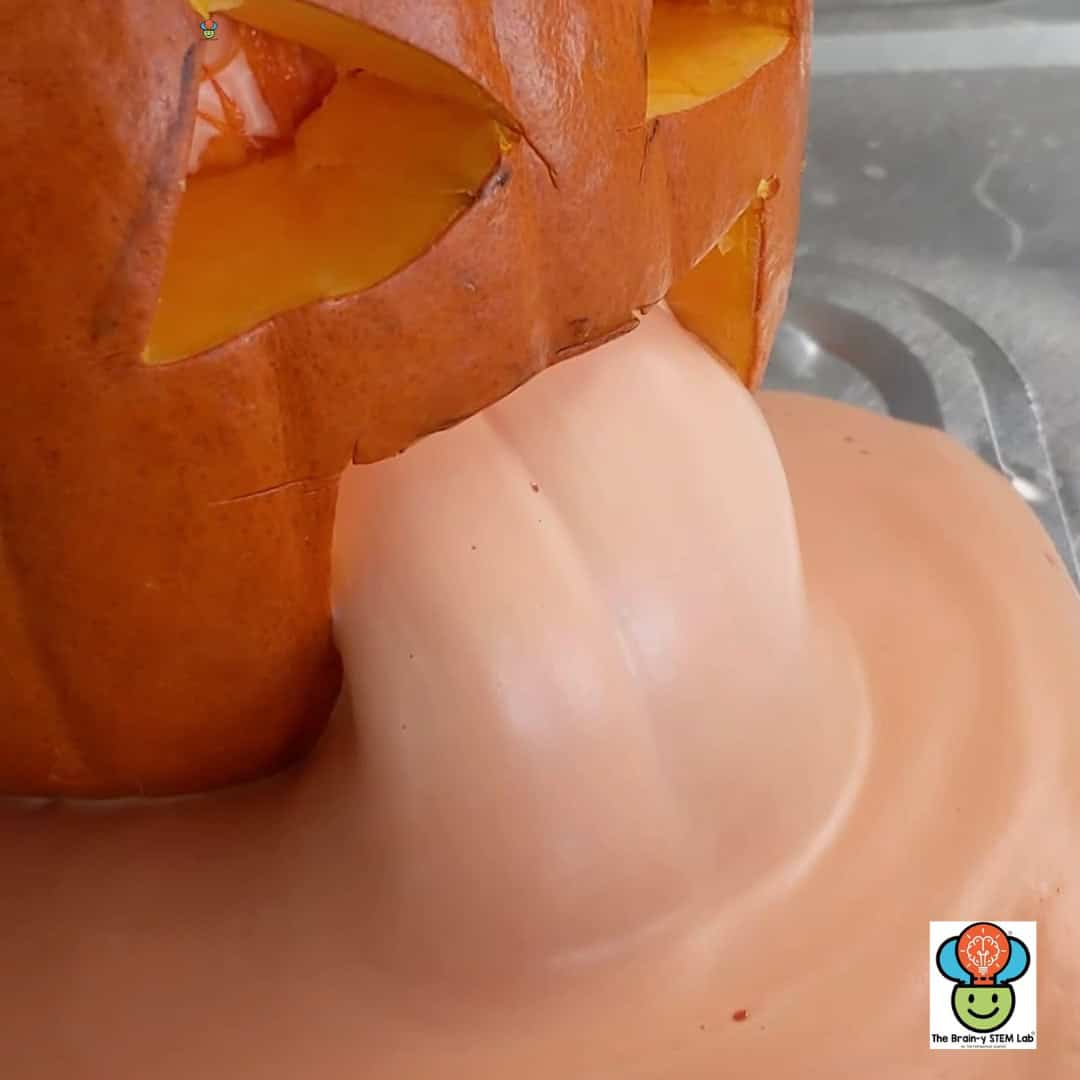
Your students will think this is a Fall prank, but it’s a demonstration of what happens when hydrogen peroxide meets yeast. The yeast contains an enzyme called catalase, which breaks down hydrogen peroxide into water and oxygen gas. The trapped oxygen bubbles also mix with the soap to create the puking pumpkin as the foam oozes through the carved parts of the pumpkin.
If you’ve done the elephant toothpaste activity, it’s the same chemical reaction.
There are so many activities to pair with a pumpkin science activity. I love this Color & Label Pumpkin Worksheet. While you’re slicing and emptying your pumpkin for the experiment, let your young scientists jump in and tackle this printable; it’s the perfect warm-up before the eruption begins!
The Science Behind the Puking Pumpkin Experiment
When we mix the hydrogen peroxide and yeast, a chemical reaction occurs. In a chemical reaction, new substances form and energy is released.
This reaction changes hydrogen peroxide (H₂O₂) into water (H₂O) and oxygen gas (O₂).
We know it’s a chemical reaction because we can see the bubbling and foaming, which is gas being produced, not just substances mixing.
Hydrogen peroxide (H₂O₂) is an unstable compound. In fact, it naturally breaks down into water (H₂O) and oxygen (O₂) over time. This is why it’s stored in a dark bottle, and it’s recommended to store it in a dark area.
Here is the chemical equation for what’s happening inside the puking pumpkin:
As the catalase enzyme in the yeast breaks apart the hydrogen peroxide, oxygen gas forms almost instantly. The oxygen gets trapped in the liquid in the bottle, especially the dish soap. The soap helps trap the bubbles, creating that growing foam that oozes out and creates the dramatic puking pumpkin effect!
The Puking Pumpkin Exothermic Reaction
This reaction, which we also see in the puking pumpkin, gives off heat, making it an exothermic reaction. This means energy is released during the reaction. If you want to learn more about endothermic and exothermic reactions, check out this post on endothermic reactions.

In our puking pumpkin activity, the yeast helps speed up the reaction. As the hydrogen peroxide breaks down, the energy released is heat.
An exothermic reaction is a chemical reaction that gives off heat or light. It’s like when you rub your hands together really fast, and they get warm; energy is being released.
Other exothermic reactions include:
Combustion is a chemical reaction where fuel, like wood or candle wax, reacts with the oxygen in the air. This reaction releases energy in the form of heat and light. That’s why when we sit or stand near a campfire, we feel the warmth.
Our bodies break down glucose (a type of sugar) during cellular respiration, which releases energy. Some of this energy is used to power our cells, and some of it is release as heat to keep us warm.

Puking Pumpkin Materials
Gather these materials for this activity:
- 1/4 cup or 60 mL of warm water at about 100°F to 110°F or 38°C to 43°C.
- Pumpkin (We used a pie pumpkin size.)
- 1/2 cup (120 mL) hydrogen peroxide (3% concentration is common for safety)
- Green food coloring for the “Gross!” effect or red and yellow for a pumpkin color. 🙂
- A spoon
- An empty water bottle. You’ll need to cut it down to 1/4 of its size. It will serve as the “stomach” for our puking pumpkin.
- Dawn dish soap (It doesn’t have to be Dawn, but do make sure it will bubbles well.
- 1 envelope of yeast per pumpkin
- 1 tablespoon measuring spoon
- Measuring cup
Puking Pumkin Experiment Instructions
- Carve the pumpkin. Make sure the mouth is large enough for your puking pumpkin to puke.
- Place the pumpkin in a foil pan or baking pan to help contain the mess.
- Add the “stomach”, which is the ¼ water bottle.
- Pour in the hydrogen peroxide. This is the reactive base.
- Add the food coloring.
- Add 1 to 2 tablespoons of Dawn dishwashing liquid soap to the bottle.
- Mix the yeast and warm water and let it sit for a two minutes to activate before adding it to the hydrogen peroxide and soap.
- If you are going to video the puking pumpkin, get the camera ready!
- Pour the yeast mixture into the “stomach” so it mixes with the hydrogen peroxide and soap.
- The yeast breaks down the hydrogen peroxide, releasing oxygen gas that gets trapped in the soap, creating foam that creates the puking pumpkin effect.
Puking Pumpkin Experiment in Pictures!


Request the Puking Pumpkin Experiment Printable
Related resources:
- Follow up the puking pumpkin activity with elephant toothpaste! Here’s an elephant toothpaste handout from the American Chemical Society.
- For high school students, try this study of catalase from Cornell.
I hold a master’s degree in child development and early education and am working on a post-baccalaureate in biology. I spent 15 years working for a biotechnology company developing IT systems in DNA testing laboratories across the US. I taught K4 in a private school, homeschooled my children, and have taught on the mission field in southern Asia. For 4 years, I served on our state’s FIRST Lego League tournament Board and served as the Judging Director. I own thehomeschoolscientist and also write a regular science column for Homeschooling Today Magazine. You’ll also find my writings on the CTCMath blog. Through this site, I have authored over 50 math and science resources.