

Laser Cutting Project for Students – Making Backpack Tags
This is a fun laser cutting project for students, and although we did ours as part of back to school, these backpack tags are a fun way to enjoy a laser cutting lesson with your kids.
Before we started any of the maker process, there were a number of decisions that needed to be made, and each of those decisions touched on a different STEM area.
- What materials would we use? metal, plastic, wood? This required research into what materials could be laser cut and which couldn’t and why. This is a good materials science lesson for kids.
- Would we create the designs from scratch or would we edit an existing file and modify/add to it? What type of files would we use and what software would we use to edit the files.
- One of the most fun parts was determining what we’d put on the key chains to go along with the graphic. It was fun creating the play on words. Optionally, if you are trying to incorporate AI into your child’s education, they could use ChatGPT and ask for help. You can test different types of prompts – short, more vague ones vs. something more specific.
So, once we had identified where we would start with aluminum tags. While this sounds like a simple decision, there are some rules and further material science lessons involved with using metal. With a laser cutter, when using aluminum, it’s best to use anodized aluminum.
When metal is anodized (usually aluminum), it undergoes an electrochemical process. This makes the outer layer of the metal extremely tough, much like armor. It also lets people add bright colors that won’t peel off like paint. So, the metal is stronger and shinier.
Below is a video explanation of the anodizing process that you can share with your students
The tough, colored surface makes it really easy for the laser to “etch” or draw designs on it. Think of it like using a marker on a whiteboard—the laser shows up super clear because the anodized layer reacts and changes color where the laser hits. Without that special coating, the design wouldn’t stand out as well.
So, anodized metal = strong, colorful, and perfect for laser art and labels. Basically, it’s the metal version of having both style and strength.
Our design (we did purchase an SVG of science symbols), we pulled it into Canva. You can also bring it directly into the Xtool Creative Space or start from scratch in Creative Space.

It did take some trial and error to ensure that the graphic and text would space well on the tags. We downloaded our design as an SVG and uploaded it into the Xtool Creative Space. We did have to go back and forth between Canva and Creative Space until we had the spacing between the graphic and text.
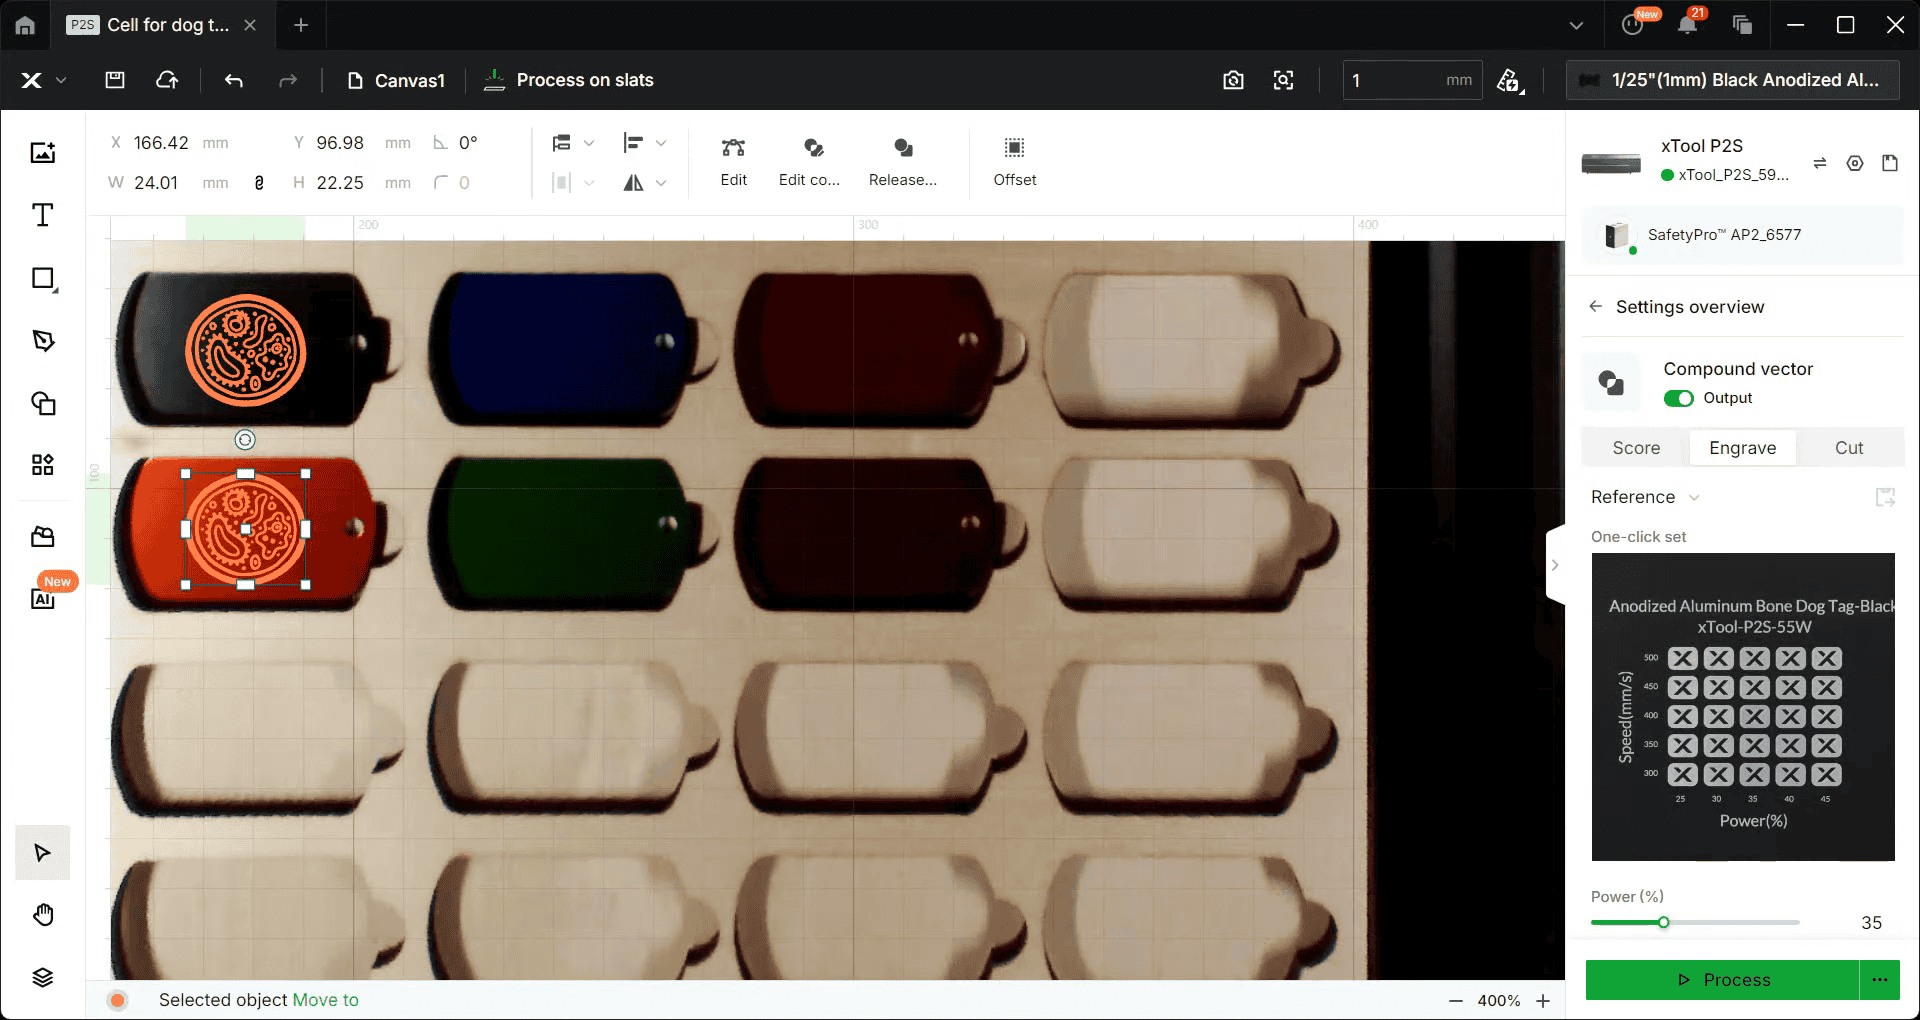
Below is a screenshot from Xtool’s Creative Space work area. Here students are able to place the design and resize. We can get a close-range shot of the laser bed and have better accuracy on placement. Students can also set the type of material being used (see the top right of the screenshot) and can set the laser to score, engrave, or cut.
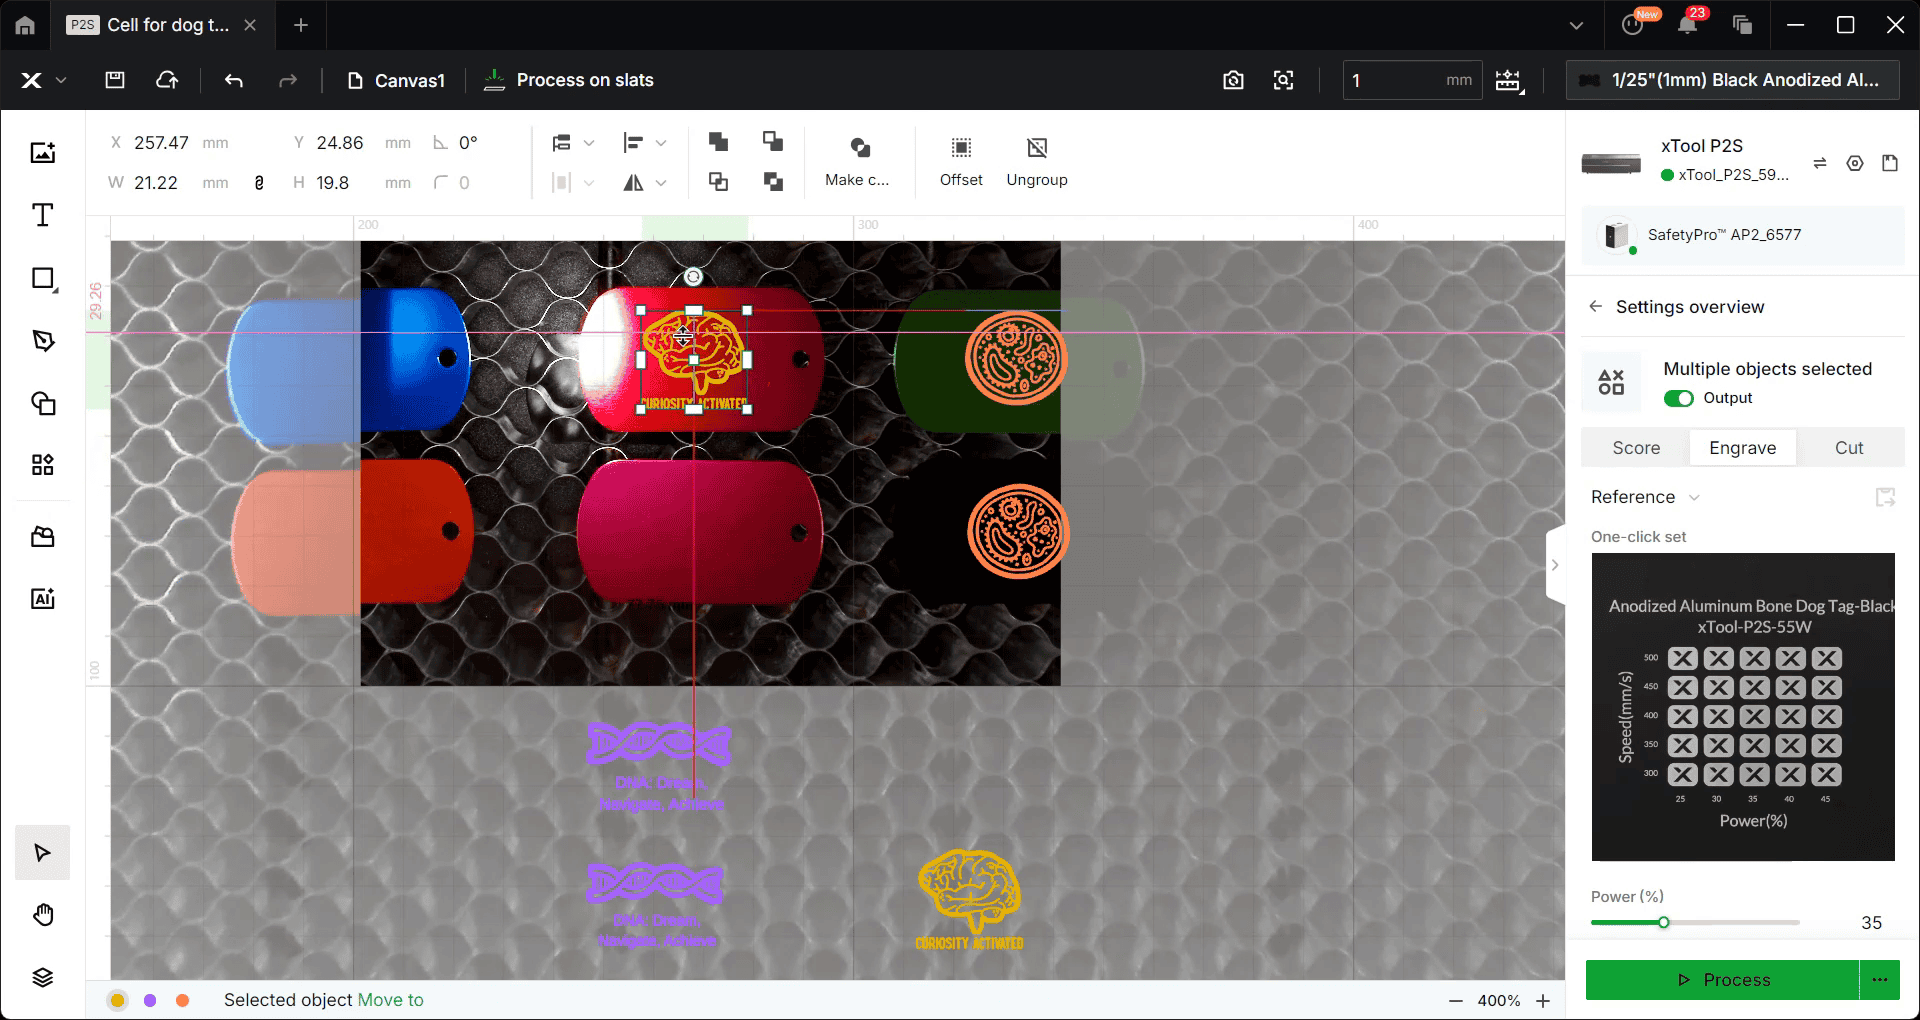
Once we created our files in Canva, we saved them in SVG format and pulled them into the XTool Create Space. Then, it was time to get close-up shots of the laser bed and space the designs to ensure they would be placed properly on each tag.
We also had to make sure the design was set to engrave and not cut or score. here is a video of our process.
Getting Ready to Engrave
We did have some interesting lessons before engraving on the tags. The challenge was to figure out the best way to line up the tags and keep them straight during the engrave process.
First, we tried a jig we created (another engineering lesson!), but the jig didn’t sit flush on the bed and it was hard to see the tags when we were trying to align the designs on each tag.
We ended up placing the tags directly on the honeycomb surface in the laser bed. (They didn’t move during the engrave process.)
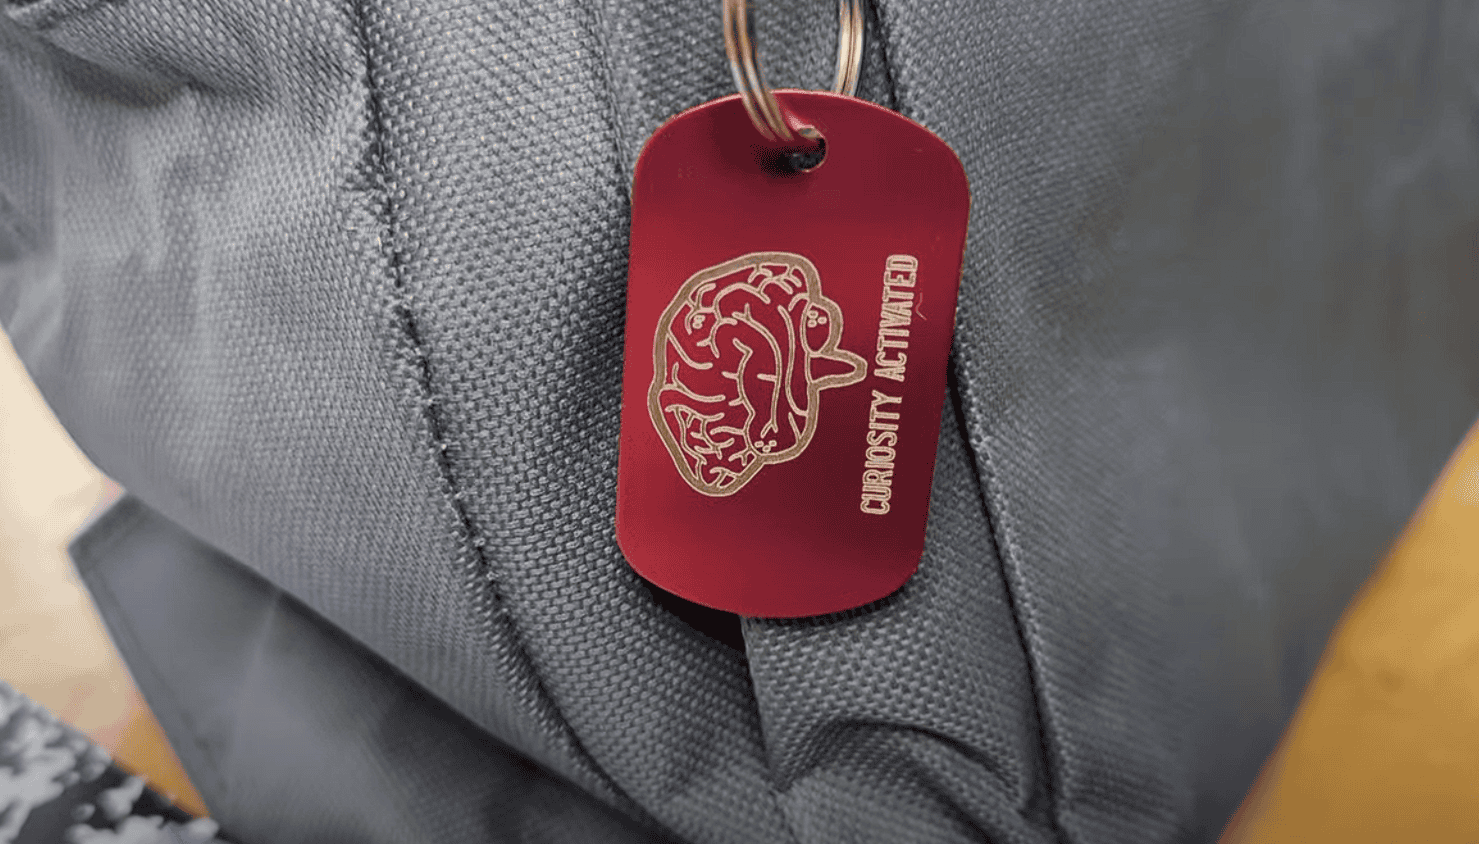
We loved the way these backpack tags came out!
You can view our other laser projects – a biology plant cell puzzle and our catapults.
I hold a master’s degree in child development and early education and am working on a post-baccalaureate in biology. I spent 15 years working for a biotechnology company developing IT systems in DNA testing laboratories across the US. I taught K4 in a private school, homeschooled my children, and have taught on the mission field in southern Asia. For 4 years, I served on our state’s FIRST Lego League tournament Board and served as the Judging Director. I own thehomeschoolscientist and also write a regular science column for Homeschooling Today Magazine. You’ll also find my writings on the CTCMath blog. Through this site, I have authored over 50 math and science resources.