


Make a Homemade Thermometer Weather Activity
Weather is a big part of our lives and affects our day-to-day plans. To help our children understand the weather, let’s learn how to make a homemade thermometer. We’ll also look at the science behind HOW a DIY thermometer works.
Use this activity as a springboard to a weather study. Make a simple rain gauge. Then, measure and record rainfall in your area with our rainfall chart.
What Is Needed to Make a Thermometer
You just need a few household materials (an empty water bottle, water, rubbing alcohol, tape, a straw) to make a thermometer with your kids and show them the science behind how a thermometer works. Afterall, weather conditions can determine what we wear, what we do, and where we go. If it is cold and snowing outside, we will probably not put on flip-flops and work in the garden. If it rains, the baseball game will probably get canceled.
A thermometer is an instrument used to measure temperature. Temperature tells us how hot or cold something is. While many thermometers today are digital, traditional liquid thermometers work because liquids expand when they get warmer and contract when they get cooler.
In this activity, you’ll make a homemade thermometer that works on a similar principle. As the liquid inside your thermometer warms, it expands and moves up the straw. When it cools, it contracts and the level drops.
Your homemade thermometer won’t automatically give you the temperature in degrees Fahrenheit or Celsius. For that, a thermometer needs a scale and calibration. But you can use this homemade thermometer to observe and compare temperature changes.
How to Make a Homemade Thermometer

You just need a few household materials to make a homemade thermometer with your kids and show them the science behind how a thermometer works.
Materials
- Empty plastic water bottle
- Clear drinking straw, so children can see the liquid moving inside.
- 1/2 cup rubbing alcohol
- 1/2 cup room temperature water
- Red food coloring
- Tape
- Sharp scissors or craft knife
- Play dough or modeling clay
- Index card 4x6
Instructions
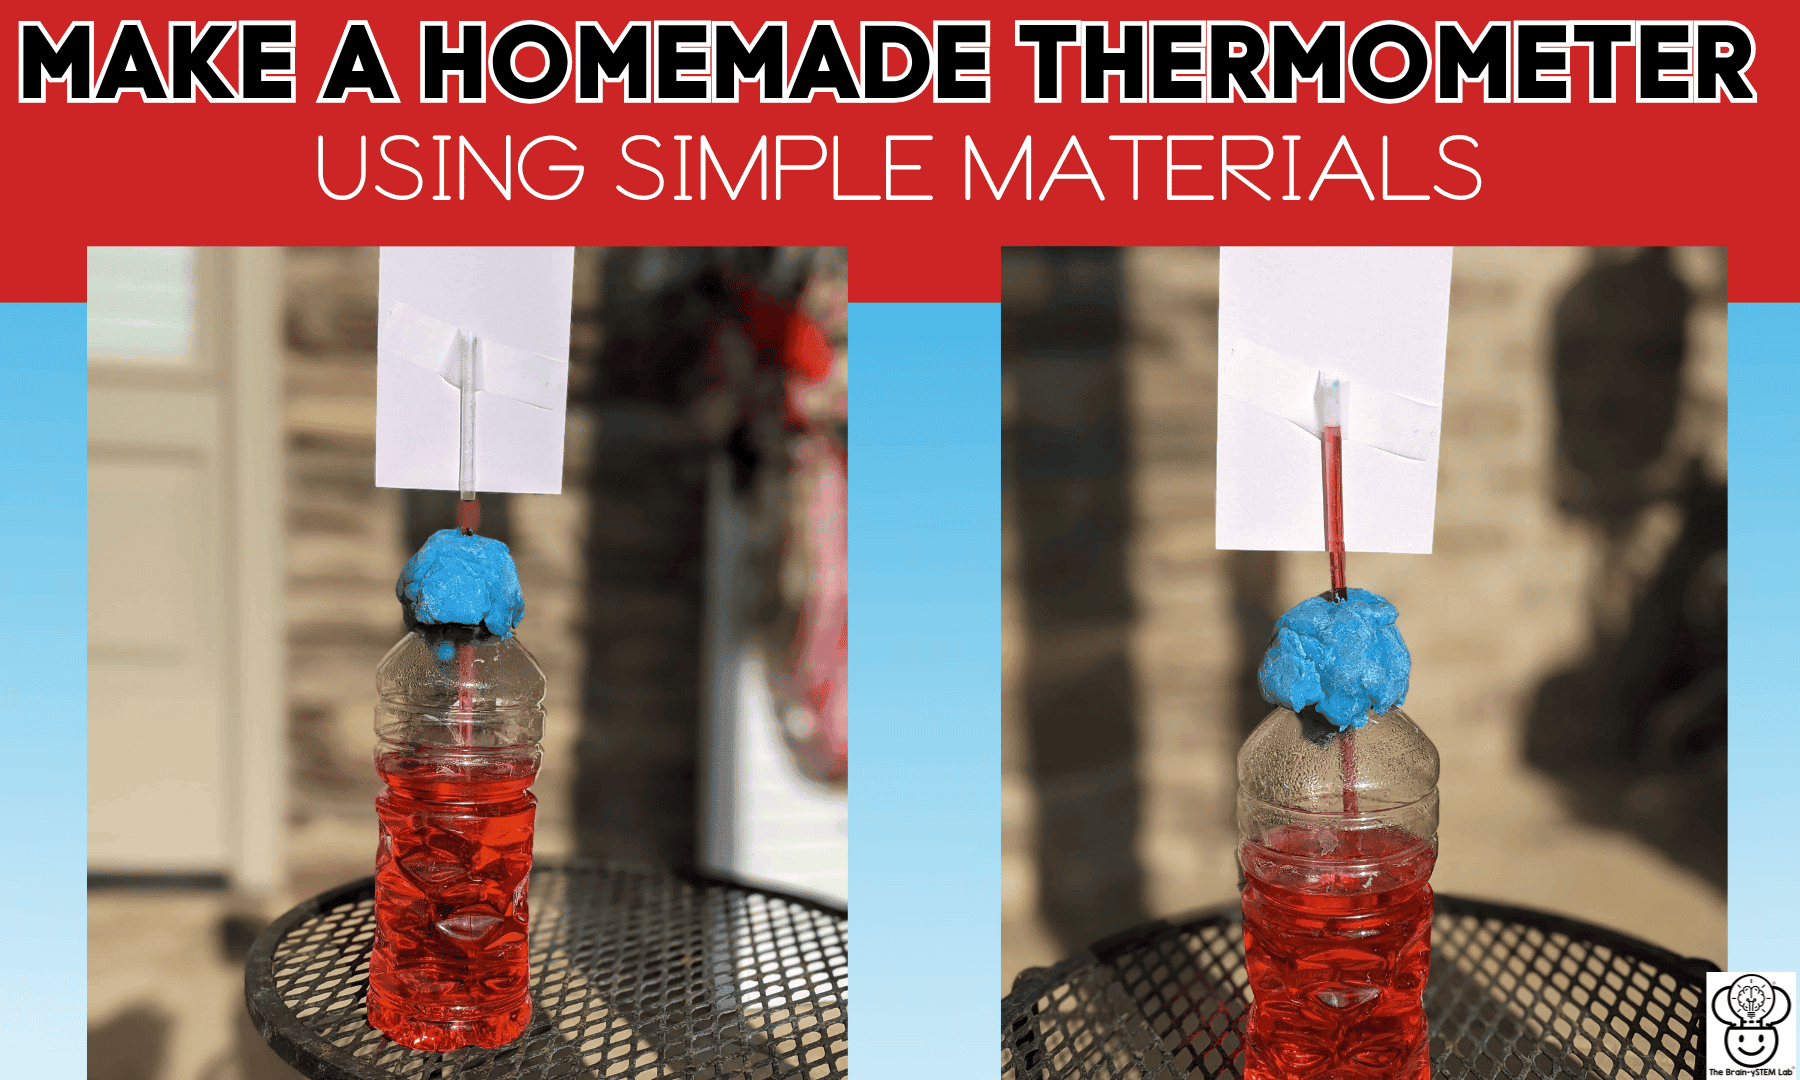
- Fill the water bottle a little past halfway with equal parts of rubbing alcohol and room temperature water. You can also use ½ cup of each. (We wanted to see the mixture rise above the bottle, so we filled it slightly past halfway.)
- Add a few drops of food coloring and mix it up.
- Place the straw in the bottle and pack the playdough around the top. Ensure the straw stands straight and there is an airtight "seal." The bottom of the straw should NOT touch the bottom of the bottle.

- Tape an index card to the back of the straw. Your children can mark where the water mixture level is as the thermometer begins to read warm enough to move past the seal.
- Place the thermometer outside in a sunny place. If it's very cold outside, then you can place the thermometer in hot water, then in cold water to watch the temperature rise and fall.

- Place the thermometer in the freezer for a few minutes and look at the level of the water-alcohol mixture. Then, take it out and place at room temperature. What happens? How quickly did the liquid move?


7. Place your thermometer in a bowl of cold water, then a bowl of comfortably warm water. Keep the water below the bottle's opening. Watch the liquid level in the straw and mark each level on the index card. How does the level change as the bottle warms and cools?
What Is Weather?
Scientifically speaking, the weather is the atmospheric conditions in a place within a relatively short amount of time. These conditions might change hour-by-hour or minute-by-minute. It might be cloudy, cold, and rainy in the morning and hot and sunny by the afternoon.
Temperature, precipitation, cloud cover, wind, barometric pressure, and humidity are all atmospheric conditions that we can measure to describe and predict the weather.

Make a Thermometer – What is Temperature?
Before we make a thermometer with our kids or students, let’s talk about temperature; it is how hot or cold something is measured by a thermometer. Air temperature is probably the first weather condition you check each day. The temperature will determine if you wear a coat or not, or maybe if you go outside at all! The temperature affects if and how many people do their daily activities.
The atmosphere’s temperature, or air, is determined by the sunlight present. The more sunlight reaches the Earth, the higher the temperature. When rays of sunlight hit the Earth, the Earth warms up, which in turn warms the atmosphere.
Heat can build up over time, which is one of the reasons why the shorter days of winter are colder than the longer days of summer.

The temperature of the Earth’s atmosphere is also determined by the angle at which the sunlight hits the Earth.
No matter the season – summer, winter, spring, or fall – the same sun with the same amount of brightness shines on the Earth. If the sunlight is just as bright at all times of the year, why are the temperatures so different?
The temperatures on Earth are lower in winter due to the tilt of the Earth’s axis and its orbit around the Sun. The Earth’s axis is tilted at an angle of about 23.5 degrees relative to its orbital plane. This tilt causes different parts of the Earth to receive varying amounts of sunlight throughout the year.
The sun is directly overhead in the summer, and its rays directly hit the Earth. In the winter months, the sun sits lower on the horizon. Sunlight arrives at a shallower angle, resulting in the same amount of solar energy being spread over a larger area. This leads to less heating and lower temperatures.

Instructions on How to Make a Homemade Thermometer
This was one of our favorite weather activities to do. If it’s a hot day, the thermometer starts out reading cooler inside because of the air conditioning. But when it’s placed outside, it’s fun to watch the temperature rise and mark it on the bottle and index card. If it’s cold outside, the opposite will happen.
You can also make the temperature rise and fall by placing the bottle in hot water and cold water. We opted to put the thermometer in the freezer, then took it out in the sun on a 50-degree day.
Let your children try different variations—ice water, hot water, outside in the sun, outside in the shade, in the freezer—so they can test their ideas.
How the Homemade Thermometer Works
Our homemade thermometer has air trapped inside the bottle above the liquid. The clay seals the opening around the straw, and the bottom of the straw sits below the liquid’s surface.
When the bottle warms, the trapped air warms too. It pushes on the liquid, forcing some of it up the straw. The liquid also expands as it warms, which contributes to the movement. You can learn more about convection currents in this activity.
When the bottle cools, the trapped air cools and its pressure decreases. Air pressure outside the bottle helps push the liquid back down the straw.
An airtight seal is important. If air leaks around the clay, the liquid may barely move or may not rise at all. Keep the top of the straw open and its bottom end submerged in the liquid.
If you’d like to study more about the properties of water, check out our post on testing the properties of water.
This homemade thermometer shows temperature changes, but it does not automatically tell us the temperature in degrees. The marks on your index card let you compare higher and lower liquid levels.
A traditional liquid-in-glass thermometer works differently. Its narrow tube and bulb contain a liquid that expands as it warms and contracts as it cools. It does not rely on a large pocket of trapped air like our bottle does. Its numbered scale allows us to read the temperature in degrees.
Other Resources for a Weather Study
We recommend these resources as you make a thermometer

I hold a master’s degree in child development and early education and am working on a post-baccalaureate in biology. I spent 15 years working for a biotechnology company developing IT systems in DNA testing laboratories across the US. I taught K4 in a private school, homeschooled my children, and have taught on the mission field in southern Asia. For 4 years, I served on our state’s FIRST Lego League tournament Board and served as the Judging Director. I own thehomeschoolscientist and also write a regular science column for Homeschooling Today Magazine. You’ll also find my writings on the CTCMath blog. Through this site, I have authored over 50 math and science resources.