

Make an Anemometer
Studying the weather and learning to make an anemometer, rain gauge, and thermometer helped our kids understand what was happening when a hurricane came through or the tornado warning signal went off. We did all of this in an effort to take the mystery out of why natural disasters like hurricanes, tornadoes, and massive ice storms happen.
Living in the southern United States, we get our share of hurricanes and ice storms. We’ve lived through demolished roofs, flooded homes, crushed garages, and smashed cars.
This is one of the reasons we studied about how the wind is generated and how it’s measured by an anemometer.
Needless to say, when our kids were really small, we had to help alleviate the fear such damaging storms brought into their little hearts. When my youngest was three, we had to take cover in the walk-in crawlspace of our home; she remembers it to this day and the fear she felt.
One of the best ways I found to help our kids through what can be a traumatic natural disaster is to educate them about why we experience storms, the lightning, wind, funnel clouds, and hurricanes. It’s ominous for a child to see the satellite image of a category 4 hurricane. So, we approached it that knowledge is power. We wanted our children to understand what wind was, what forms the thick layer of ice on power lines and trees, etc.
This lead us to do activities like make a rain gauge, make an anemometer, and make a thermometer. We studied what caused winds, and how hurricanes form.
We have quite a bit of content on the site about weather and measuring things like temperature, rainfall, and now in this post, tracking the wind by learning how to make anemometer.
What is an Anemometer
Before you make an anemometer with your children, it helps for them to understand what exactly it is and how it works. So, we have some brief information here you can share with your students.
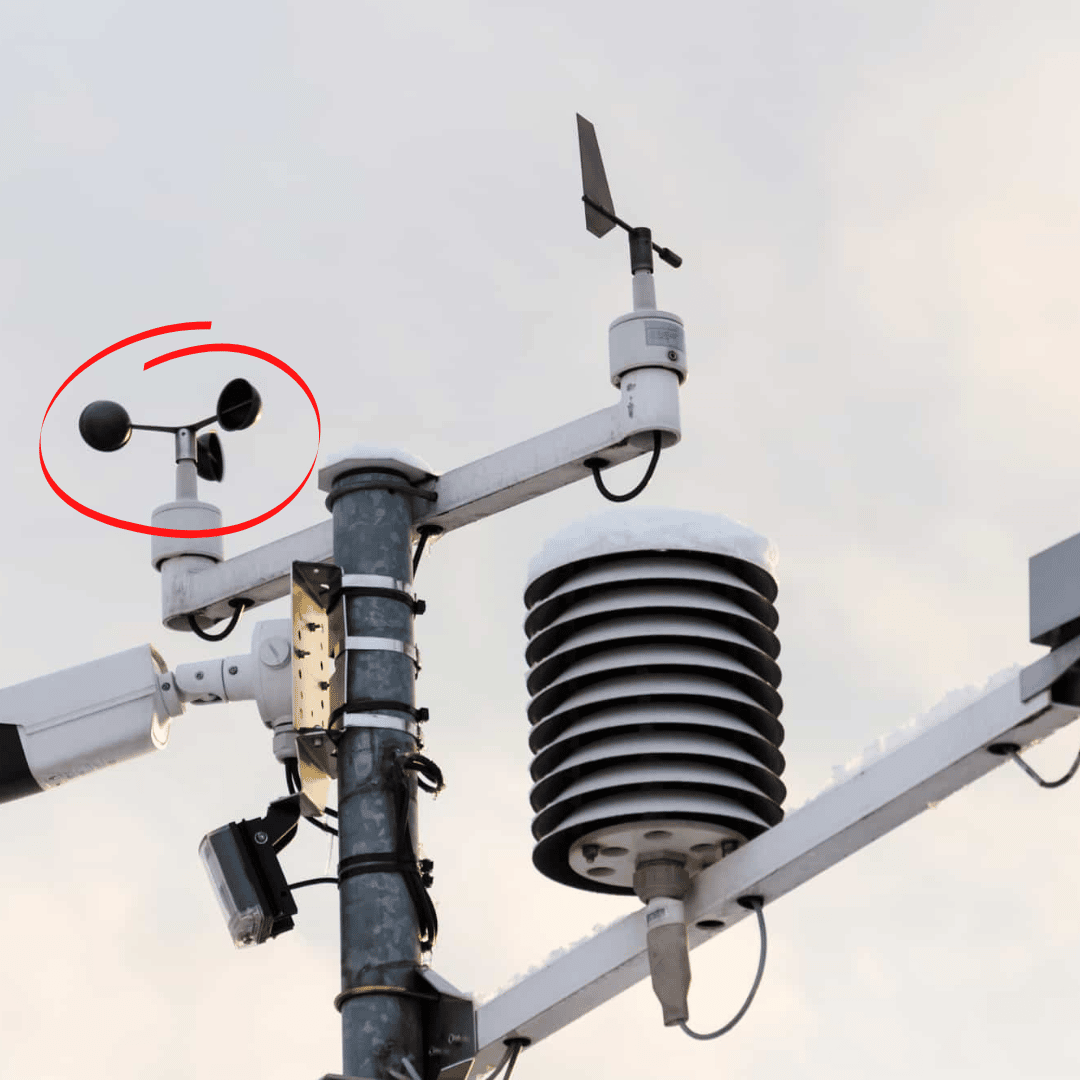
Pictured to the right is a weather station used by meteorologists. The piece of equipment that is circled is an anemometer.
There are several types of anemometers. The one pictured is a cup anemometer. These are shaped like half of a plastic Easter egg. The wind hits the cup part of the egg and the cups move. The stronger the wind the faster the cups move.
An anemometer measures several pieces of data such as:
- The direction of the wind
- The speed of the wind
- The flow of the wind
How to Make an Anemometer – But First, What is Wind?
Before we gather our materials to make an anemometer, let’s find out where wind comes from.
Did your child ever ask you that, “Where does the wind come from?” Well, now you’ll know and can share with them!
The wind is something that is there even though we do not see it. We feel it against our skin. We can see it blowing a flag, and we can sometimes hear it howling through the trees. It can be gentle enough to carry a dandelion seed through the air, strong enough to move a sailboat across the water, and fierce enough to topple trees and houses. (Ask us how we know?!)
But what is wind?
The wind is the air movement caused by the differences in temperature and pressure. These differences result from uneven heating of the Earth by the sun. As we’ve discussed before, when sunlight hits the Earth, the Earth’s surface warms and causes the atmosphere to warm.

These masses of warm air rise, and something has to move in and take it’s place. That something is cold air.
Then, the warm air that rose, eventually cools, and sinks back down. This is a process called convections.
What to learn more about convection currents? Check out this convection currents experiment.
Warm air weighs less than cold air; thus, it has a lower pressure because it is not pressing down on the Earth’s surface. As warm air rises, the cold, dense air sinks to the Earth, creating higher pressure. It is this movement of air that produces wind.
As a side note about temperatures–some parts of the Earth’s surface absorb sunlight while others reflect it. This absorption and reflection happen at different rates and causes temperature differences.
Make an Anemometer

Make an anemometer to help students understand how meteorologists calculate wind speed. This makes a fun addition to a backyard weather station your kids create themselves.
Materials
- 4 small paper cups
- 1 push pin
- Pencil with a full eraser
- 2 pieces of sturdy cardboard, cut to 5 x 9 strips
- Play dough or modeling clay
- A shallow pan or plastic container.
- Scissors
- Stapler
- Ruler
Instructions
- Form an X with the two cardboard strips and staple several times in the center.

- Staple one cup to each end of the cardboard X. All of the cups need to face the same direction. The opening of one up should face the outside, bottom of the up "in front" of it.

- Place the play dough in the middle of the pan or plastic container. Place the pencil in the center of the play dough.
- Attach the anemometer cups to the eraser by placing the push pin into the X and then into the center of the pencil eraser.

- Place the anemometer outside in an open area, away from anything that obstructs the wind.


Calculating the Velocity of Your Anemometer
After you make an anemometer and have it working, it’s time to calculate the velocity at which the anemometer spins, we will need a few pieces of information. First, using a stopwatch or timer on your phone, count the number of times your anemometer rotates in a minute. This is RPM (revolutions per minute).
Then measure the diameter of your anemometer in feet. Multiply the RPM by the circumference. This will give you the approximate velocity at which your anemometer spins. This velocity is in feet per minute. This is not the wind speed.
Other Resources to Use With This Make an Anemometer Project:
The National Oceanic and Atmospheric Association (NOAA) has free online weather classes for students, adults, and weather enthusiasts. Check out the schedule here. https://www.weather.gov/gsp/classes
NOAA has a repository of weather science lessons nd activities for kindergarten through high school. https://www.weather.gov/owlie/science_kt

I hold a master’s degree in child development and early education and am working on a post-baccalaureate in biology. I spent 15 years working for a biotechnology company developing IT systems in DNA testing laboratories across the US. I taught K4 in a private school, homeschooled my children, and have taught on the mission field in southern Asia. For 4 years, I served on our state’s FIRST Lego League tournament Board and served as the Judging Director. I own thehomeschoolscientist and also write a regular science column for Homeschooling Today Magazine. You’ll also find my writings on the CTCMath blog. Through this site, I have authored over 50 math and science resources.