

How to Make a Pumpkin Powered Clock STEM Activity

Making a clock with fruits and vegetables is a common occurrence around here. So, it’s fitting that when pumpkins are in season, we share this post about how to make a pumpkin powered clock.
Do pumpkins and gourds make a good electrolyte that allows the flow of electrons between the copper and zinc? We’re going to find out!
In our post about experiments with oranges, we used a potato clock kit to power an LED clock using oranges. I like to use the potato clock kit because all supplies are in the box and can be reused. You can also gather a zinc nail, a penny, and alligator clips. You do need zinc and copper to create this battery.
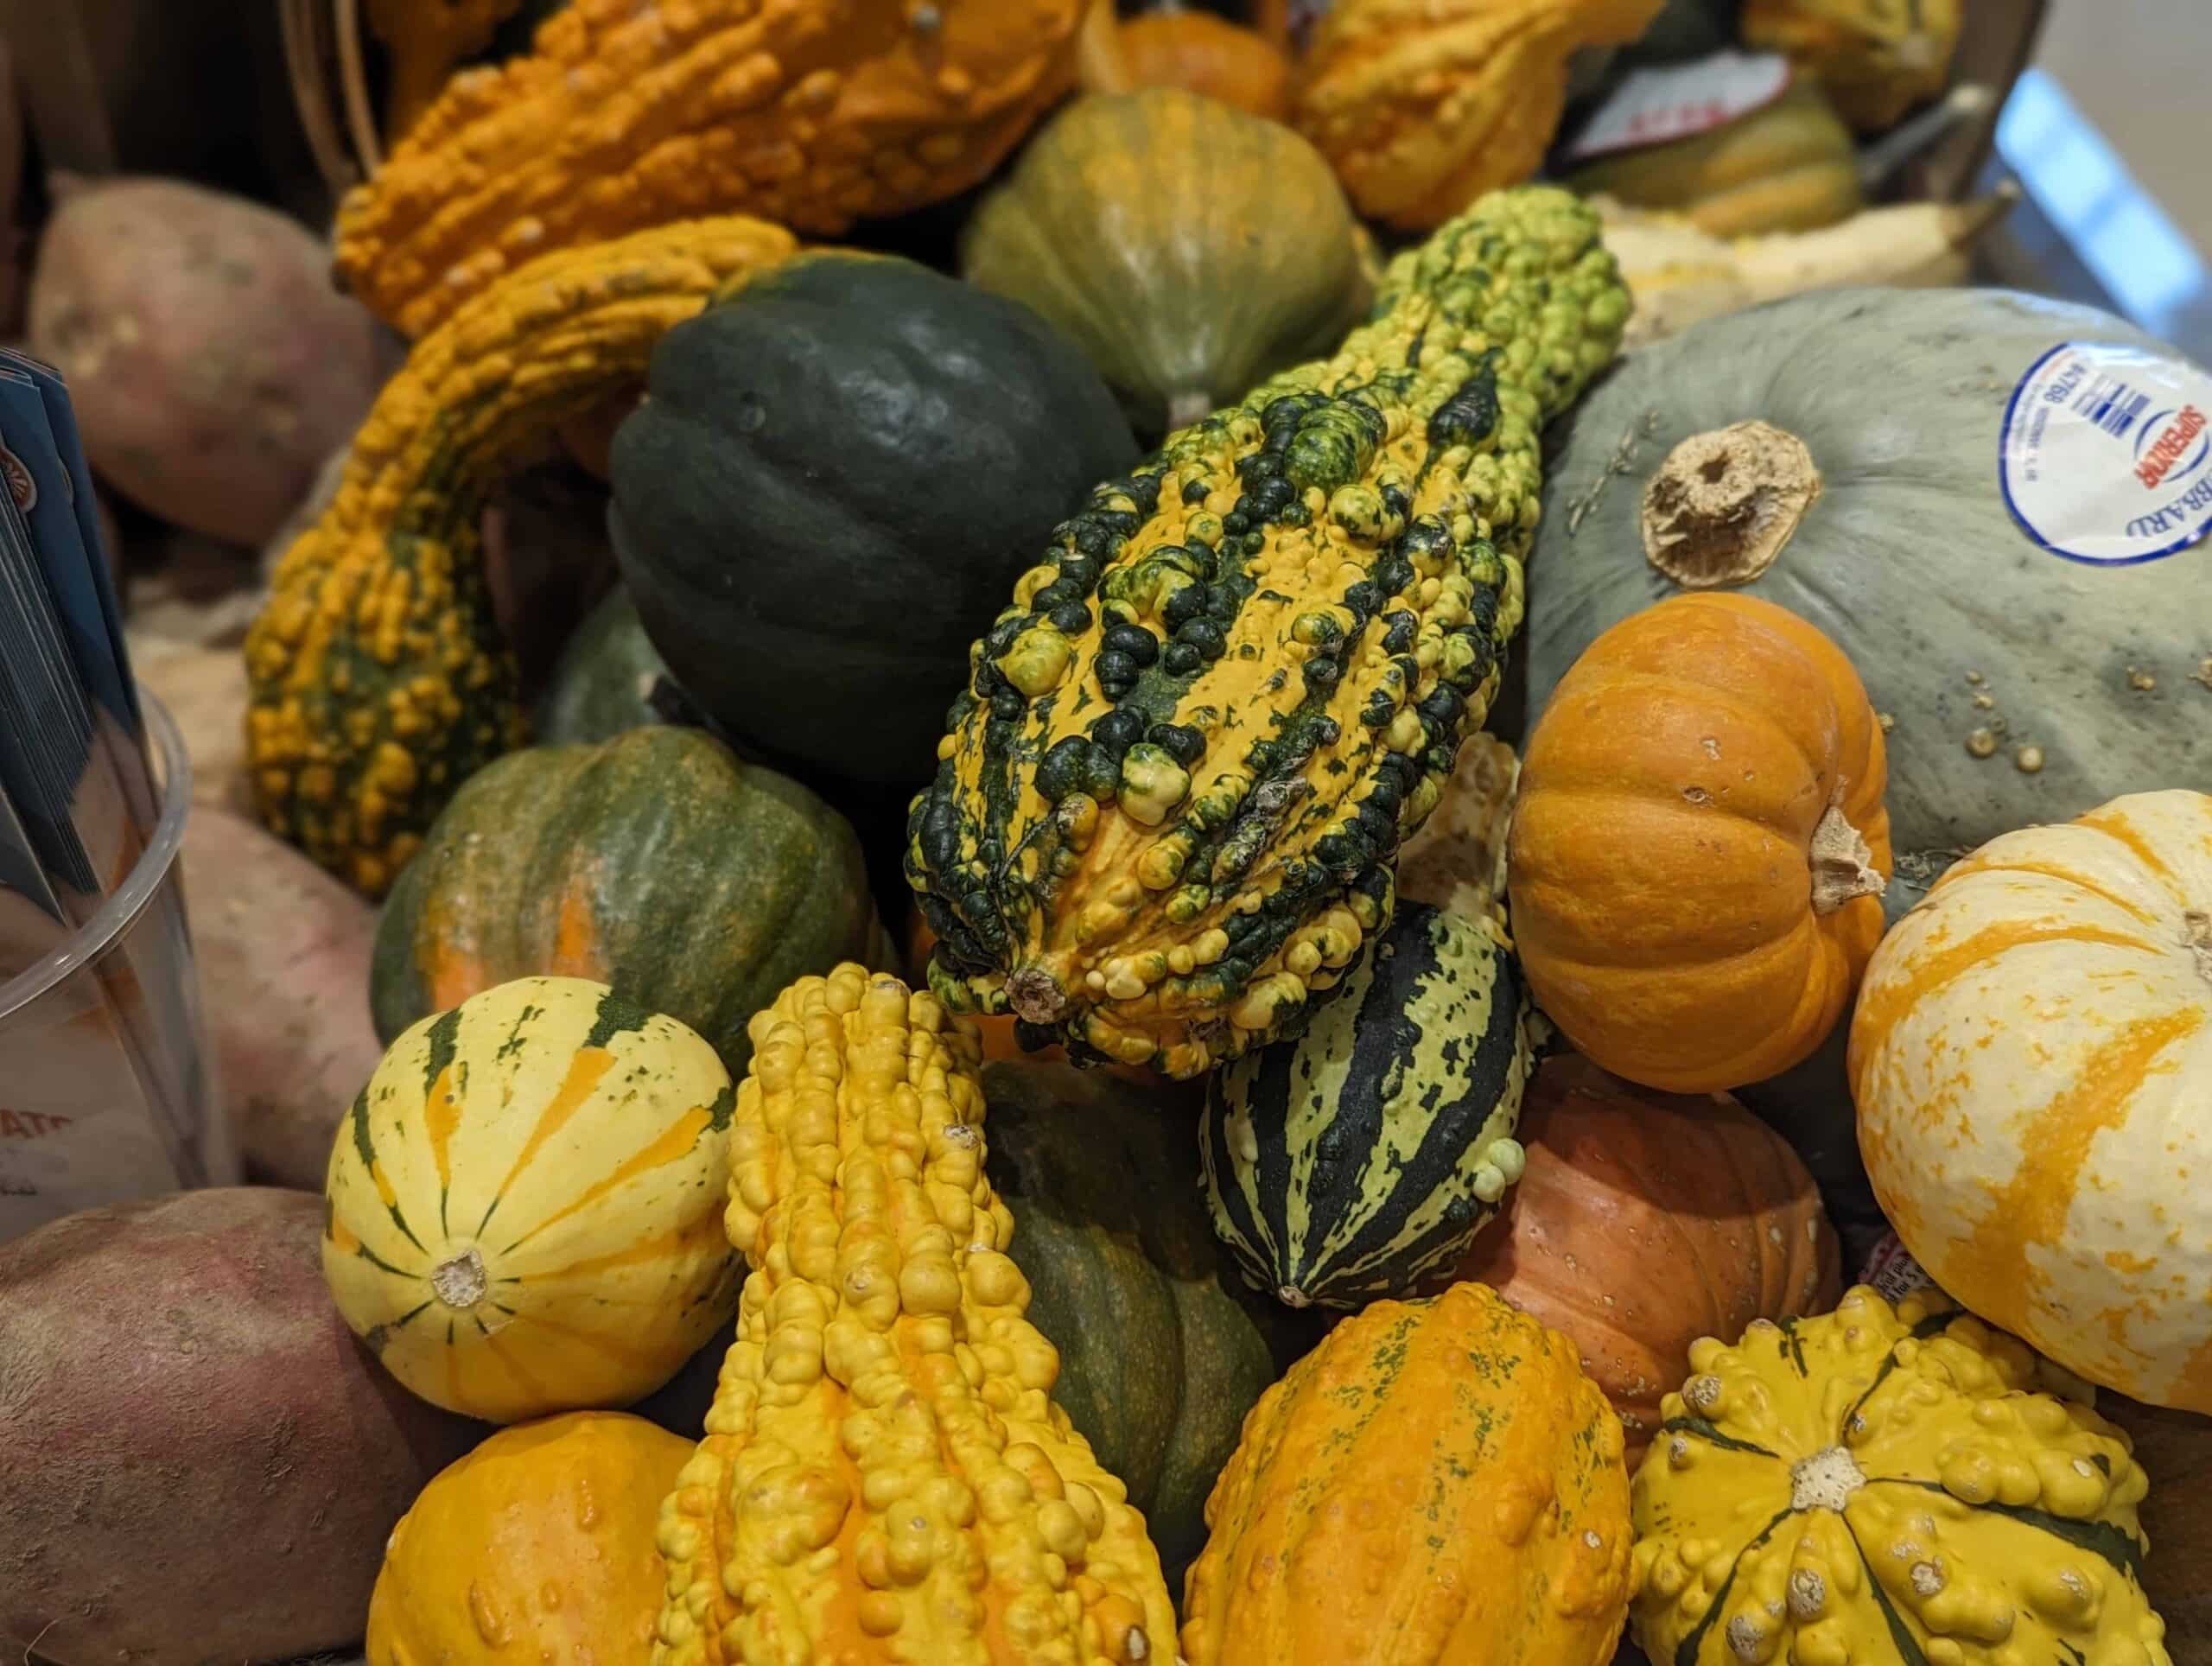
We also tested the cute little pumpkins and gourds I purchased to decorate our table at Thanksgiving.

This is what we tested:
- Can we run the clock using two pie pumpkins? How many millivolts will it generate?
- Can we run the clock using two mini pumpkins? How many millivolts will it generate?
- Can we run the clock using a mini pumpkin and a small gourd? How many millivolts will it generate?
I think it’s very important for our kids to know about and understand electricity and electrical currents. This type of information comes in handy as a homeowner. I find it helpful to understand voltage when traveling overseas and bringing travel hair dryers or hair straighteners. (We have blown out several hair dryers!)
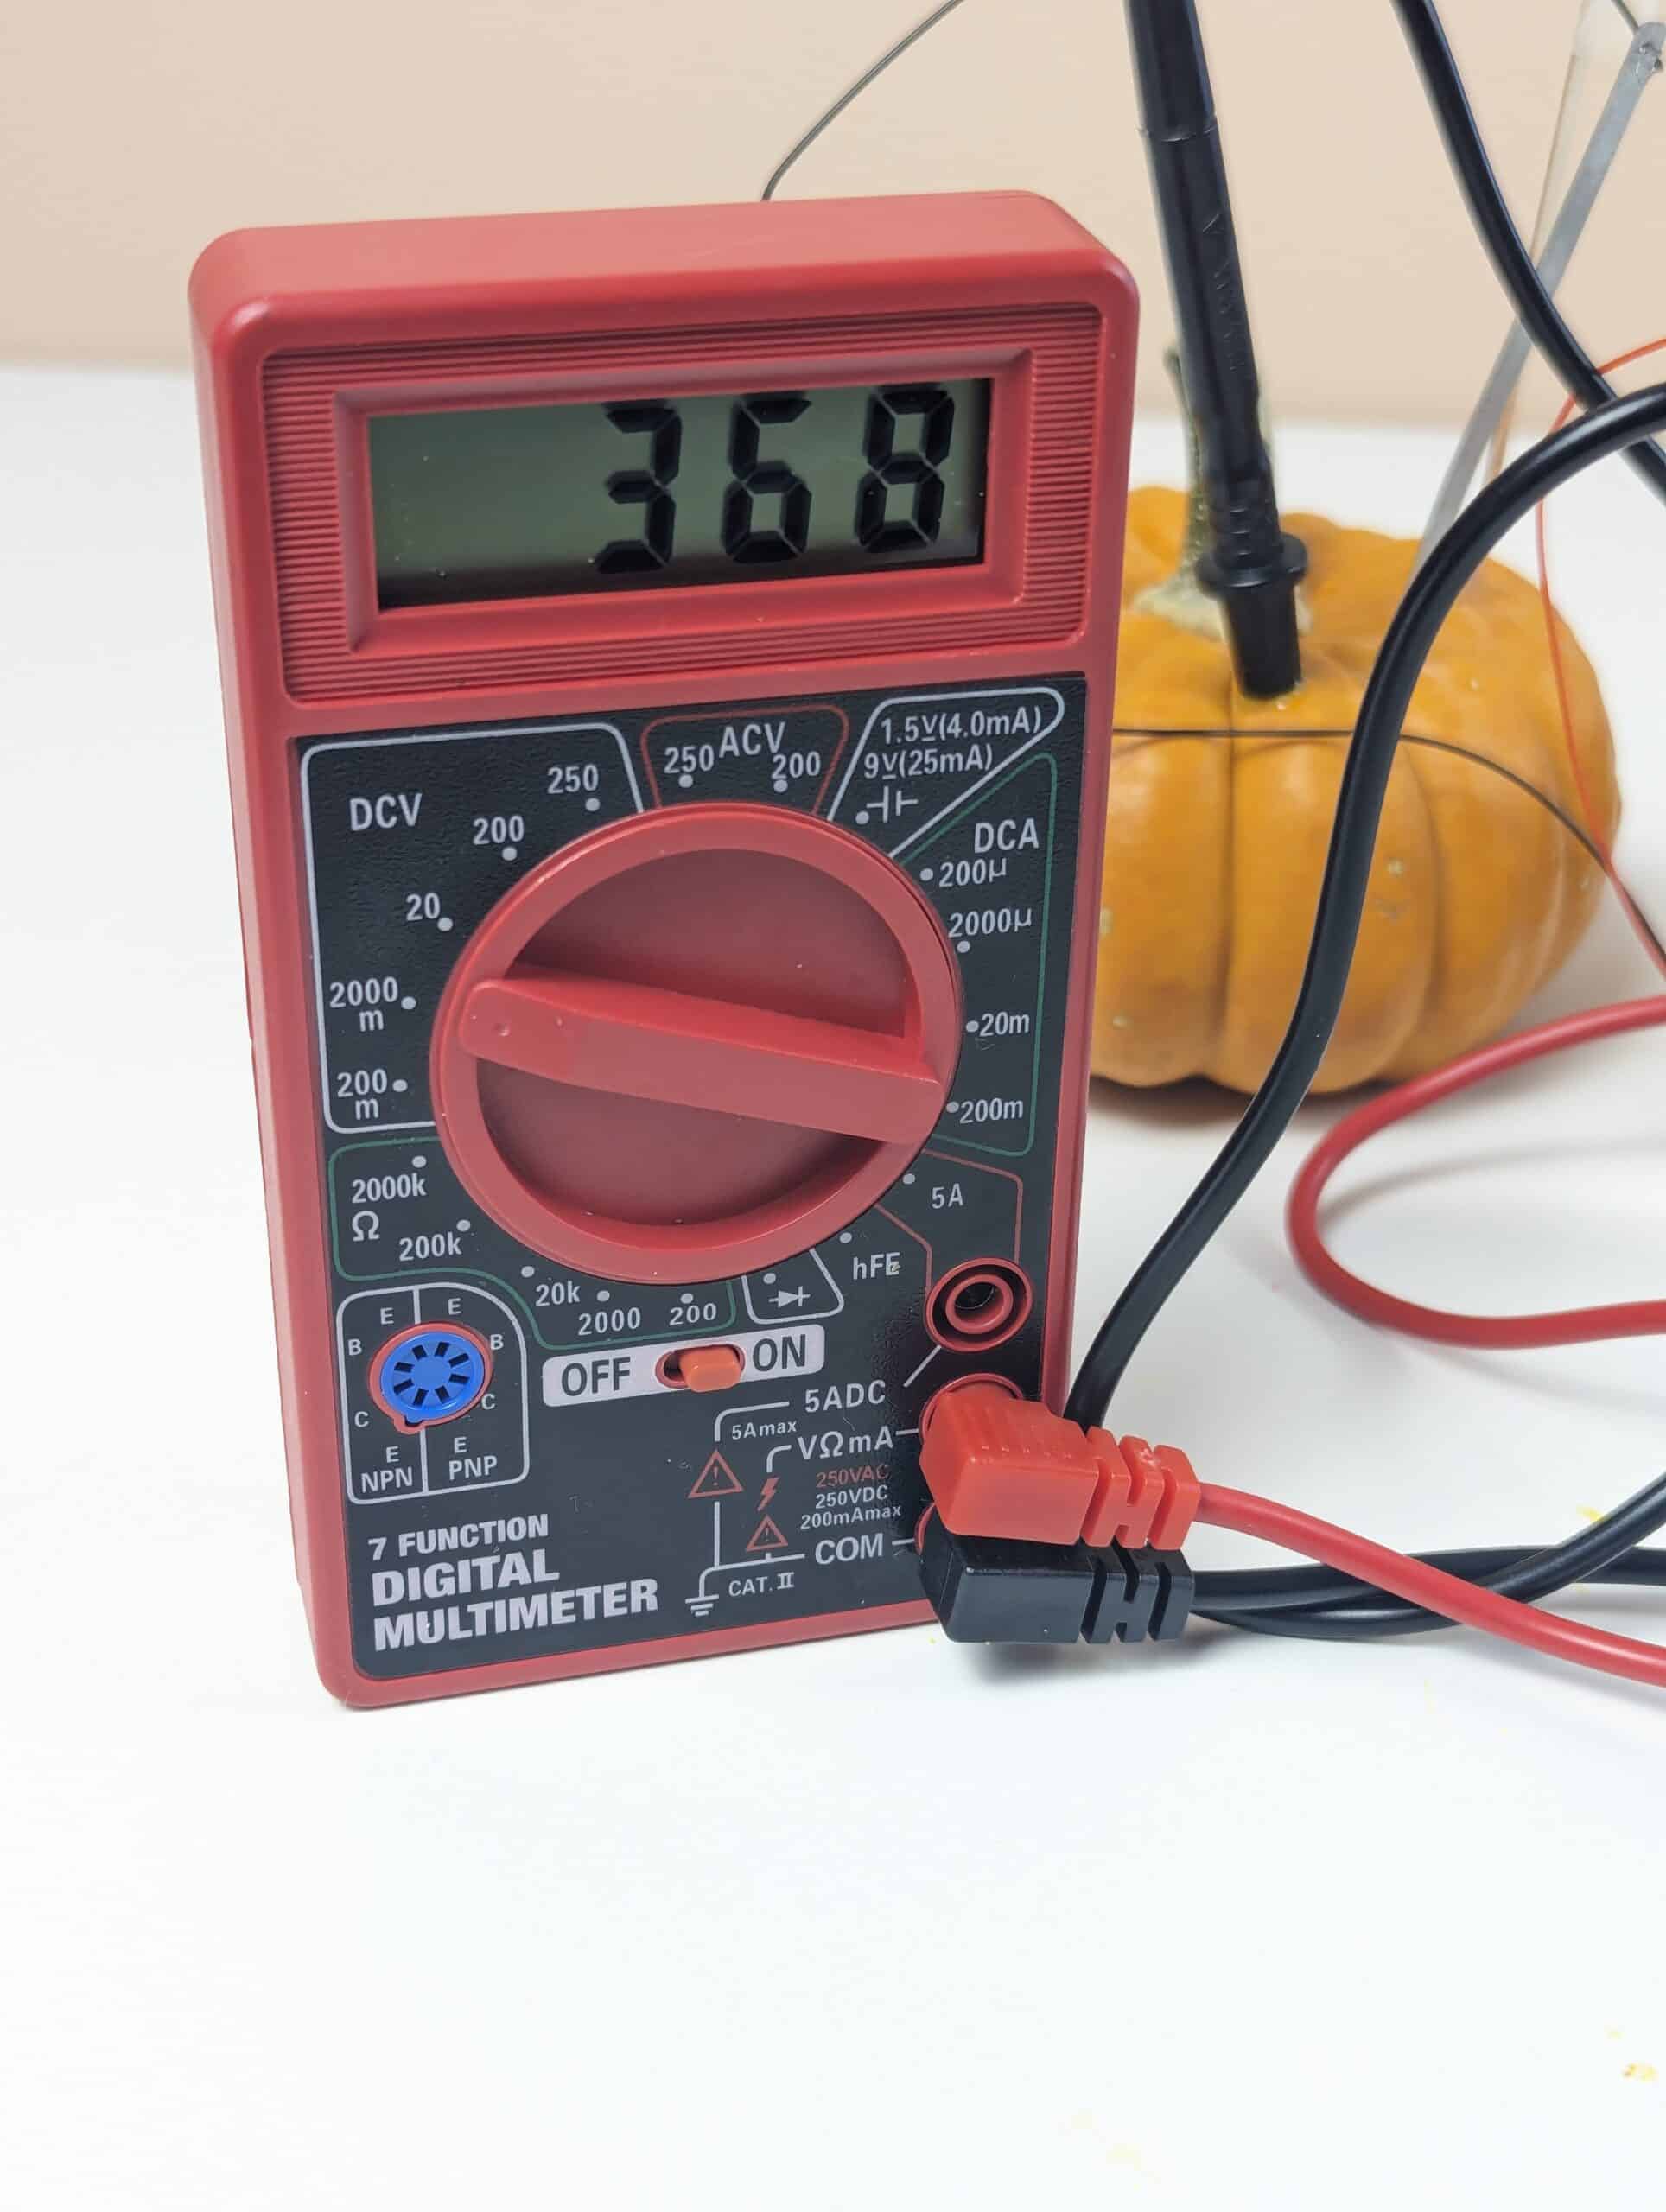
Reading the Multimeter:
The reading on the multimeter screen should be positive. If it displays a negative number, swap the multimeter leads for each pumpkin.
Note the multimeter reading in the photo to the right. 368 means there are 368 milivolts.
In the section below labeled “What is Voltage,” there is an explanation of voltage and what it indicates.
Safety warning: Please instruct students to only put the multimeter leads and the leads in the clock kit in the pumpkin or gourds ONLY. Do not put them into a wall outlet.
A millivolt is a unit of measurement that represents one-thousandth of a volt. The prefix “milli-” means one-thousandth, so when we say “millivolt,” we are talking about a very small amount of electrical potential.
To convert millivolts to volts, simply divide the millivolt value by 1,000.
For example, if you have a battery that outputs 3 volts, that means it has 3,000 millivolts of potential energy. This is important because many sensitive electronic devices, such as sensors and medical equipment, often operate at millivolt levels.
To convert millivolts to volts, you can use a simple formula. Since 1 volt is equal to 1,000 millivolts, the conversion process involves dividing the number of millivolts by 1,000. The formula looks like this:
Volts = millivolts/1000
For example, if you want to convert 250 millivolts to volts, you would perform the following calculation:
Volts = 250/1000 or 250 divided by 1000 = .25 volts
This means that 250 millivolts is equal to 0.25 volts.
Understanding millivolts and how to convert them to volts is important when working with electricity.
Looking at some of our readings in the photos we have listed below.
In the video below, we convert the millivolts displayed to volts on each of the fruit powered clocks we assembled.
How to Make a Clock Using Pumpkins
For this first experiment, we will use two pie pumpkins. Then, we’ll change out those for mini pumpkins, and lastly, we’ll swap one of the mini pumpkins for a small gourd.
Based on the configurations, will the multimeter read a higher or lower number of millivolts?
Let’s find out!
NOTE: It’s fine if you only want to test two pie pumpkins or two mini pumpkins. Your children will still learn a great deal.
Conversely, if you find your kids are jazzed about this activity and want to try other fruits and veggies you have in your kitchen, let them try!
When working in a science- or STEM-related field as a career, problem-solving is a necessary skill. Problem-solving requires self-confidence to put forth and test ideas and solutions without being afraid to do so. That self-confidence starts way back in early education. So, schedule some extra time and have some oranges, apples, or whatever on hand should your children want to test their ideas. Whether those ideas work or not, they at least used critical thinking skills and were willing to try and fail.
Materials Needed to Make a Pumpkin Powered (or Gourd) Clock
- 2 pie pumpkins
- 2 mini pumpkins
- 1 – 2 gourds (We had one small one on hand, use what you are able to find at your grocery store.)
- 1 potato clock kit
- Multimeter (Harbor Freight has them for $7) or you can use this one from Amazon
- Knife
- Tape


One very important note before starting!
The flesh on the pumpkins (especially the mini pumpkins) and the gourd are very thick and difficult to puncture with the leads in the clock kit. I had to very carefully wriggle a steak knife to make two slits for the leads and one slit for the multimeter.
The slits should be cut by an adult only.
If you DO NOT MAKE the slits wide and deep enough, it can break the lead on the multimeter. So, very carefully make those slits deep enough.
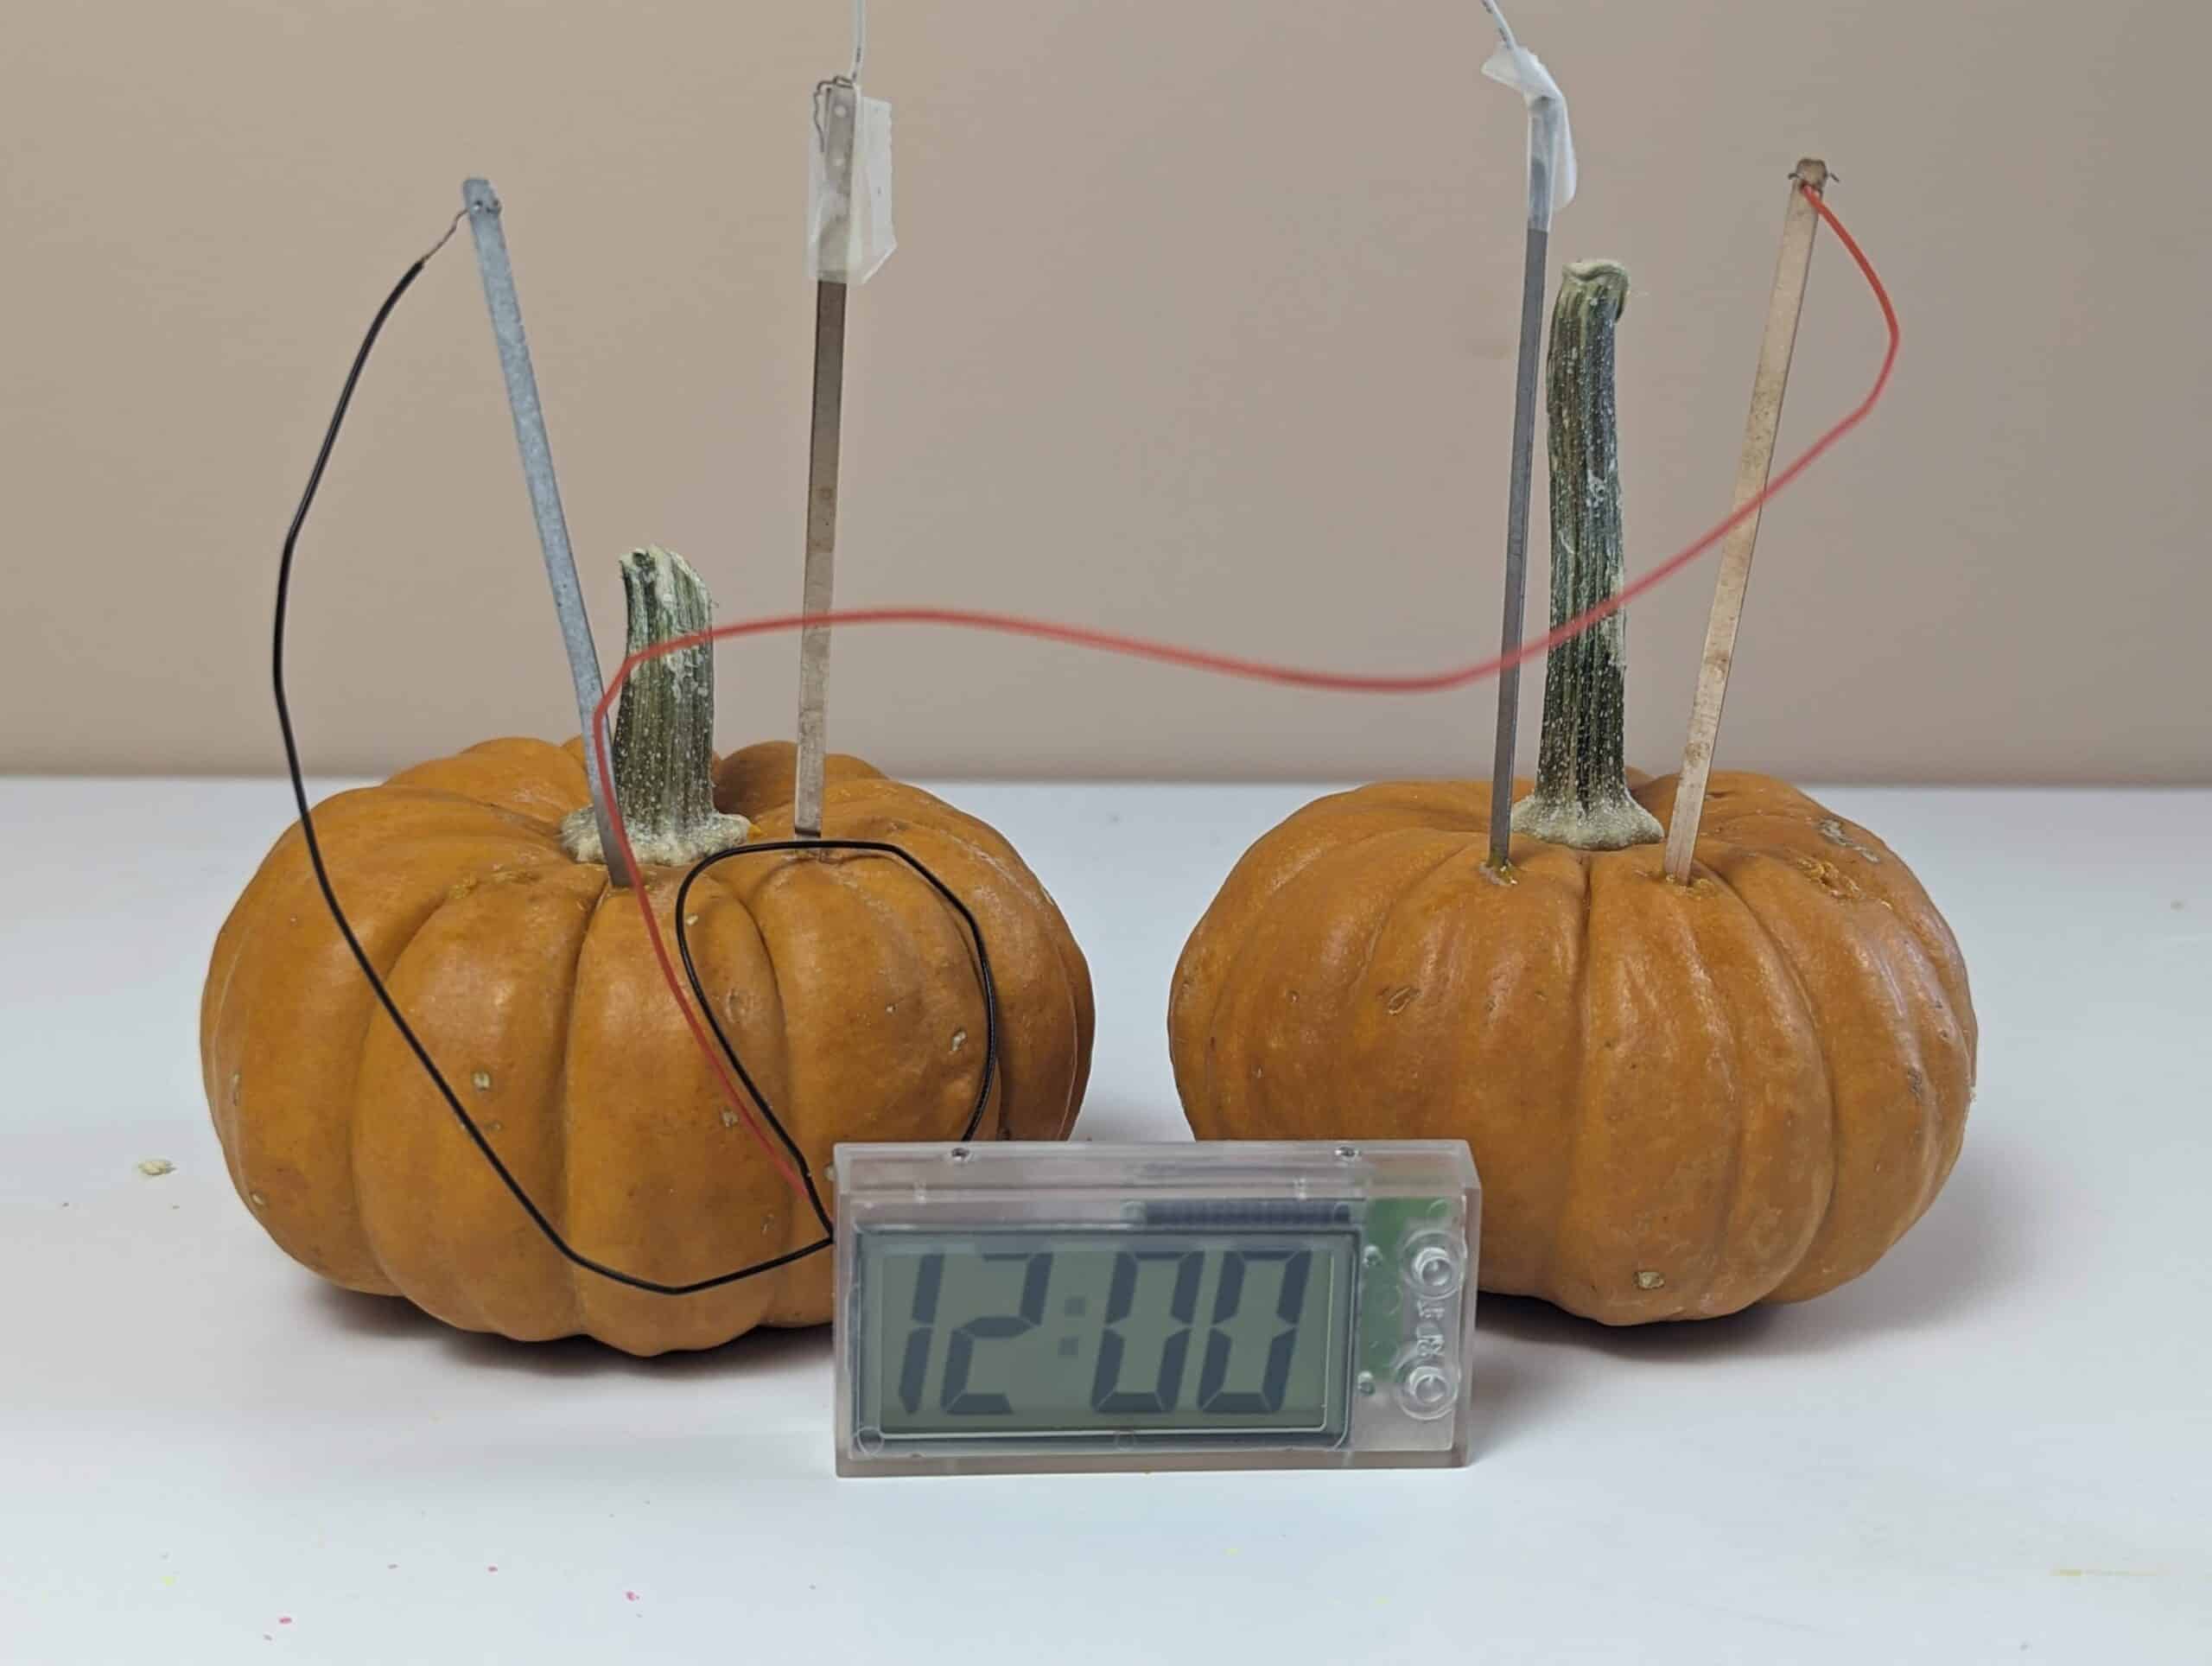
Pie Pumpkin Clock
The photo below is how we set up the pie pumpkins, and you can see the clock did run! We tested the number of millivolts (Below you will find an explanation of voltage.)


Note the multimeter reading of 549 millivolts.
Use the worksheet we have created to record the voltage. Write down the initial meter reading. Let the clock and multimeter run for several minutes and take another reading. Did the millivolts go up, down, or stay the same? Let it run for 5 to 7 minutes. Record the results.
Mini Pumpkin Clock
Pictured here is the mini pumpkin clock.
Once it is set up, use the worksheet to record the voltage. Let the clock and multimeter run for several minutes and take another reading. Did the millivolts go up, down, stay the same? Let it run for 5 to 7 minutes. Record the results.
The starting voltage on the meter below is 376. Scroll up and see that the starting voltage on the larger pumpkins was 549 millivolts.

Mini Pumpkin and Mini Gourd Clock
Pictured here is the mini pumpkin clock and mini gourd clock.

Note the starting voltage with the pumpkin and small gourd? How does it compare to the 2 small pumpkins and the 2 pie pumpkins?

Once it is set up, use the worksheet to record the voltage. Let the clock and multimeter run for several minutes and take another reading. Did the millivolts go up, down, or stay the same? Let it run for 5 to 7 minutes. Record the results.
Do you see any patterns?
We have decided we are going to test the following next to see if the distance between the clock probes and multimeter probes yield different voltage readings.
- Placing the clock probes in the same place, but placing the multimeter probes farther away from the clock probes.
- Placing the clock probes farther apart on the fruit and keeping the multimeter probes where they are.
The Science Behind the Pumpkin Clock
Let’s begin our explanation with a quick lesson on electricity and batteries.
Electricity is defined as the flow of electrons from one molecule to another within a substance and can be produced using six different methods. These include:
- Chemical reaction
- Friction
- Heat
- Light
- Magnetism
- Pressure
We power many items, from flashlights to watches, using the chemical reaction in batteries.
Let’s examine what’s inside a double A battery used to power devices like a computer mouse or a TV remote control.
Inside a battery, there are three main parts:
- Anode: This is the negative side of the battery, where the electrical current begins.
- Cathode: This is the positive side of the battery, where the current ends up.
- Electrolyte: This is a substance (usually a liquid or gel) that allows ions to move between the anode and cathode. The electrolyte helps facilitate the chemical reactions that produce electrical energy.
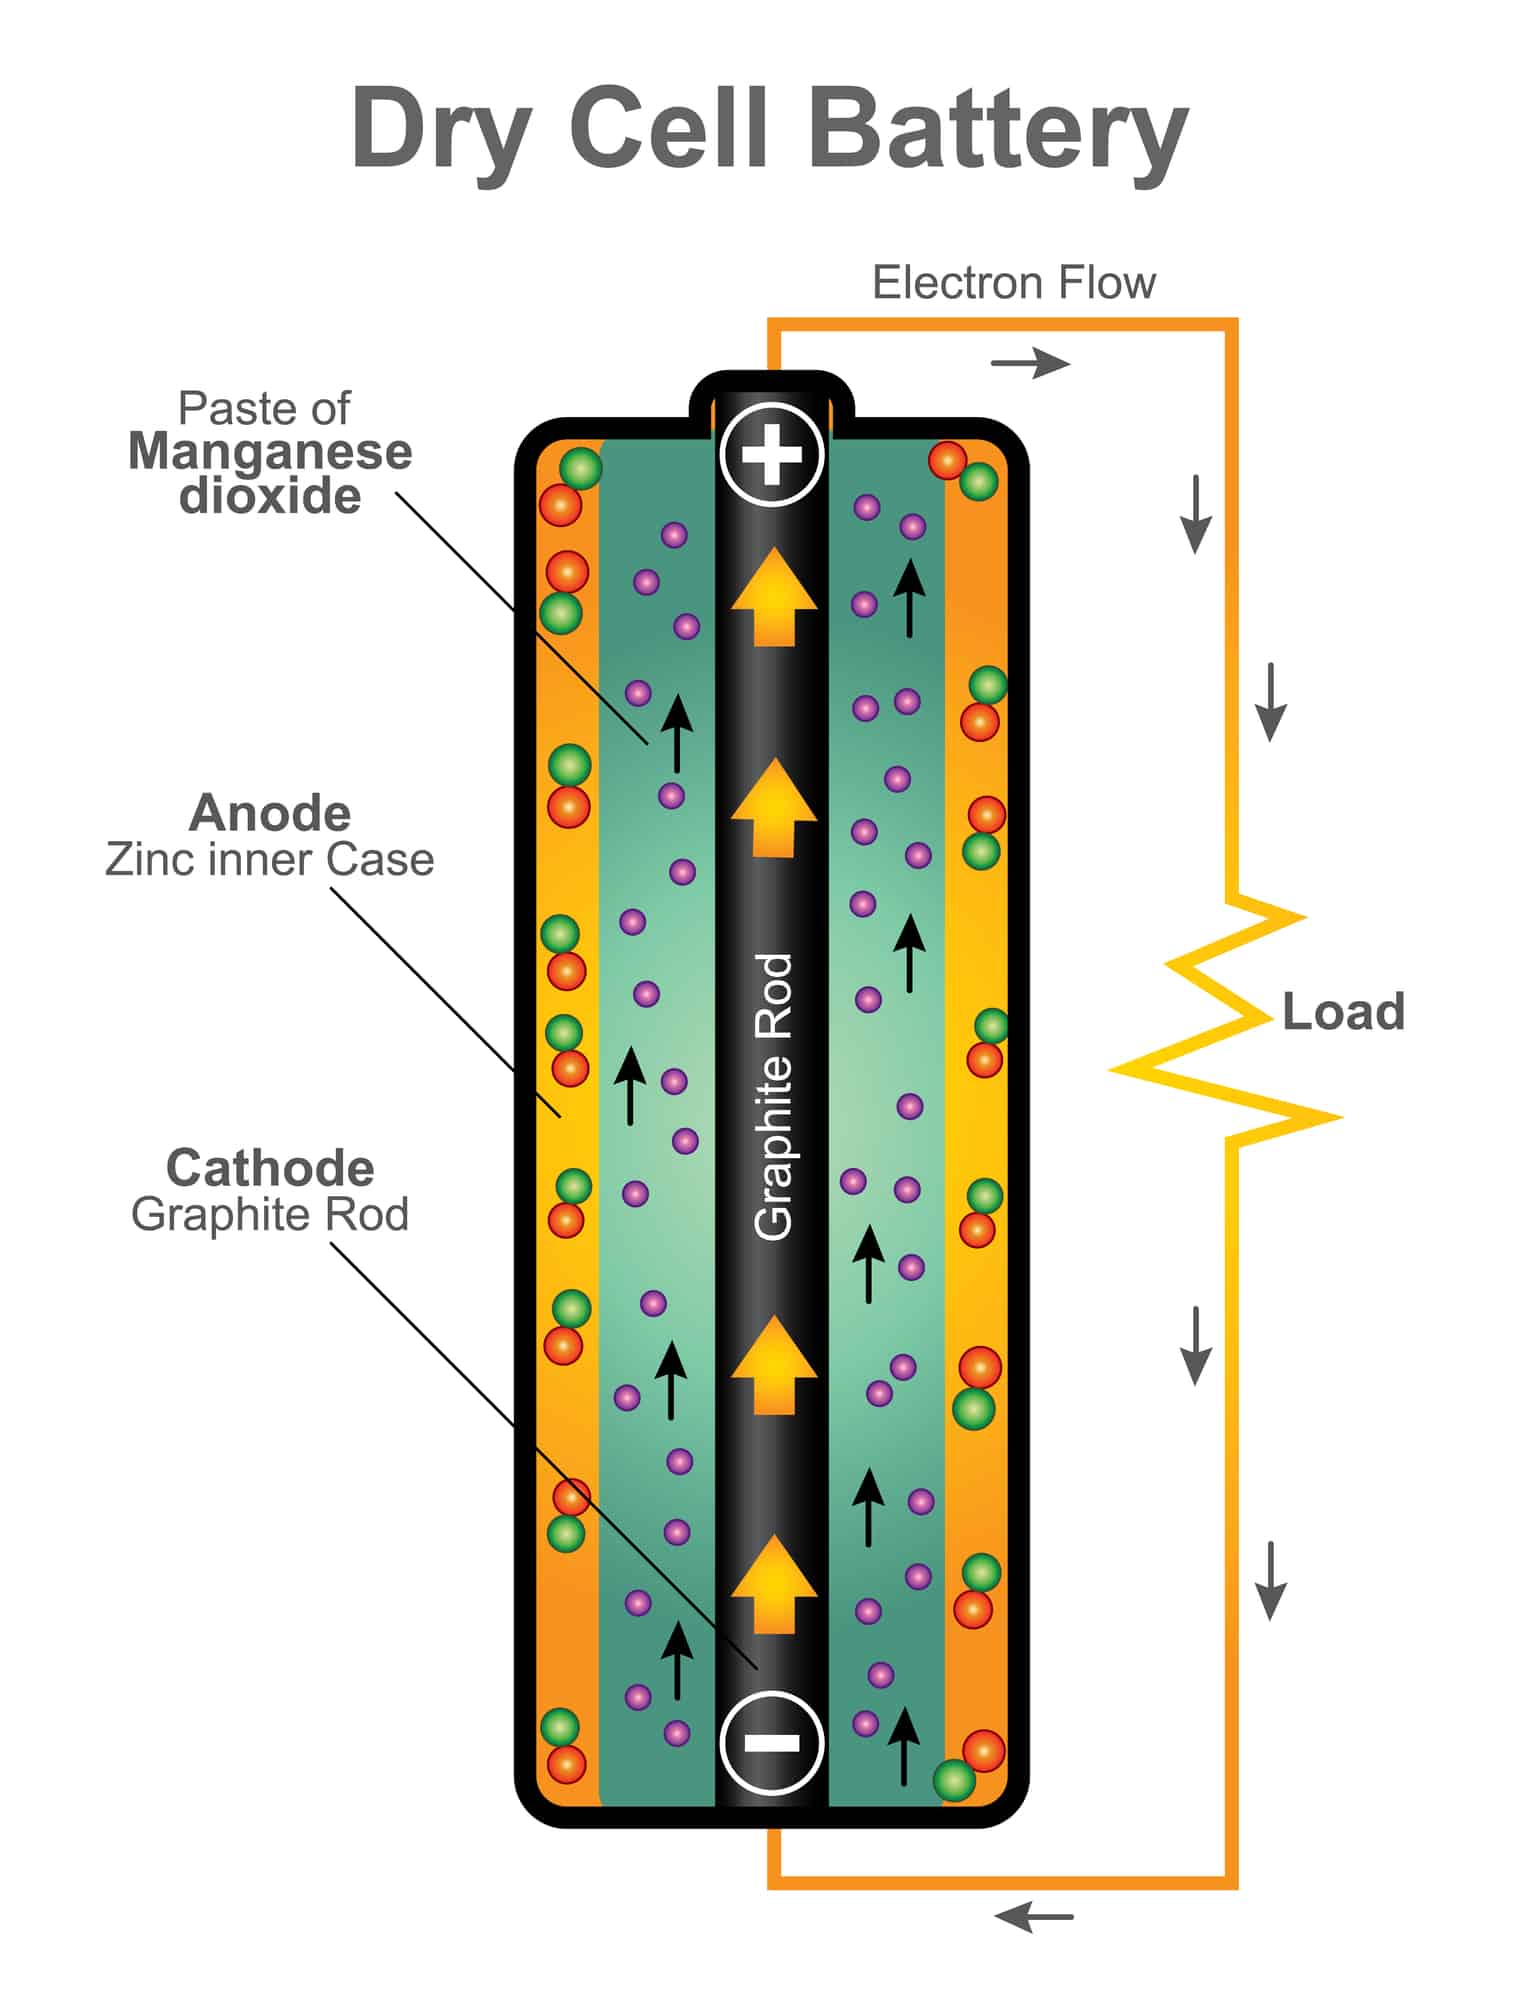
In this activity, we are using a chemical reaction to create a flow of electrons that powers the LED clock.
Our pumpkin battery is a type of battery known as an electrochemical cell. We are converting chemical energy into electrical energy. In this setup, the chemicals zinc and copper react with one another, producing chemical energy.
This chemical energy is then transformed into electric energy through the transfer of electrons. These electrons flow through the fleshy inside of the pumpkin.
It’s important to note, the pumpkin does not produce electricity; it allows electrons to flow from the copper electrode to the zinc electrode.
When powering our LED clock, the fleshy inside of the pumpkins and gourd act as the electrolyte in a battery. The zinc lead in our fruit battery is the anode, and the copper lead is the cathode.
When we use fruits, like pumpkin, to power something like the LED clock in a the potato clock kit, we are converting chemical energy into electrical energy.
At the anode (the zinc), a reaction releases electrons, which are tiny, charged particles. These electrons flow through the external circuit (the wires connecting the battery to the device) towards the cathode (the copper).
As the electrons move from the anode to the cathode, they create an electric current. This current is what powers the clock. When the electrons reach the cathode, another chemical reaction occurs, completing the circuit.
As the electrical current passes through the clock, it powers the clock and passes back through the pumpkins before it travels back to the clock.
Once the chemical reactions can no longer produce enough electrons, the battery will run out of power and need to be recharged or replaced. Same happens with our pumpkin clock.
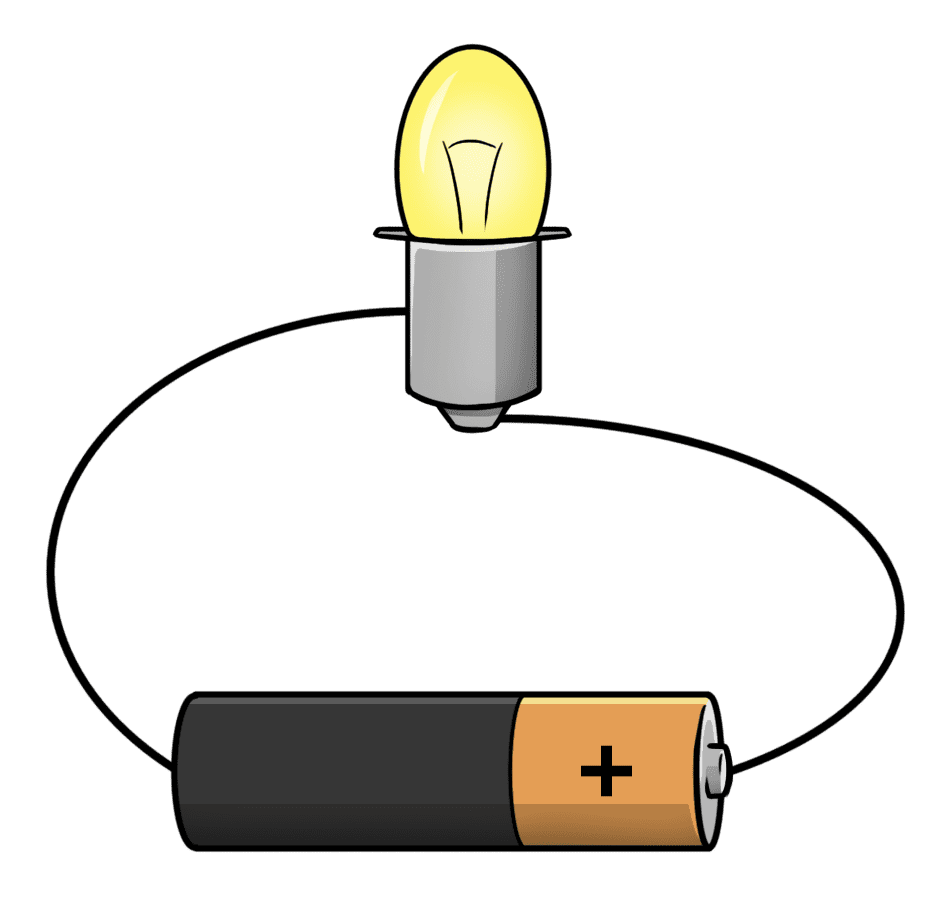
What is a circuit?
In a complete circuit, the direct current flows from its power source, or battery, back to the same power source in order to form a complete, simple circuit.
The electrons flow from the negative connection of the power source or battery, through the wires and LEDs, back to the positive side of the power source or battery.
You can read more about circuits in this post. We have included some circuit mini posters in the free resources here. See below to request that free packet.
Download the Printable
Use the form below to request the printable that accompanies this activity. The packet includes a lab worksheet, circuit information, 2-part circuit cards, and circuit mini-posters. You will be added to our email community.
I hold a master’s degree in child development and early education and am working on a post-baccalaureate in biology. I spent 15 years working for a biotechnology company developing IT systems in DNA testing laboratories across the US. I taught K4 in a private school, homeschooled my children, and have taught on the mission field in southern Asia. For 4 years, I served on our state’s FIRST Lego League tournament Board and served as the Judging Director. I own thehomeschoolscientist and also write a regular science column for Homeschooling Today Magazine. You’ll also find my writings on the CTCMath blog. Through this site, I have authored over 50 math and science resources.